
My 95 Camaro Rebuild!!!


Thread Starter
|
2nd Gear member
Joined: May 2009
Posts: 528
Another update!
I took the upper controller arms, calipers and wheel bearings off the spindles tonight. The bearings were shot and I need new calipers!
Here's a shot of the spindle after a visit to the sandblaster and the other one waiting to go in!

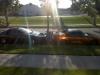
What it all looked like when I took it off the car:

I took the upper controller arms, calipers and wheel bearings off the spindles tonight. The bearings were shot and I need new calipers!
Here's a shot of the spindle after a visit to the sandblaster and the other one waiting to go in!
What it all looked like when I took it off the car:


Thread Starter
|
2nd Gear member
Joined: May 2009
Posts: 528
Some more updates!
Been working on getting the floor done.


My wife has been sandblasting my parts and coating them with POR!

Finally got my controller arms off the subframe. Had to burn out the bushings because the bolt was seized.

Been working on getting the floor done.
My wife has been sandblasting my parts and coating them with POR!
Finally got my controller arms off the subframe. Had to burn out the bushings because the bolt was seized.
Thread Starter
|
2nd Gear member
Joined: May 2009
Posts: 528
Well, more updates!
Got the heads off the engine tonight. It's ready to go to Nova Automotive for them to bore out the block, change freeze plugs, blueprint and machine the heads. More evidence of stop-leak too.


Took the timing cover off and all looked good except the chain guide. In picture #2 you'll see a better view of the broken guide.


Got the heads off the engine tonight. It's ready to go to Nova Automotive for them to bore out the block, change freeze plugs, blueprint and machine the heads. More evidence of stop-leak too.
Took the timing cover off and all looked good except the chain guide. In picture #2 you'll see a better view of the broken guide.
Thread Starter
|
2nd Gear member
Joined: May 2009
Posts: 528
Well time for some more updates!
The floor is coming along!


I got the engine apart completely, tomorrow I'm taking the CAM and bottom end out and getting ready to clean it all up!
Here's a picture of the subframe after a visit to the sandblaster!

The engine:


I'm not sure if my thread just isn't interesting, but I won't continue to post updates if there's no interest.
The floor is coming along!
I got the engine apart completely, tomorrow I'm taking the CAM and bottom end out and getting ready to clean it all up!
Here's a picture of the subframe after a visit to the sandblaster!
The engine:
I'm not sure if my thread just isn't interesting, but I won't continue to post updates if there's no interest.
Dude... Dont stop posting, its a great thread. You are making great progress. Member participation is down right now, its that time of year when everybody's out doin stuff in the nice weather and not checkin in as often. Keep the pics coming man.

