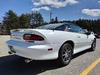
Updates and records of my car.

#32
 10-13-2015, 02:00 PM
you got these choises too stagg shs 317.00 free ship includes springs kyb front an back 249.00 no springs ,blistien $427,00 no springs ,but much less for same set i had priced at $555.00 at ricks ,there are diferent models of all these ,the first one has the lowering springs ,but like craby said i would not lower the car unless your raceing it ,your choise ,me i dont drive on to many bumpy roads ,so a set of premeum shocks is all i need ,blistien has 2 fronts for like 139.00 each ,if thats all you want,oh he said those are not ajustable ,but the koni is ,man i priced a set of those over 1000.00 you can get a desent set of adjustable for 500.00 if that what i understand kyb makes adjustable QA1 makes same ,dont know who makes rebuildable the QA1 looks awsome $489.00 front set ,an kyb set of 4 adjust $404.00 for road or raceing manual adjust ,thats all the home work i am doing for now ,hehehe
Last edited by 95 camaro 406; 10-13-2015 at 02:18 PM.

#34
11-08-2015, 06:50 PM

Join Date: Aug 2015
Location: Jacksonville, FL
Posts: 270
Okay, some updates on what my father has gone and found out while I've been floating around here. He's been nose deep in the car, digging around and having at it.
1. Fixed all the worn out switches inside.
2. Replaced the emergency blinker relay, ran the wiring for the 3rd brake light on the optional SS wing that my car came with. 3rd light, and blinkers fixed.
3. Found out the main cause of the terrible vibration above 75mph. The tranny output bushing was all maushed up, so he replaced that. Vibration gone.
4. All the transmission mounts are the stock GM rubber ones, and are severely worn, or shorn apart. Those will be replaced with poly mounts, as well as the torque arm.
Here's where it gets fun, and by fun, I mean that I slowly begin to realize that this car is going to have some more problems show up in it's very near future. It's had a hard, hard life.
Father got access to a lift, and got a comfortable, up close look at everything. Something I didn't have access to when I bought it.
5. The car has been in a front end wreck, at least once in it's life. The front passenger front quarter panel... fender... whatever you want to call it, has been just slightly off from being flush. That's why, it's been replaced, but the mounts or whatever it's called that it mates up to are bent. There's overspray where it was attempted to be covered up, but the damage is obvious.
6. The exhaust. It's all stock, minus the half-assed, ghetto, cat-back manual cutout that was used for drag racing the car.
It looked normal enough from my limited viewing access under the car when I bought it, and to be fair, all that I was looking for was mismatched color and rust on anything.
7. The front... I think he said... crank shaft seal, is leaking oil very slightly. Not running enough to actually drip, it's just got some residue from where it's slowly coming out. Going to have to go in and replace that.
8. He started taking the T-Tops off, to investigate where the slight driver side drip was coming from in heavy rain. Took it off, couldn't really find where exactly it was coming from, and decided to put them back on and hose test it. Horrible leaking now, from both of the tops. I guess gravity just slowly pressed them into a seal that was good enough over time to keep water out, but now it's broken, and they're showing their true colors, which is where the obvious water damage in the car came from in the first place.
So, regarding issue #8, I've got what I think to be two options.
-Option number one, I go and order both the seal kits that are on camaro central, which I've located here: Link is here
-Option number two. I go order a new side strip off of camaro central for the tops, and we use some generic 3M weather stripping, and make our own door to roof gasket seal, because my oh my, it's a little pricey for that pair.
Option number two worries me a little bit though. While it'll be significantly cheaper, will the extra plush (thicker) 3M stuff stop the tops from being able to seat properly, and lock in place? We'd also have to be extremely diligent in the sharp corners along the center of the roof, where those 90 degree bends are at. Probably have to use a heat gun, and mold a bend in the foam with a wood block before hand or something.
Craby, or anybody, do you have any advice on this seal dilemma? Am I better off just buying the OEM style stuff from the site, or try to make my own door to roof seals with 3M generic weather stripping?
Plan of action so far for repairs.
I think I'm going to go cheap, and just go with some run-of-the-mill cheapo Monroe or Gabriel shocks now, in lieu of the recently discovered problems. Mounts and everything will still be Moog, so that's that for that.
The drive shaft is getting dropped, and I'm taking it somewhere to get balanced, and I'll have the place that does that pop out the u-joints and replace them while they're doing that. Not taking any chances.
The T-Tops, I'll wait to hear back for some advice on here. I'm searching around for anyone that's tried making their own seals, via generic weather stripping, so I'll report back on that if I don't get any advice before hand here.
The exhaust, is going to stay ghetto for now. It leaks slightly, and looks awful when you get to see it up close underneath, but money doesn't permit right to get all of that sorted with everything else taking priority. Still have to finish off the little bit of payment left on it, still have to get everything else fixed.
The interior, while of my last concerns now, will need to be handled after this. Seats are going to be re-done. I saw, and read through quite a few times now, where they took the seats leather sections apart, and made their own, and sewn everything up.
I think I'm going to try my hand at this, mainly because I don't want to have to spend money on new seat mounts and seats, and lose the power seat on the driver's side. I'll use that as a good time, later on now, to glue down some more memory foam in the passenger and driver seat lower section as well, to give it some newer feel. They're a little 'worn in', if you know what I'm saying.
Not saying that I'm now getting thrown through a wringer with the car now, but it's showing now that it's going to need some more maintaining and repairing than I originally thought.
Last edited by Thefoodman52; 11-08-2015 at 07:02 PM.
#35
11-08-2015, 07:13 PM

Join Date: Mar 2009
Location: Tokeland, Washington
Posts: 21,645
you dont want to be making one. is the seal torn or creased where water can get through. i have seen a few times where water was getting under the seal and they fixed it by pulling the seal back drying and using some kind of sealant to keep it from leaking through. not sure if we sickied that one.
#36
11-08-2015, 07:23 PM
Join Date: Aug 2015
Location: Jacksonville, FL
Posts: 270
Okay, so if I'm going to replace it, just get the seal from camaro central. Got it.
I'll ask what he's found as far as how the seal looks. If it's looking okay, we'll try just peeling it up, taking all the old adhesive off, and using some of that 3M seal adhesive stuff. I'll really gunk it up under there, and go around the edges with as much as I can.
I'll ask what he's found as far as how the seal looks. If it's looking okay, we'll try just peeling it up, taking all the old adhesive off, and using some of that 3M seal adhesive stuff. I'll really gunk it up under there, and go around the edges with as much as I can.
#38
11-09-2015, 07:49 AM
Join Date: Aug 2015
Location: Jacksonville, FL
Posts: 270
I think I'd found that thread awhile ago, but I lost track of where it was.
Why isn't that one stickied?
Considering how there's consistent issues with the seals failing on them, I would feel that to be a beneficial sticky.
-edit-
I guess you can take what he did there, and apply the same concept for the whole gasket, which is what it sounds like I'll have to get at doing. All day job, ahoy!
Last edited by Thefoodman52; 11-09-2015 at 07:51 AM.
#39
11-09-2015, 08:20 AM
Join Date: Mar 2009
Location: Tokeland, Washington
Posts: 21,645
it is stickied. its in the how to section/thread https://camaroforums.com/forum/93-02...rt-here-38462/ number 17
#40
11-09-2015, 12:38 PM
well now you know if you live in a state that has pre buy inspections,thats the way to go,couse most of these cars with under 100.000 that were not mistreated ,don't need more then a tune up ,or that's all mine needed an after one year a water pump ,yes anything is better then the shocks you got now ,live an learn I ended up putting 650,00 in that 3800 to make it safe ,I can tell it needs shocks replaced soon too rear sway bar links ,though with that one I am only looking for 2 to 3 more seasons out of it ,I avoid dirt roads like the plague,well atleast your going through it well an thorough,
Last edited by 95 camaro 406; 11-09-2015 at 12:41 PM.