
My 69 Camaro project


Thread Starter
|
Newbie
Joined: Mar 2010
Posts: 16
Hello all. Here is my addition to the projects section. Keep in mind that it has been a slow progression to this point. I just graduated college and am saving up for an eventual restoration. Since we are all fans of these cars, I thought I ought to contribute my story. Take it easy on me, I'm a n00b with basically no money, going it alone.
Story time!
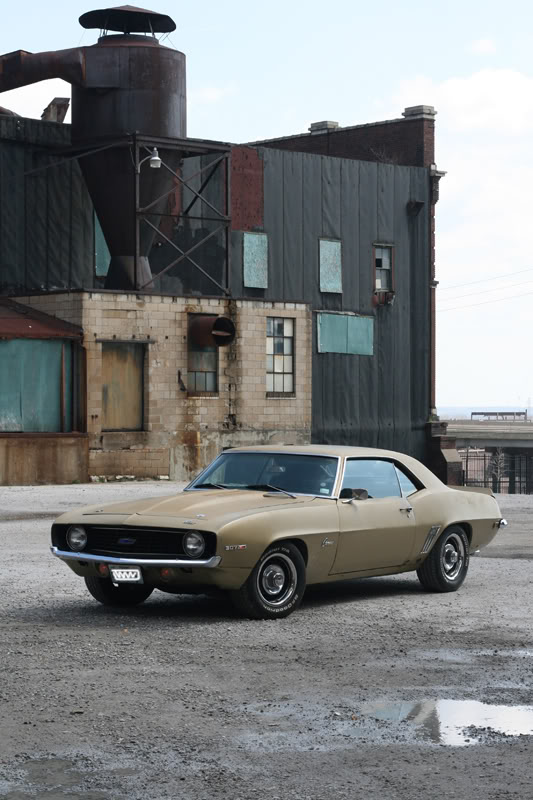
I bought her in 2001. I happened to be in the market for a new daily driver. I attended a party with the nephew of the owner, who told me about his uncle's Camaro. For the price, I thought it must be a rusted out bucket of bolts that I could never get my hands on, let alone repair.
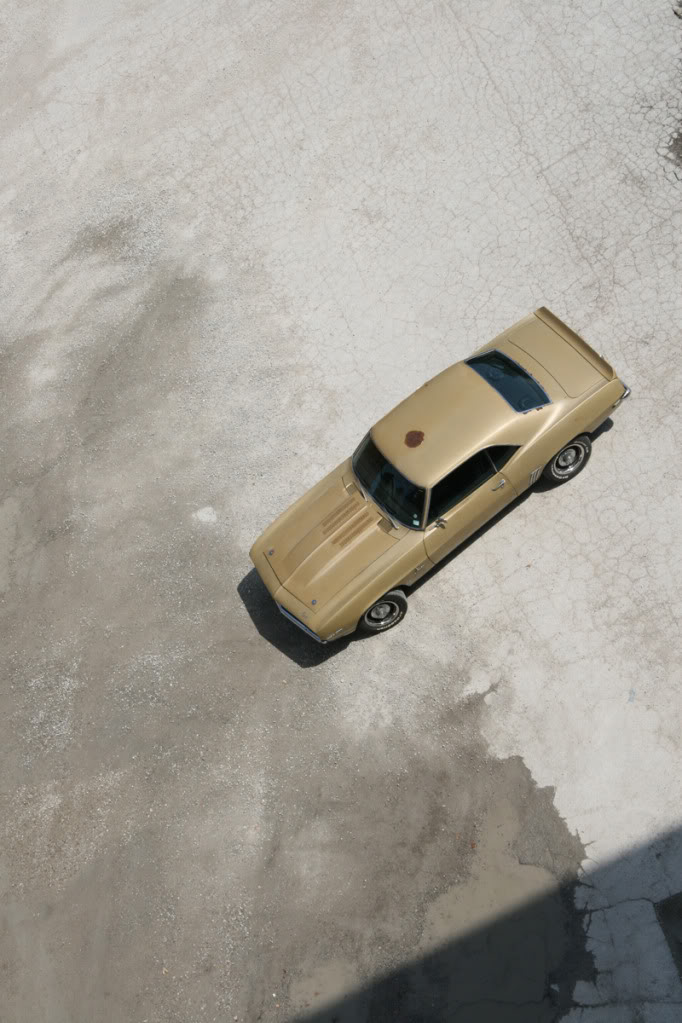
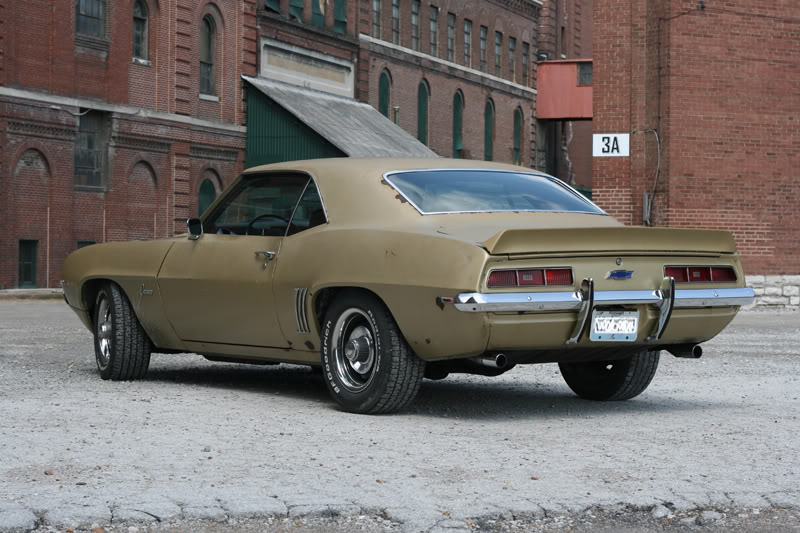
Still, I decided I must go check it out. For the price, it's worth a look. I got there and found it under a tarp. The rust spot on the roof is from a brick that sat there for who knows how long. It had some terrible aftermarket wheels, circa 1980, on it and he couldn't remember the last time he started it. Well, he put in a fresh battery and she came to life with very little effort. I drove around the block and knew I couldn't pass it up.
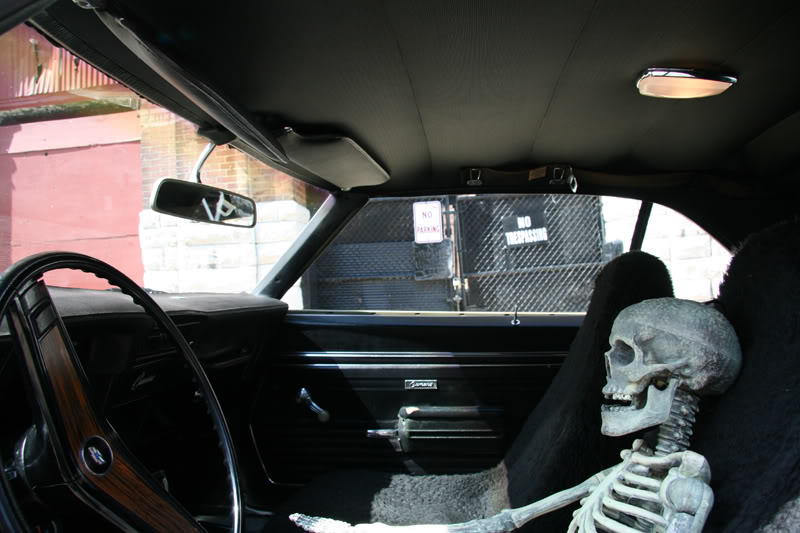
All original, numbers matching, 80K miles. Interior was old but not junk. I replaced/rewired the dome light and the plastic cover.
Since then, I've driven her in the snow and two hail storms. Not on purpose and I cringed the whole time, but I was 20 years old and didn't have much choice. Every where I went, people saw the rust and thought I must be a desperate old lady driving it around like that. If I parked it somewhere, I was bound to find notes on it asking if it's for sale.
I've replaced a few belts and hoses, the thermostat, leaky valve covers and radiator cap. Replaced the brake master cylinder because it started leaking. Last year, the points distributor was swapped out for electronic. And that's it for the engine work.
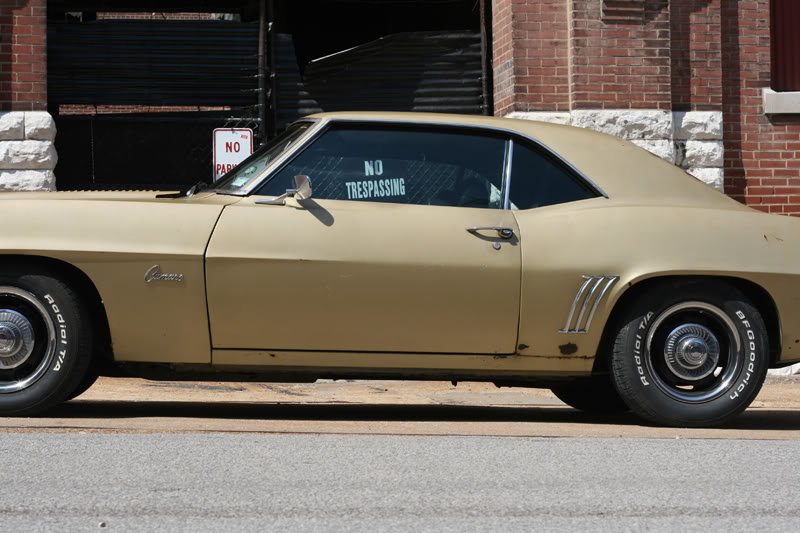
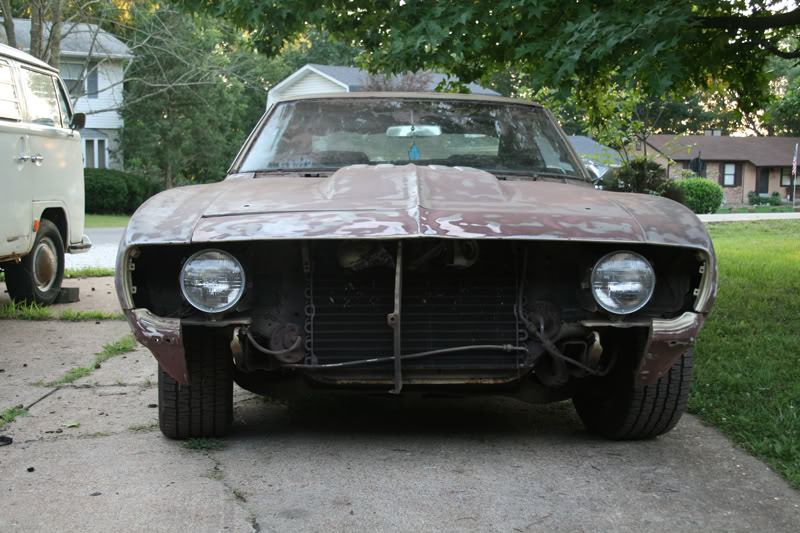
I couldn't take the rust any more and I knew it was going to be a lot of work but I knew I had to do something. In my preparatory research, I learned about the "Rustoleum method". This sounded like the perfect thing to get me by until I could afford to do it properly. I was unemployed while finishing my last semester of school and figured now was the time.
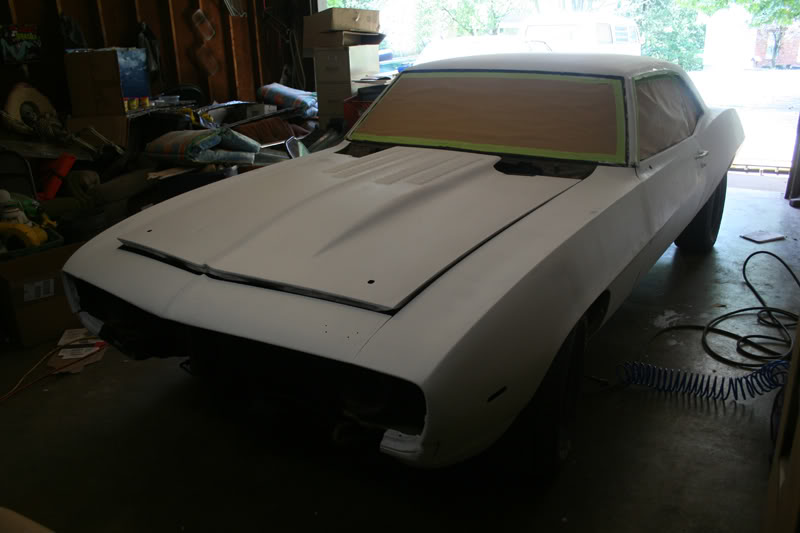
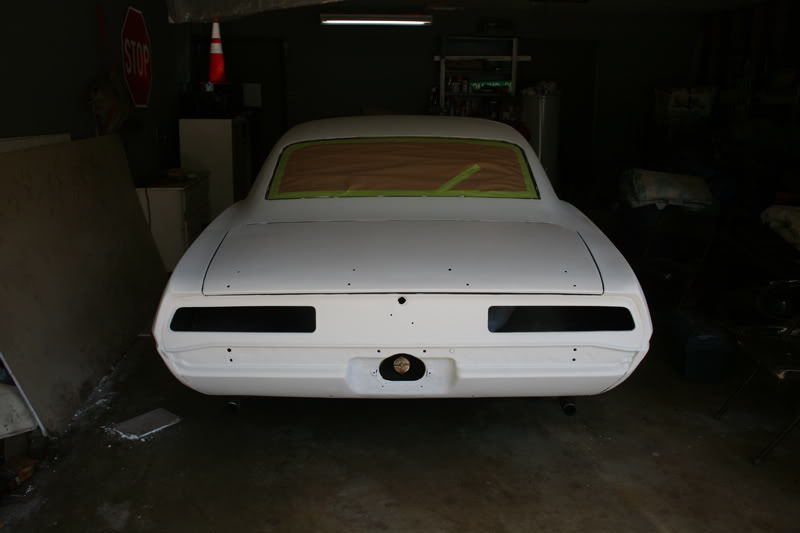
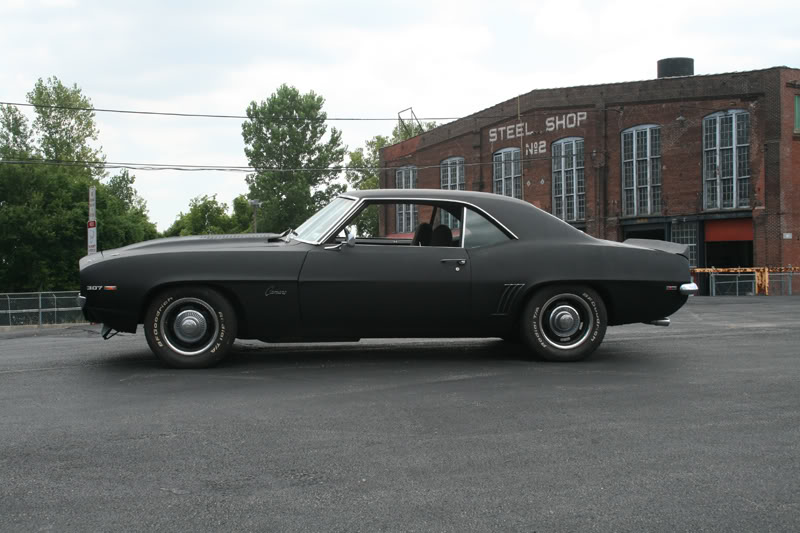
So I bought all the necessary paint, sandpaper, etc. It took all of July that year working on it with every free minute I had. I removed all the trim and the lower valance panel, rear spoiler, etc. Sanded everything down to the sheet metal. I did about 50% of the car by hand until my hands bled before I bought an orbital sander. That made it a bit easier!
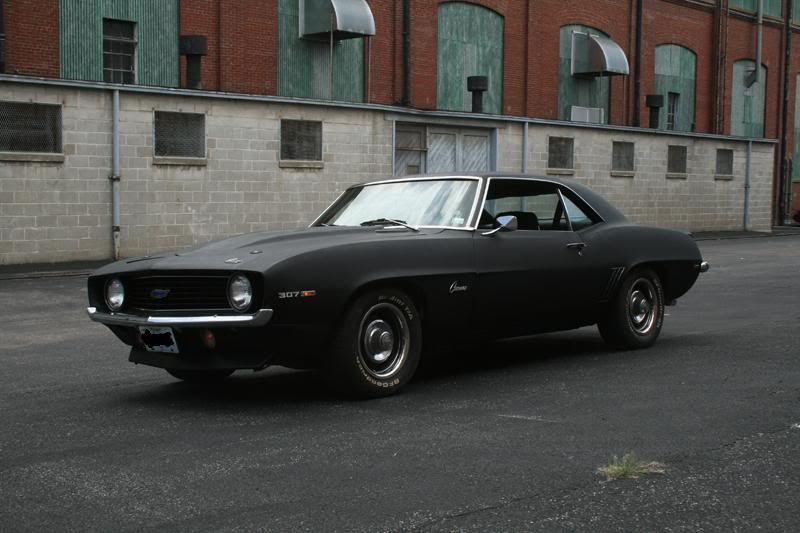
I decided that a front spoiler was in order. I also bought new weatherstripping and seals. The rear bumper guards were installed shortly before the paint as well, they were not original. The cowl hood and louvers are not my doing but I sure like em.
That is the extent of my work thus far. This is the progression of my project. I posted these pics in the new member section, but I felt this might be more appropriate.
Next on the list: Exhaust and brakes. Still rocking the old rusty manifold and scary looking drum brake system. The exhaust tips were put on to cover up the rusty original pipes.

Story time!
I bought her in 2001. I happened to be in the market for a new daily driver. I attended a party with the nephew of the owner, who told me about his uncle's Camaro. For the price, I thought it must be a rusted out bucket of bolts that I could never get my hands on, let alone repair.
Still, I decided I must go check it out. For the price, it's worth a look. I got there and found it under a tarp. The rust spot on the roof is from a brick that sat there for who knows how long. It had some terrible aftermarket wheels, circa 1980, on it and he couldn't remember the last time he started it. Well, he put in a fresh battery and she came to life with very little effort. I drove around the block and knew I couldn't pass it up.
All original, numbers matching, 80K miles. Interior was old but not junk. I replaced/rewired the dome light and the plastic cover.
Since then, I've driven her in the snow and two hail storms. Not on purpose and I cringed the whole time, but I was 20 years old and didn't have much choice. Every where I went, people saw the rust and thought I must be a desperate old lady driving it around like that. If I parked it somewhere, I was bound to find notes on it asking if it's for sale.
I've replaced a few belts and hoses, the thermostat, leaky valve covers and radiator cap. Replaced the brake master cylinder because it started leaking. Last year, the points distributor was swapped out for electronic. And that's it for the engine work.
I couldn't take the rust any more and I knew it was going to be a lot of work but I knew I had to do something. In my preparatory research, I learned about the "Rustoleum method". This sounded like the perfect thing to get me by until I could afford to do it properly. I was unemployed while finishing my last semester of school and figured now was the time.
So I bought all the necessary paint, sandpaper, etc. It took all of July that year working on it with every free minute I had. I removed all the trim and the lower valance panel, rear spoiler, etc. Sanded everything down to the sheet metal. I did about 50% of the car by hand until my hands bled before I bought an orbital sander. That made it a bit easier!
I decided that a front spoiler was in order. I also bought new weatherstripping and seals. The rear bumper guards were installed shortly before the paint as well, they were not original. The cowl hood and louvers are not my doing but I sure like em.
That is the extent of my work thus far. This is the progression of my project. I posted these pics in the new member section, but I felt this might be more appropriate.
Next on the list: Exhaust and brakes. Still rocking the old rusty manifold and scary looking drum brake system. The exhaust tips were put on to cover up the rusty original pipes.

HELP ME TOM CRUISE
Yaaarrrrrr
Yaaarrrrrr
Joined: Oct 2006
Posts: 4,010
From: Northern VA (but still in the south)

Very nice. What did you use to remove the paint? (details on sand paper and type of sander) Do you plan to replace any panels?
I know these seems like simple questions but other members might be interested to know
so..
details!...
oh yeah, how much do you think you spent already?
I know these seems like simple questions but other members might be interested to know
so..
details!...
oh yeah, how much do you think you spent already?
Thread Starter
|
Newbie
Joined: Mar 2010
Posts: 16
I bought everything I needed for the paint from one of those big home improvement chains.
-$40 Ryobi orbital sander
-variety of sandpaper to fit the sander. It wasn't the original paint, so I had a few layers to get through. For this, I used 80 grit, which was almost too harsh at times.
-$30/each for Rustoleum flat black paint and metal primer gallons
-$12 for variety packs of high density foam brushes
-$12 for high density foam rollers
etc
From Autozone:
-$12 x 2 3M Paint and Rust stripper drill bit for the hard to reach spots. Very useful! Can't find it on their website, but you've probably seen these before.
I just followed most of the suggestions from googling the "$50 Rustoleum Paint job". I think it started here. See the charger half-way down the page. If you're going for gloss, you just mix in some thinner and buff, rinse, repeat. I went with flat black and didn't need to do that extra step.
TL;DR: All paint was done for a total of under $200. It took me a month to complete, less door jambs. I still have enough left over to complete the job, just haven't gotten around to them yet.
-
I just wanted it to be protected from the elements. I couldn't take the bare metal/rust anymore. Looking good or professional came second to that. I certainly did not do a professional job, but it looks a helluva lot better now! And I'm saving the body for further down the road when I can do it right. This was just to get me by until then. I can drive it with pride and that's all I was going for. Personally, I don't need a $10K glossy paint job. I just wanted something I can drive and not feel the shame for driving in such poor condition.
-
And yeah, I will plan on redoing the front end eventually. The hood appears to not sit properly, but that's actually from the front inner quarter being rusted out. That's actually the only real bad area on the car. The battery was left to sit for some time and it corroded away everything underneath it. To straighten the hood, I will actually have to replace all that and it will be a big undertaking. I have neither the time or money right now to take on that project. I also don't look forward to all those rusty bolt and whatnot snapping off. I replaced the bumper bolts when I did the paint and snapped off most of the old ones in the process. One of these days that will happen, but first I will be putting my money into the mechanicals. New brakes are first on the list.
All together, so far, I've put maybe $1,500 into this car. That includes the distributor and new tires a few years ago. I was very lucky when I found it and feel that every time it starts up.
Last edited by 69_307; Feb 15, 2012 at 11:15 AM.

Thanks for the great info. We have been sandblasting most of the car, but when it came to the hood and roof, the sandblaster just didn't want to touch it. We would have gone through bags and bags of sand. I will show this to the hubby. We knew we would have to sand it, but he was thinking we needed a bigger sander. The grit of sandpaper you used is very helpful also.
I agree with driving her around flat black for awhile. I cannot wait until mine is at least in primer, but we decided to tear her down further first and replace everything underneath. It will be a couple more years before I can sit behind that wheel and start up the engine, but the day will be here soon enough and I know my grin will be ear to ear.
Jennifer


Thread Starter
|
Newbie
Joined: Mar 2010
Posts: 16
My uncle has a 350 ready to go from carb to oil pan, but with the manual brakes it currently has, I'm not sure I want to put it in yet. Given the money, I'd probably put a 350 in it with power brakes, etc. But for now, I have no plans to change anything until it breaks (still can't afford to put much into it and I've had it for 12 years now). I drive it a couple times a month when the weather permits and just like to have fun with it.
Last edited by 69_307; Feb 28, 2013 at 12:17 PM.

Newbie
Joined: Jun 2012
Posts: 5
My uncle has a 350 ready to go from carb to oil pan, but with the manual brakes it currently has, I'm not sure I want to put it in yet. Given the money, I'd probably put a 350 in it with power brakes, etc. But for now, I have no plans to change anything until it breaks (still can't afford to put much into it and I've had it for 12 years now). I drive it a couple times a month when the weather permits and just like to have fun with it.

