Did some weekend modding!!!

Thread Tools
 
Search this Thread
 
Old Dec 4, 2011 | 04:03 PM
  #1  
chernmax's Avatar
Thread Starter
|
In the Staging Lanes
Joined: Nov 2011
Posts: 46
From: Southern Maryland
Default Did some weekend modding!!!

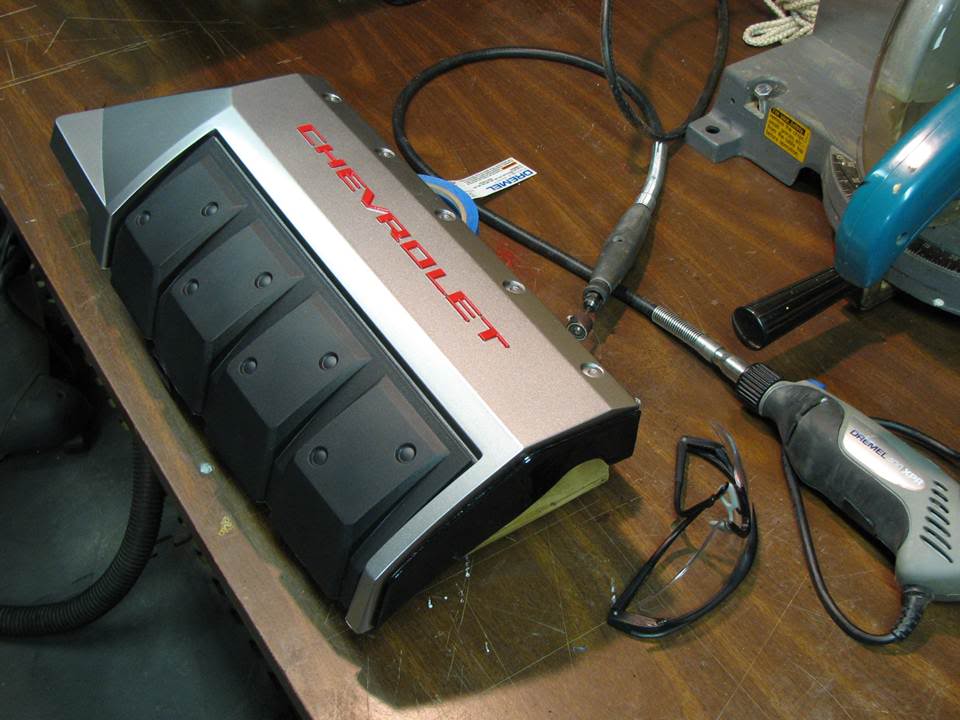
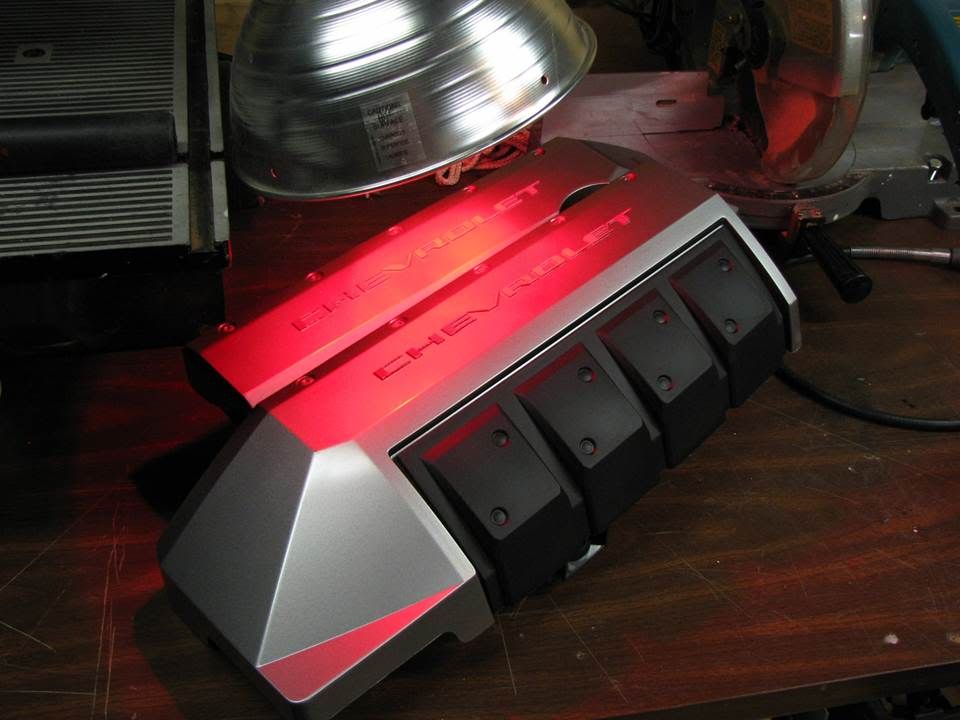
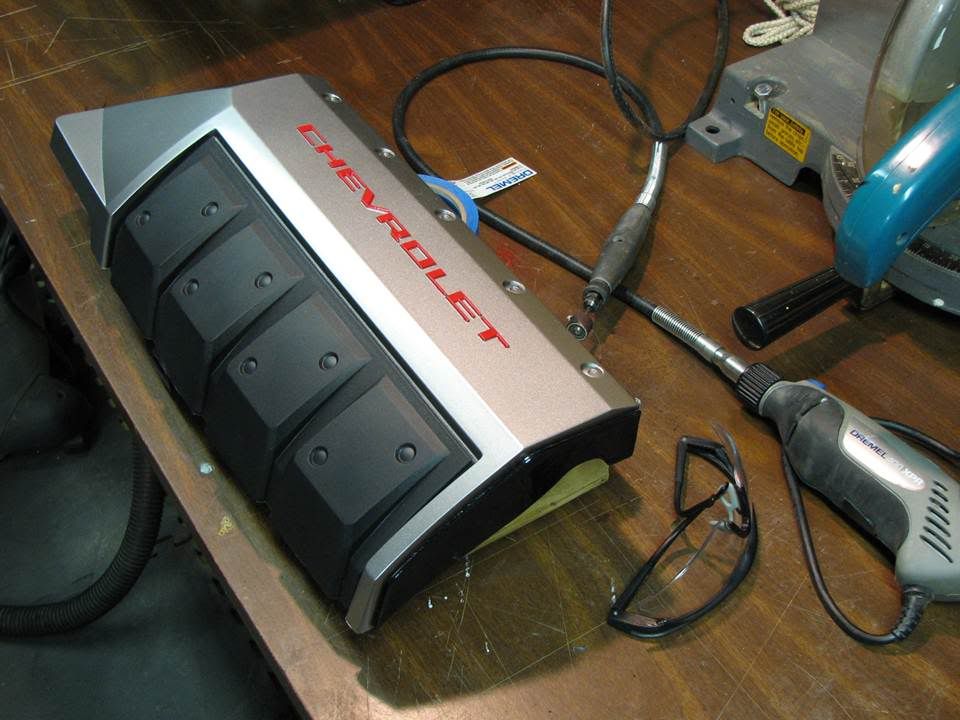
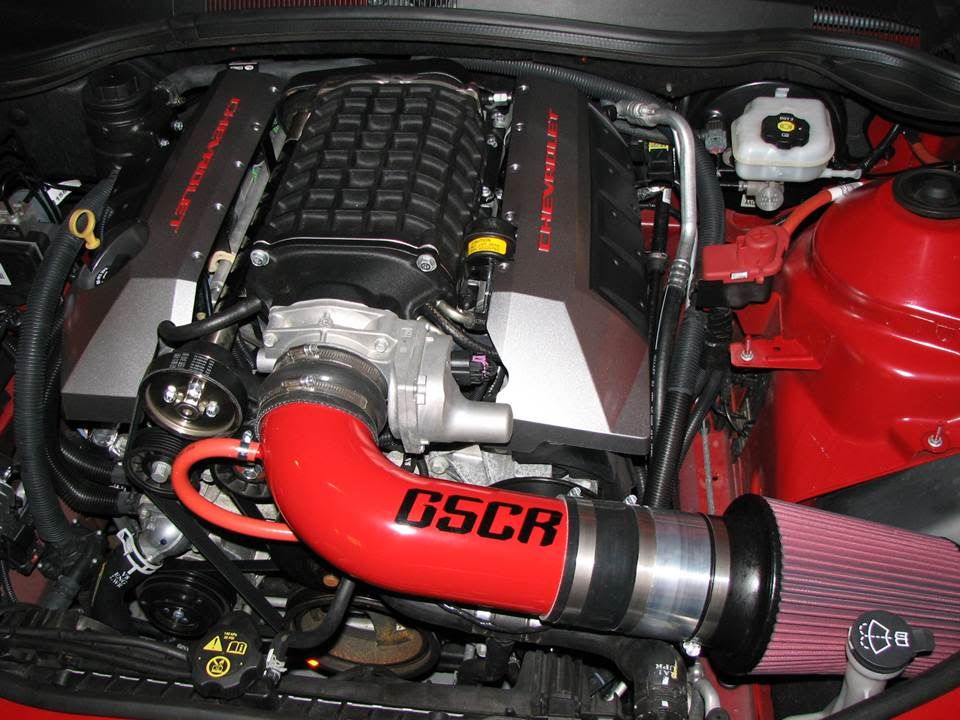
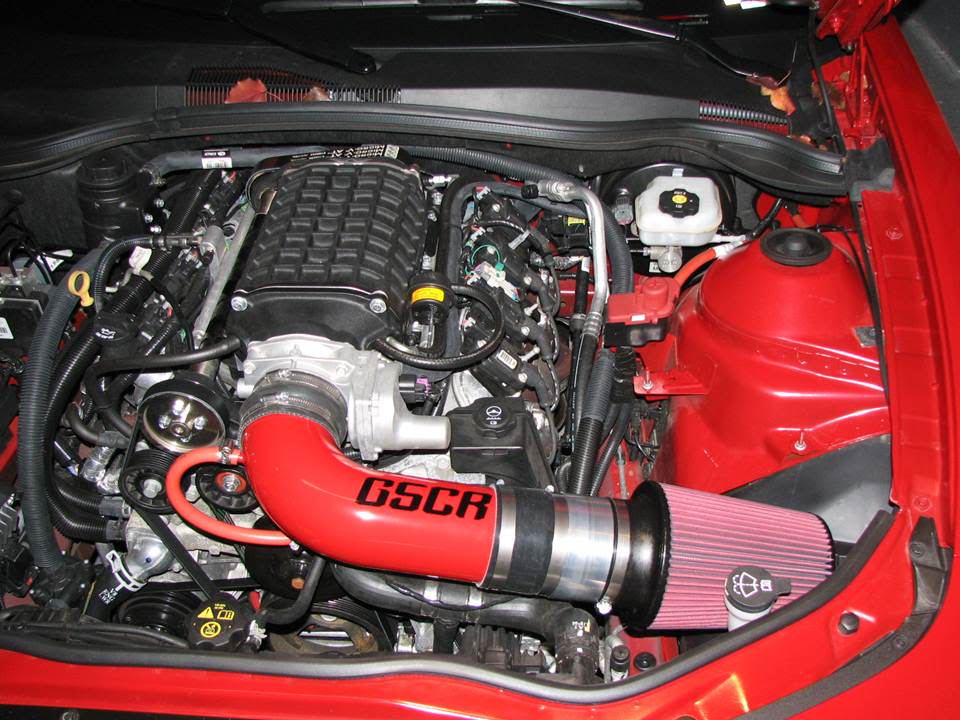
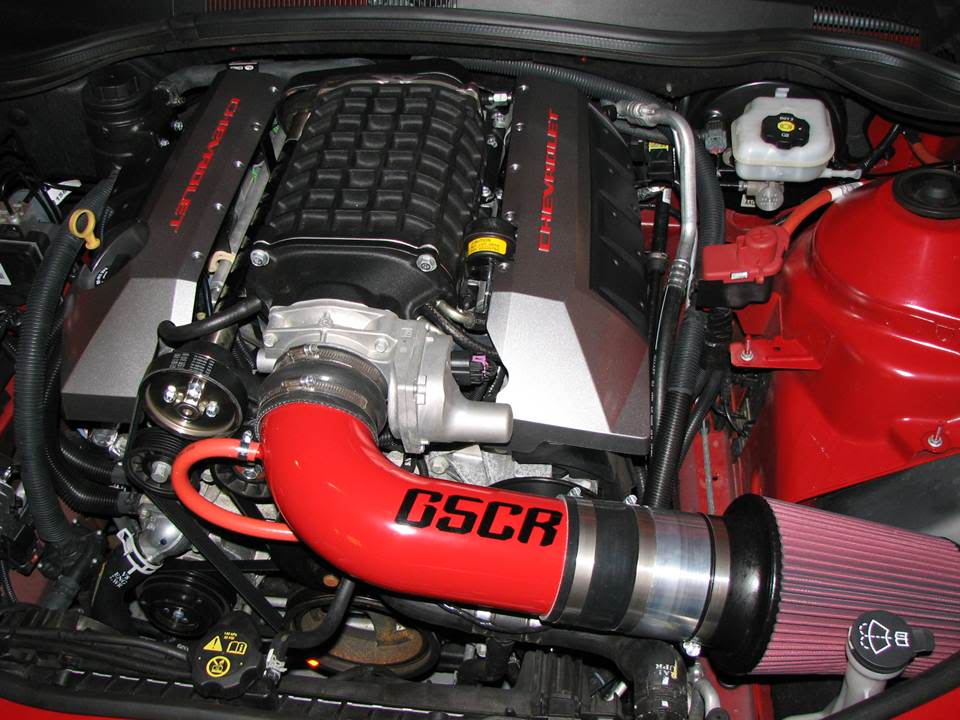
OK with a Supercharger the stock engine cover no longer fits, so I went on Ebay motors and ordered an OEM cover, some Phastek Engine Cover Brackets. And with the use of a Scroll saw, Dremel tools (cutter/sander), enamel model paint, heat lamp, lots of cutting, measuring, inspecting, cutting, measuring, inspecting, cutting, measuring, inspecting...

I did this!

Before:

Name:  enginecover-4.jpg
Views: 88
Size:  110.2 KB

During:


Name:  enginecover-1.jpg
Views: 76
Size:  79.0 KB


After!!! (I'm pretty Happy with it!)

Name:  enginecover-3.jpg
Views: 87
Size:  98.5 KB
 
Old Dec 4, 2011 | 04:05 PM
  #2  
iLL95's Avatar
I Like to Party
Super Member
Joined: Aug 2011
Posts: 1,112
From: South TX
Default

That looks beautiful, I can honestly say thats the best looking 5th gen (Both power and beauty) that ive seen, great job
 
Old Dec 4, 2011 | 04:06 PM
  #3  
iLL95's Avatar
I Like to Party
Super Member
Joined: Aug 2011
Posts: 1,112
From: South TX
Default

How did you go about painting the lettering on the covers? Im wanting to do the same on my intake plenum
 
Old Dec 4, 2011 | 04:09 PM
  #4  
nj85z28's Avatar
Senior Administrator
February 2012 ROTM
May 2012 ROTM
Joined: Jan 2005
Posts: 121,560
From: New Jersey
Default

Looks very nice! Good job
 
Old Dec 4, 2011 | 04:34 PM
  #5  
chernmax's Avatar
Thread Starter
|
In the Staging Lanes
Joined: Nov 2011
Posts: 46
From: Southern Maryland
Default

Originally Posted by iLL95
How did you go about painting the lettering on the covers? Im wanting to do the same on my intake plenum
Artist brush and steady hand!!!

I used a model enamel red paint, then baked it under a heat lamp for about 4 hrs!
 
Old Dec 4, 2011 | 04:40 PM
  #6  
iLL95's Avatar
I Like to Party
Super Member
Joined: Aug 2011
Posts: 1,112
From: South TX
Default

I saw that, ill have to test my steady hands then again sweet mod and keep us updated with any future mods, this car is of interest to me
 
Old Dec 4, 2011 | 05:38 PM
  #7  
chernmax's Avatar
Thread Starter
|
In the Staging Lanes
Joined: Nov 2011
Posts: 46
From: Southern Maryland
Default

Originally Posted by iLL95
I saw that, ill have to test my steady hands then again sweet mod and keep us updated with any future mods, this car is of interest to me
The link under my sig is Cardomain and will always show the entire cars History, info, VIDs, and "how to", I did the same with my custom 2004 Nissan Maxima SE Turbo!
 
Old Dec 4, 2011 | 07:29 PM
  #8  
iLL95's Avatar
I Like to Party
Super Member
Joined: Aug 2011
Posts: 1,112
From: South TX
Default

That's great,I see you put in quite a bit of time making it the beast it is,being supercharged with a new exhaust system,it can easily run with the ZR1 without spending 60k
 
Old Dec 7, 2011 | 12:15 AM
  #9  
SilverBullet's Avatar
Newbie
Joined: Nov 2011
Posts: 15
From: Southern California
Default

VERY NICE!!! I like it!!!
 
Old Dec 10, 2011 | 09:23 AM
  #10  
havnaparty's Avatar
In the Staging Lanes
Joined: Jan 2011
Posts: 50
Default

Awesome job once again Chern.
That really looks clean.

Originally Posted by chernmax
OK with a Supercharger the stock engine cover no longer fits, so I went on Ebay motors and ordered an OEM cover, some Phastek Engine Cover Brackets. And with the use of a Scroll saw, Dremel tools (cutter/sander), enamel model paint, heat lamp, lots of cutting, measuring, inspecting, cutting, measuring, inspecting, cutting, measuring, inspecting...

I did this!

Before:


During:


After!!! (I'm pretty Happy with it!)


All times are GMT -5. The time now is 01:06 AM.