
CRU!NCH TIME - 73 Z28 Build


#172
 12-26-2011, 12:02 PM

Ill have some more pictures of the dash install as I finish it up
#174
02-04-2012, 01:44 AM
It's amazing how time flies by and I haven't even touched the car in months. Holidays and Winter vacations have a way of getting in the way. Me and the GF went to AZ for the first part of January for a little vacation. It's nice to get away from the cold for a bit. I don't have any progress to share but I have a pic I forgot to post of the dash install project though. I'm in the process of moving my business to a larger shop so it will pry be a while till I can work on the car again.
But here is a picture I forgot to post.
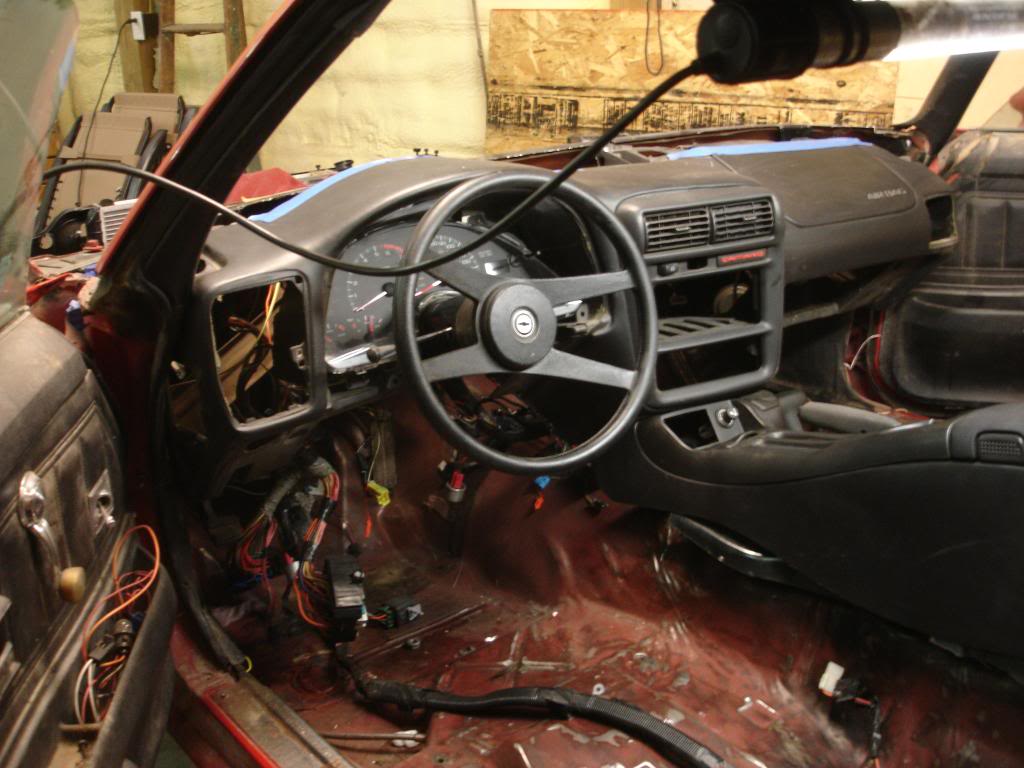
Looks pretty much like the picture of the mock up. but I was bored so I thought I'd post it. I still need to move the dash mounts closer to the firewall to get more clearance for the key and the Instrument bezel.
But here is a picture I forgot to post.
Looks pretty much like the picture of the mock up. but I was bored so I thought I'd post it. I still need to move the dash mounts closer to the firewall to get more clearance for the key and the Instrument bezel.
#175
02-04-2012, 01:19 PM

Join Date: Aug 2008
Location: Portland, Or
Posts: 9,097
Looks great! But you're gonna have to change the name of this post from "Crunch time" to "Some time"!  Just razzing you a little to get back on it!
Just razzing you a little to get back on it!
#176
02-04-2012, 03:09 PM

Thats how projects go. I have been under no illuision it will take less than five years to get were I wasnt to be. The guy I just bought my Stealth Ram from abaondoned his project due to money issues. I hope I never get hat bad.
#177
02-04-2012, 06:28 PM
yeah all good projects take time,never give up one day it will be finished.but i have no time limit on mine,i work on it when i can,with my dad having cancer it takes alot of my time up to care for him,maybe 5 years for me too.i just do what i can do and take my time to be sure everything is the best i can do,
Last edited by bad436z28; 02-04-2012 at 06:32 PM.
#178
09-25-2012, 10:42 PM
I've been absent for far to long... I'm excited to report. I've finally started to do work on the car again! I had to knock down a wall in the new shop to make room for the project car. (I had to move my auto service and repair biz to a commercial shop and found this 3000sq ft. shop in fort Collins, CO) unfortunately I don't have a sand blasting both set up anymore but I think I've done more sand blasting than I care to remember. Looking back through my thread is a constant reminder on how much work I've already done...
Recently I've been working on the brake system and installing and setting up the ABS system. Lots of plumbing to do. I'm making all the brake lines and flares myself (obviously since I can't buy the brakes lines I need premade for my set up) I also completed 1 or 2 brackets for the LS disc parking brake cable and modified the LS brake booster and master to fit in the originals place.
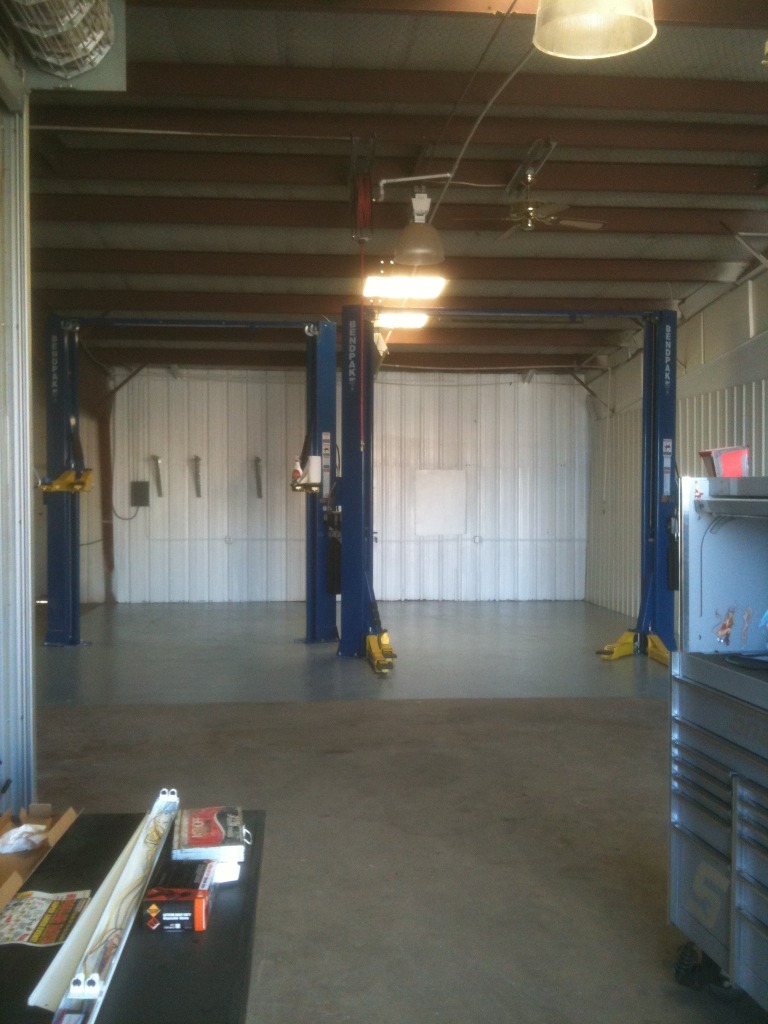
Here's a pic of the new shop with the lifts installed and floor painted (epoxy) just before I moved everything else in. This pictures is back in March 2012
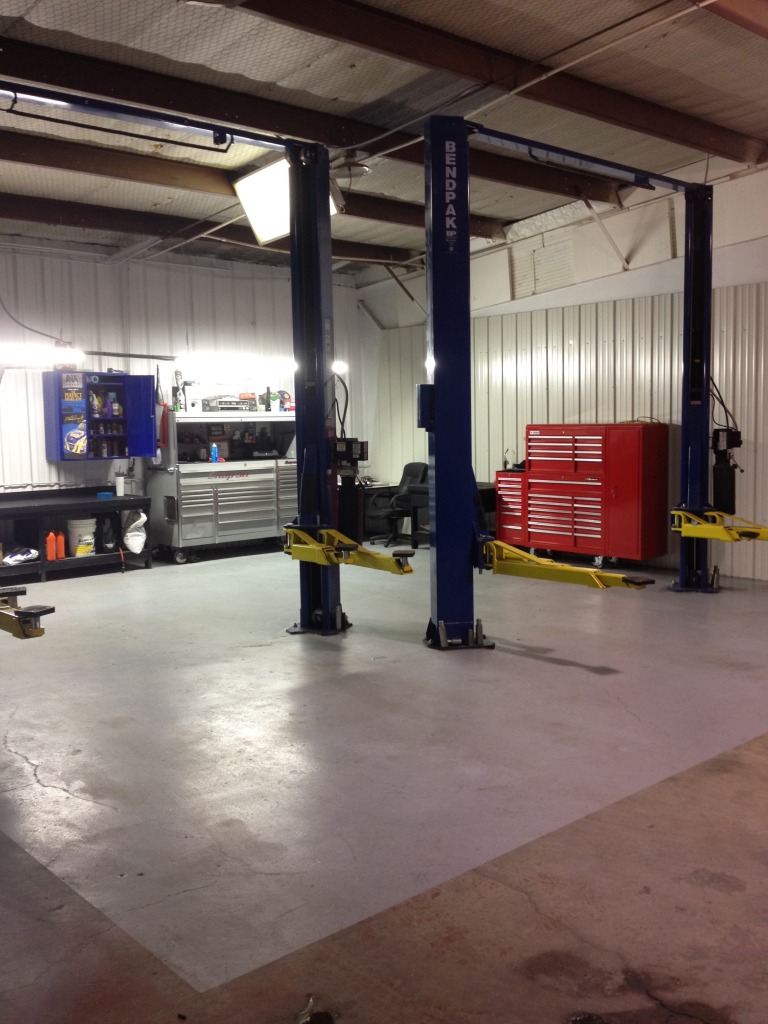
Here it is today
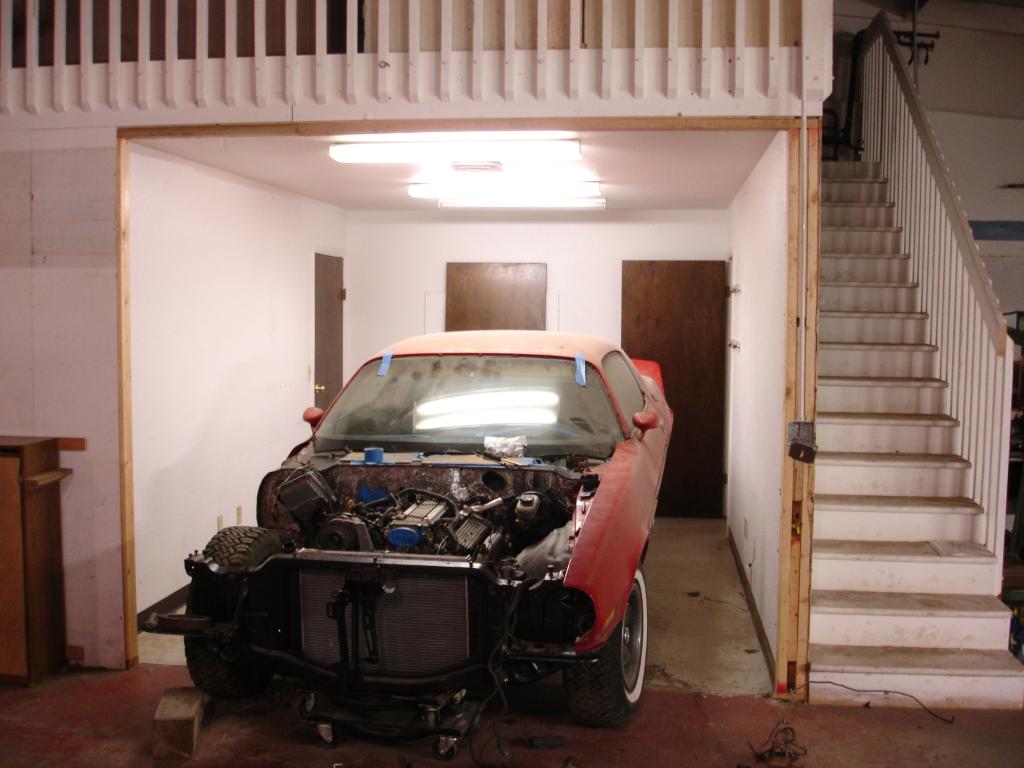
The other side of the shop and new home of my Camaro.

It sits where a wall once was.
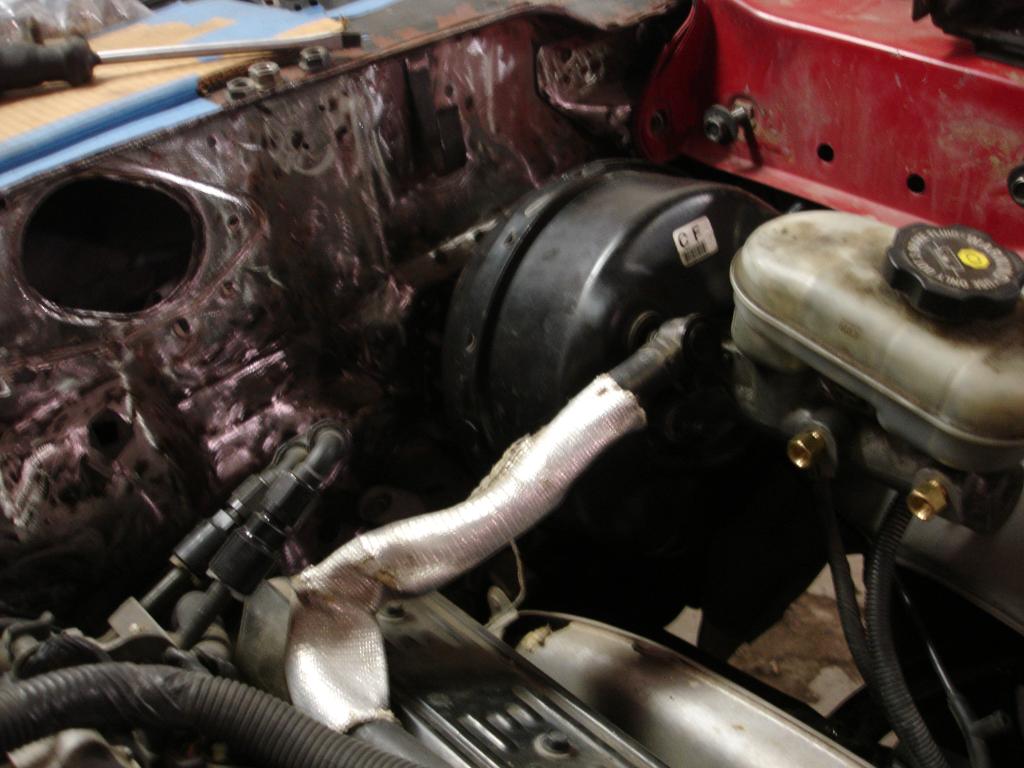
The booster was a pain to get it this far it's still not 100% yet. The booster and master are from a 02 Trans Am and they had studs. I had to cut those and drill holes. then I had add some metal to lower the mounting holes. I may need to adjust the angle of the whole thing. the master cylinder might what to occupy the same space as the hood.
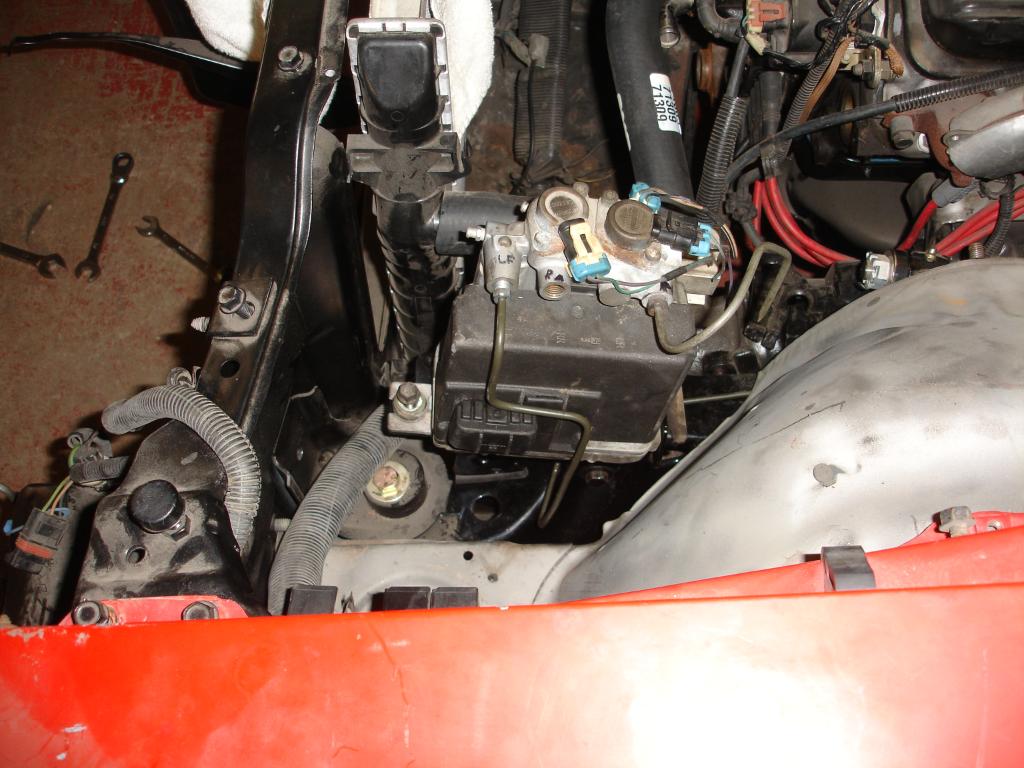
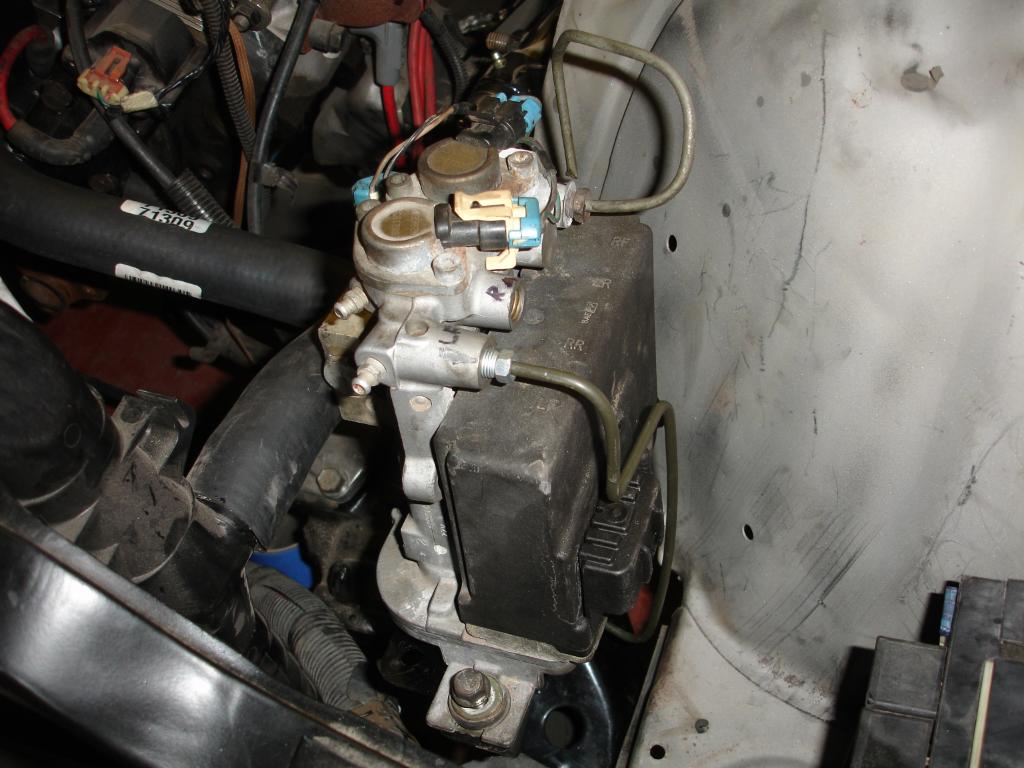
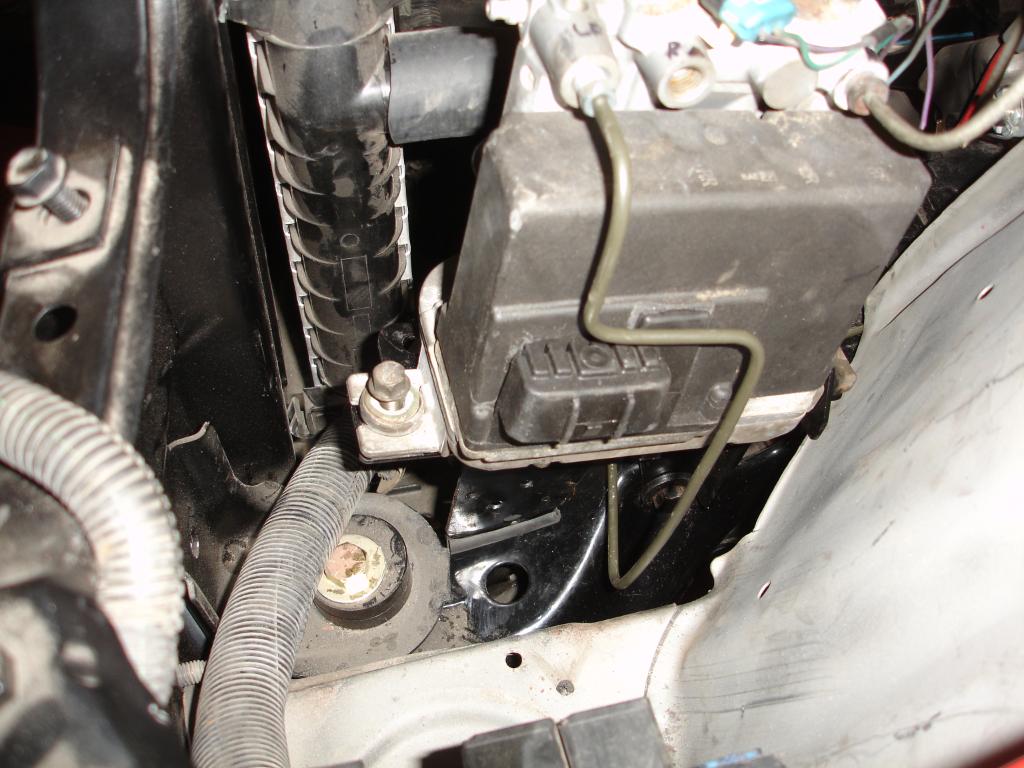
Mounted the Electronic Brake Traction Control Module (EBTCM) or ABS computer in this area here. I've only got one brake line made so far which goes to the LF brake caliper.
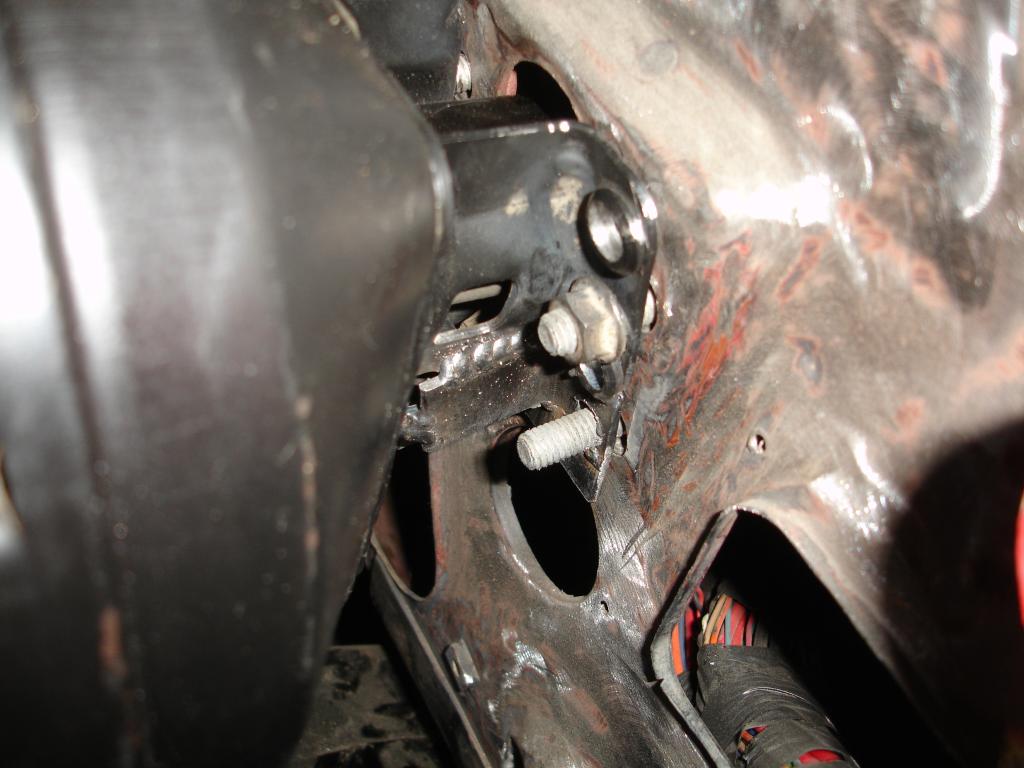
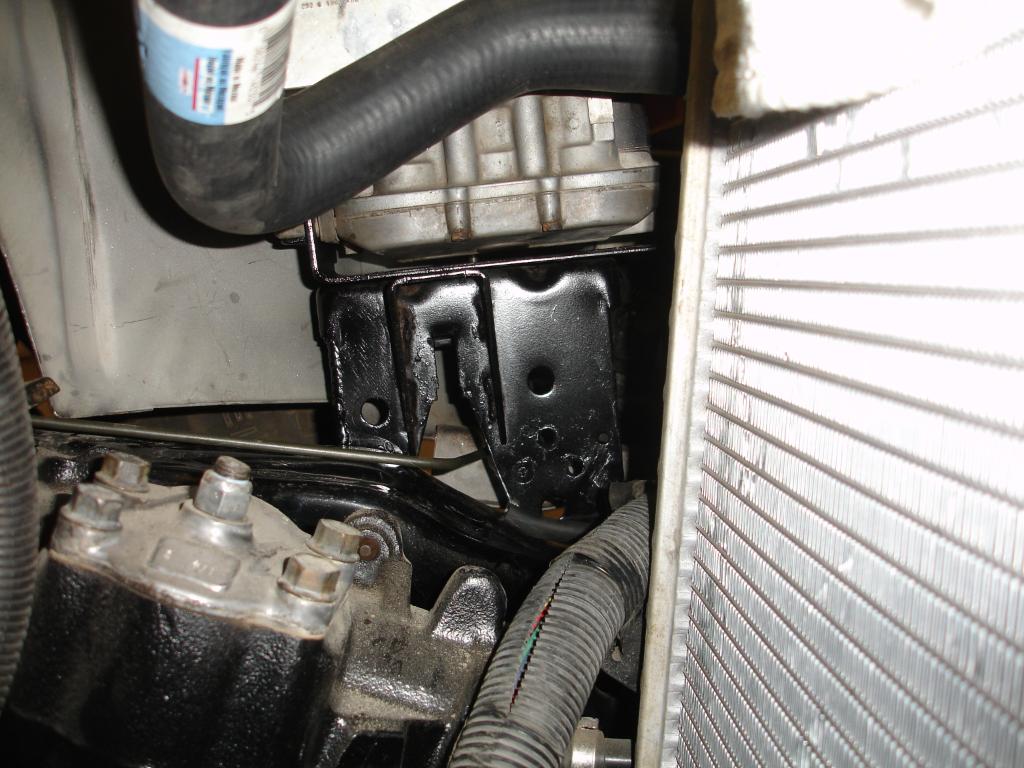
Using part of the 97 camaro EBTCM bracket it fit nicely using the steering box bolt to hold it in place.
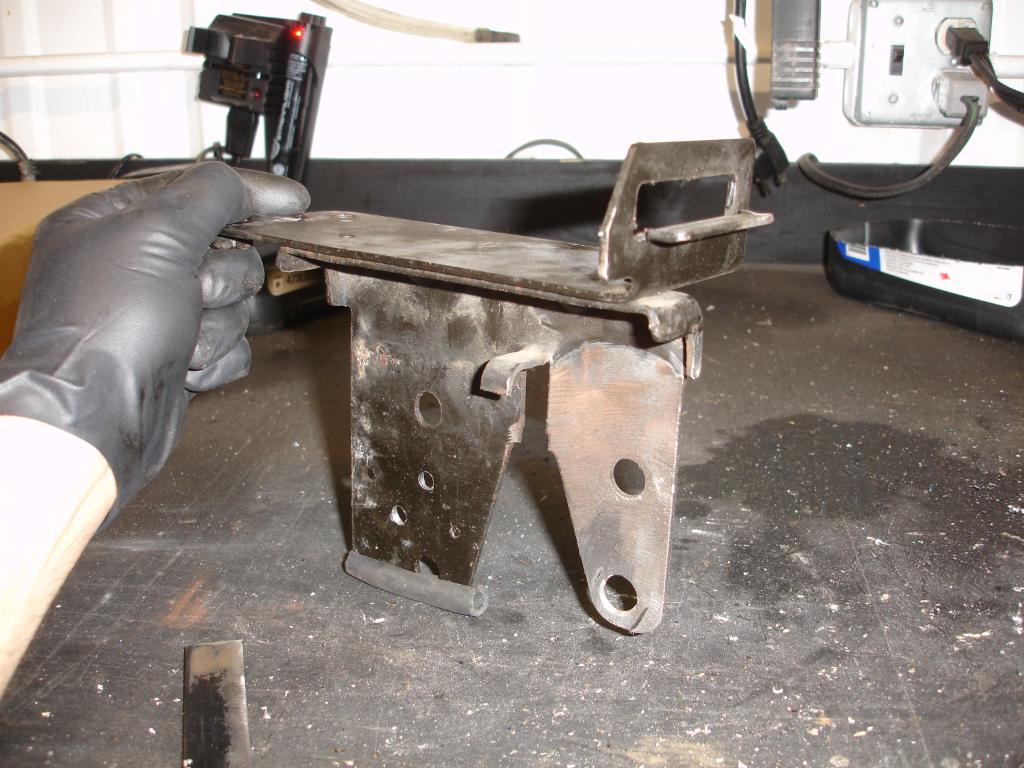
Here is the bracket itself
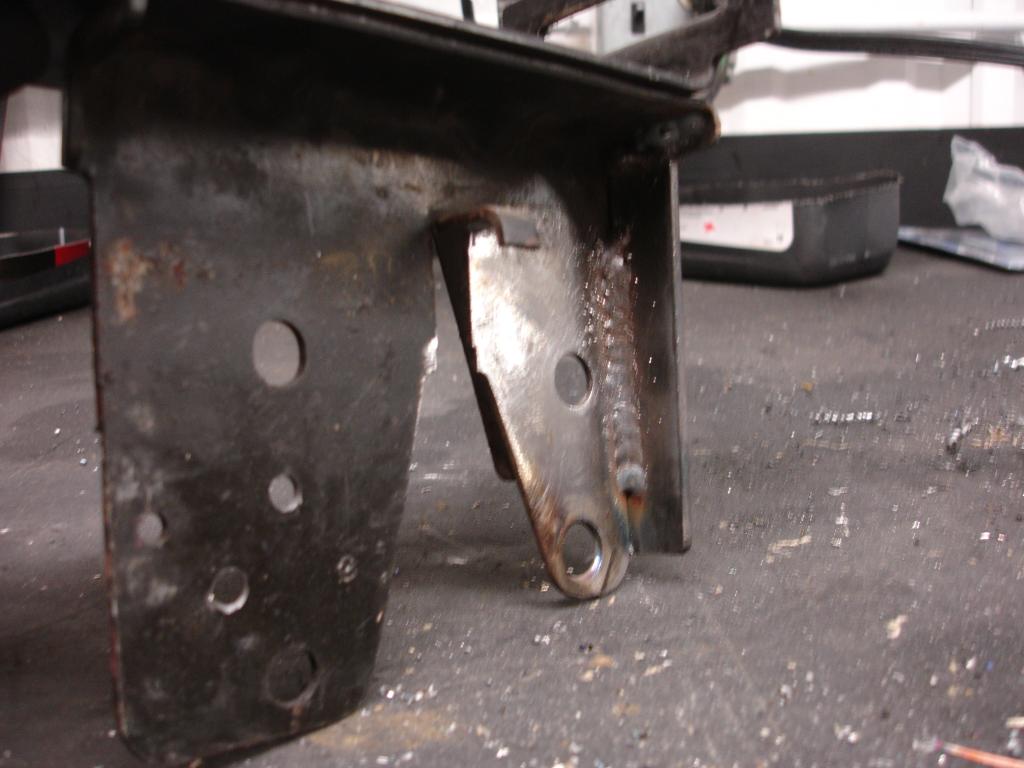
It was a little unsteady. so I welded on a little more support. It's solid now.
This is the first time I've ever made flares and bent brake lines. It's been fun so far and I'm sure it's going to be quite a challenge when it comes time to route two lines all the way to the back one for each side. You will see what I mean later by "two" lines all the way to the back. (instead of one that splits at the diff)
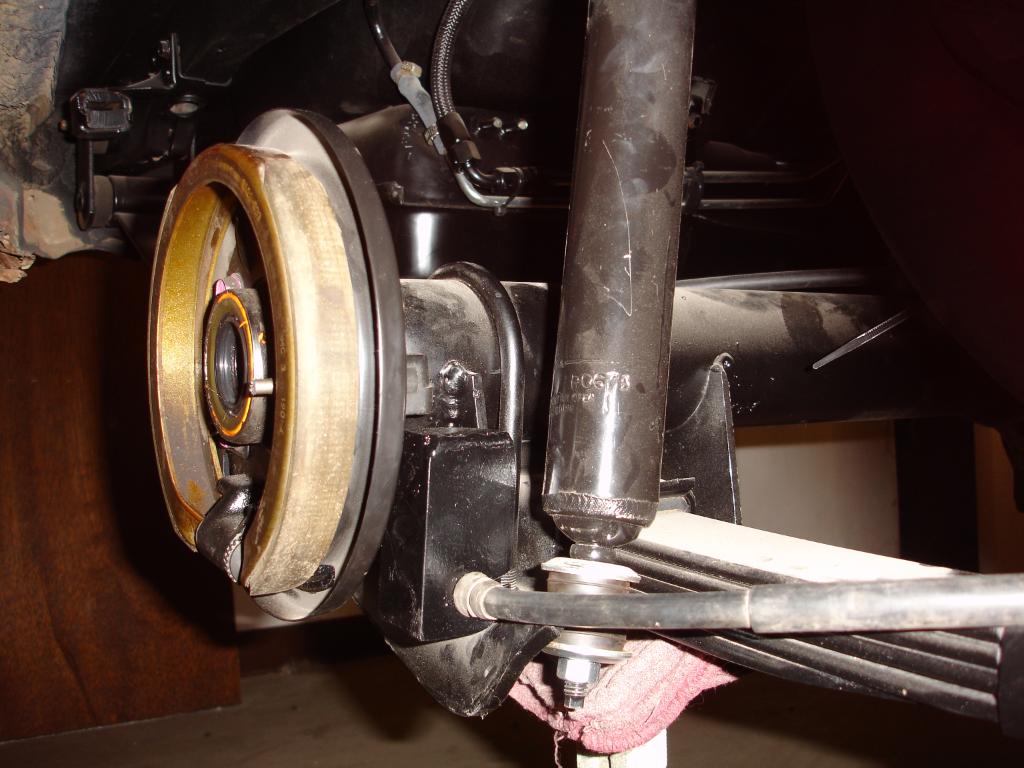
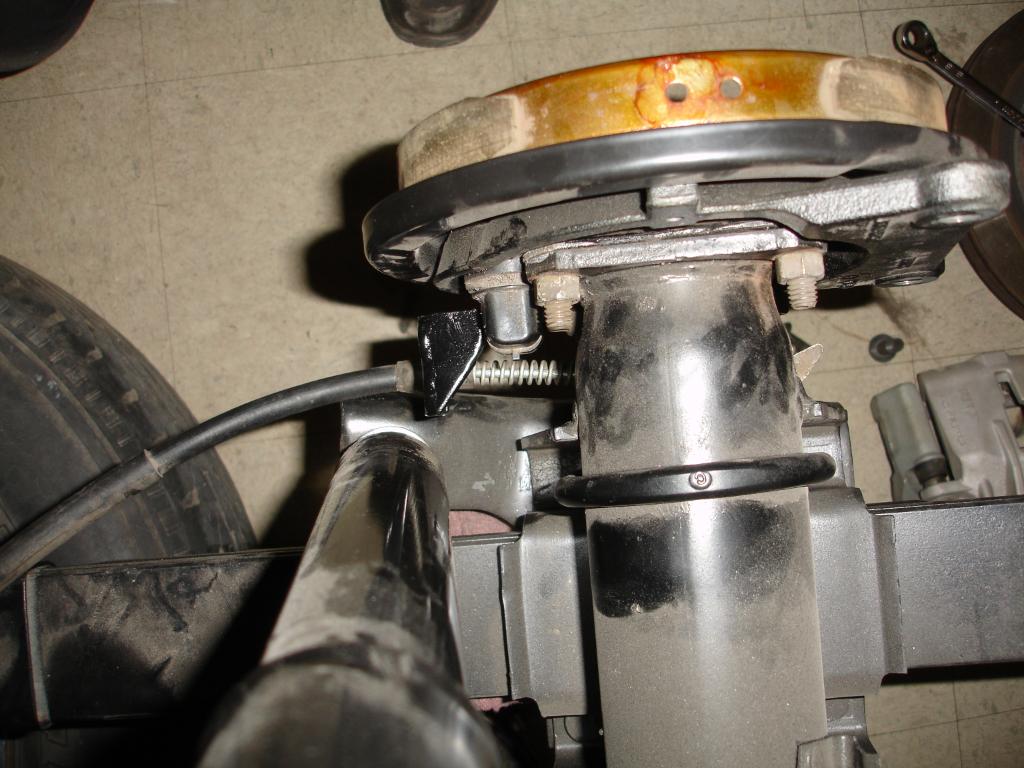
The parking brake cable bracket I made was a pretty interesting process. I borrowed a basic idea from someone's thread from another forum on how to make a bracket and had to change it due to the fact that I have the wheel speed sensors. It came out pretty good I guess.
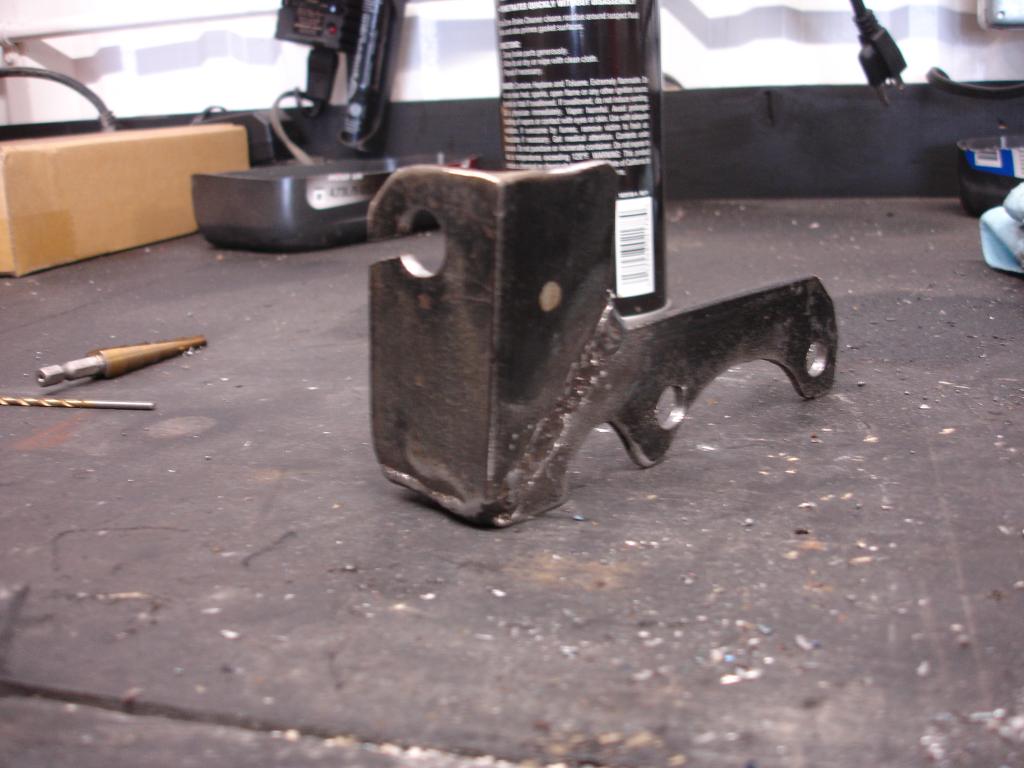
I used some angle iron and cut a v and bent it over and with lots of grinding and cutting I came up with that. Here it is installed on the car
Well that's all I have for today. I've got the bug to work on it again so I hope to keep posting more and more these days.
And before anyone asks "why abs?"... because I can!
Recently I've been working on the brake system and installing and setting up the ABS system. Lots of plumbing to do. I'm making all the brake lines and flares myself (obviously since I can't buy the brakes lines I need premade for my set up) I also completed 1 or 2 brackets for the LS disc parking brake cable and modified the LS brake booster and master to fit in the originals place.
Here's a pic of the new shop with the lifts installed and floor painted (epoxy) just before I moved everything else in. This pictures is back in March 2012
Here it is today
The other side of the shop and new home of my Camaro.
It sits where a wall once was.
The booster was a pain to get it this far it's still not 100% yet. The booster and master are from a 02 Trans Am and they had studs. I had to cut those and drill holes. then I had add some metal to lower the mounting holes. I may need to adjust the angle of the whole thing. the master cylinder might what to occupy the same space as the hood.
Mounted the Electronic Brake Traction Control Module (EBTCM) or ABS computer in this area here. I've only got one brake line made so far which goes to the LF brake caliper.
Using part of the 97 camaro EBTCM bracket it fit nicely using the steering box bolt to hold it in place.
Here is the bracket itself
It was a little unsteady. so I welded on a little more support. It's solid now.
This is the first time I've ever made flares and bent brake lines. It's been fun so far and I'm sure it's going to be quite a challenge when it comes time to route two lines all the way to the back one for each side. You will see what I mean later by "two" lines all the way to the back. (instead of one that splits at the diff)
The parking brake cable bracket I made was a pretty interesting process. I borrowed a basic idea from someone's thread from another forum on how to make a bracket and had to change it due to the fact that I have the wheel speed sensors. It came out pretty good I guess.
I used some angle iron and cut a v and bent it over and with lots of grinding and cutting I came up with that. Here it is installed on the car
Well that's all I have for today. I've got the bug to work on it again so I hope to keep posting more and more these days.
And before anyone asks "why abs?"... because I can!
Last edited by JmeZ28; 09-25-2012 at 10:46 PM.
#179
09-26-2012, 10:32 AM
Join Date: Aug 2008
Location: Portland, Or
Posts: 9,097
Glad to see you're back on the Camaro! Very nice shop too!
Nothing is easy with a drastic change, and fabbing almost everything is pretty common. I actually enjoy the fabrication process and making something that was never designed to go in a certain model fit.
Nice work on the brackets!
Nothing is easy with a drastic change, and fabbing almost everything is pretty common. I actually enjoy the fabrication process and making something that was never designed to go in a certain model fit.
Nice work on the brackets!
#180
09-26-2012, 01:04 PM

Before you go and start making all those brake lines you should consider converting them over to AN fittings and use braided lines. Cost a little more but much easier to do and looks much better also. I used them all on my 4x4 when swapping bodies to early model frame. Something to consider?