
New toy for my new toy (1st gen)


Thread Starter
|
June 2011 ROTM
2011 RIDE OF THE YEAR
2011 RIDE OF THE YEAR
Joined: Oct 2008
Posts: 102
From: Rochester, NH
ROTM Winner's Club
So, I got tired of not being having anything to do on the car, so I've found a body shop and started tearing the car apart. Interior is pretty much apart, but anyone have any tips for removing the headliner. I would really like to re-use it later since it's in such good condition, but it's glued on the sides. Any tricks?
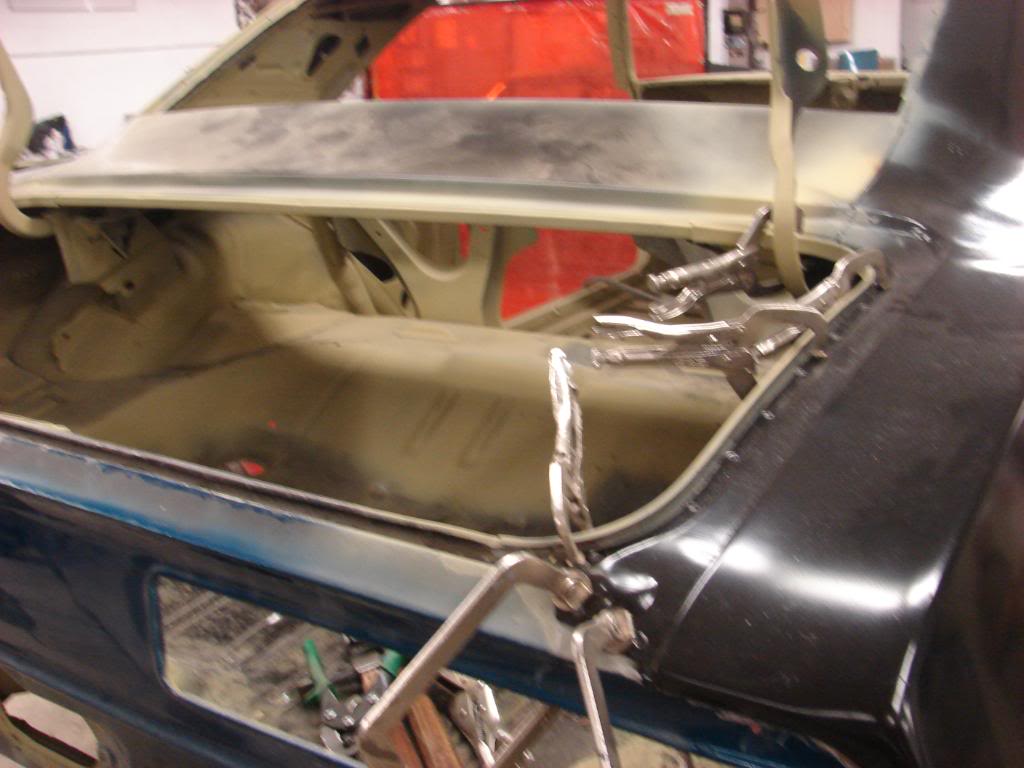
Also, I thought I remember a thread here about how the window trim clips work and how to remove the trim (around front and rear windows). I know there is a tool (which I'll make), but this thread had pictures that showed how they work.
Derrick
Also, I thought I remember a thread here about how the window trim clips work and how to remove the trim (around front and rear windows). I know there is a tool (which I'll make), but this thread had pictures that showed how they work.
Derrick
Last edited by tazinhawaii; Jul 31, 2010 at 09:35 PM.
Thread Starter
|
June 2011 ROTM
2011 RIDE OF THE YEAR
2011 RIDE OF THE YEAR
Joined: Oct 2008
Posts: 102
From: Rochester, NH
ROTM Winner's Club
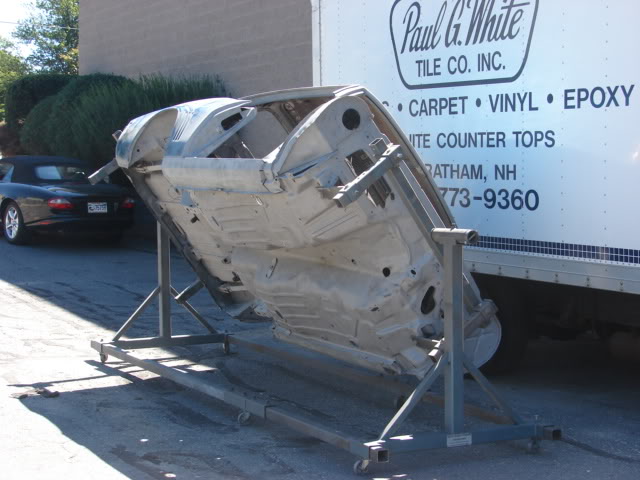
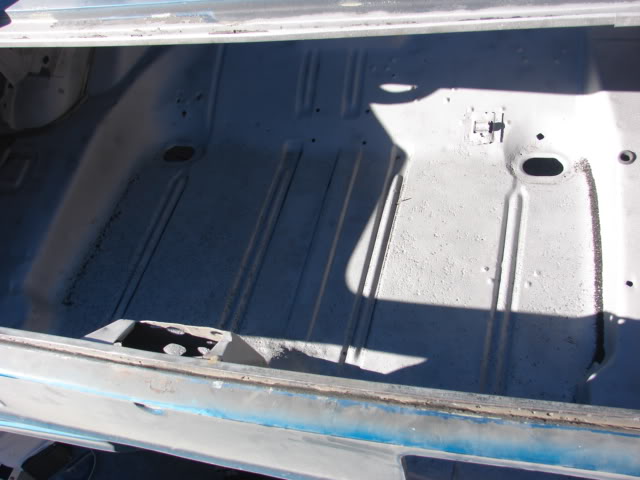
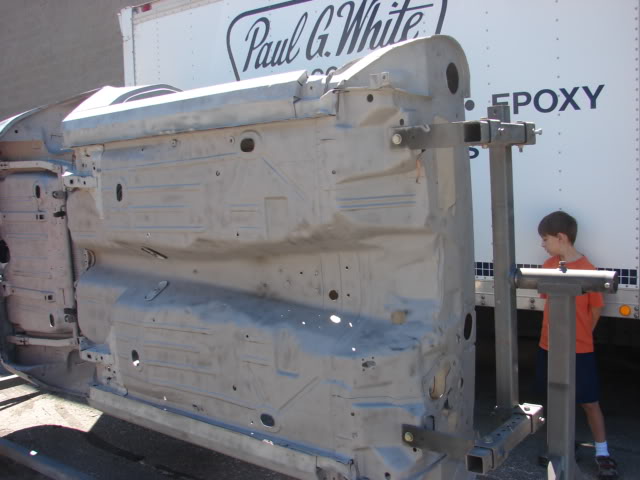
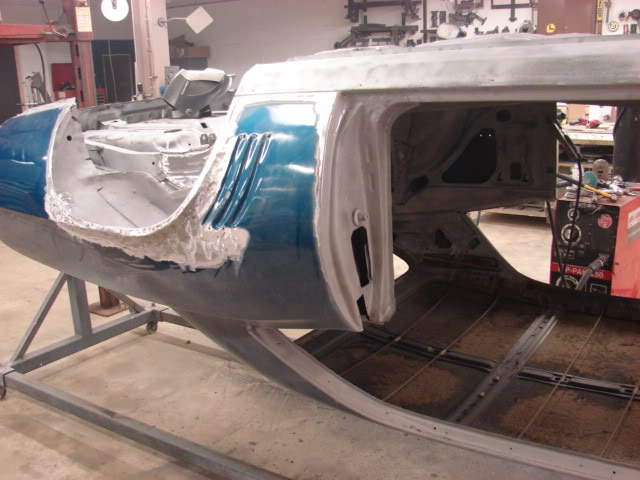
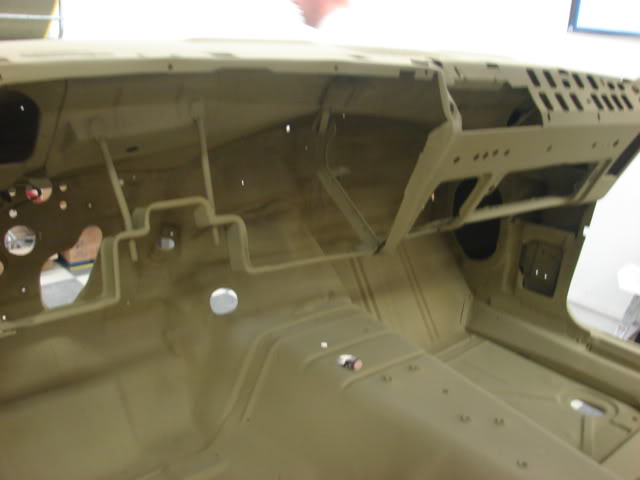
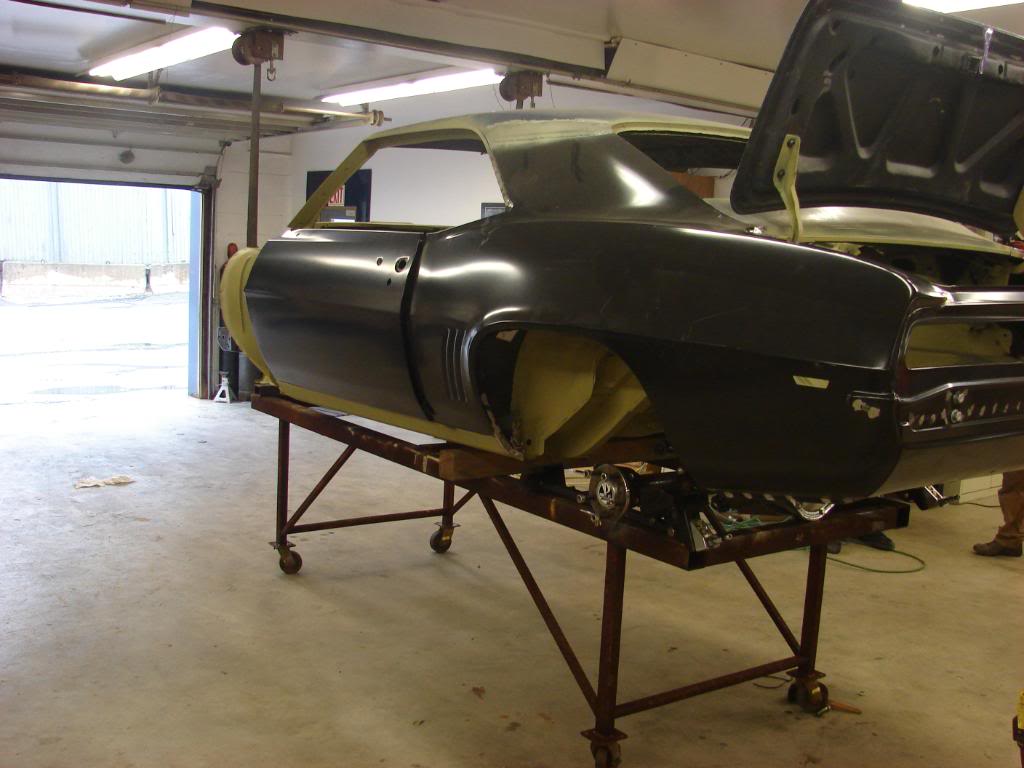
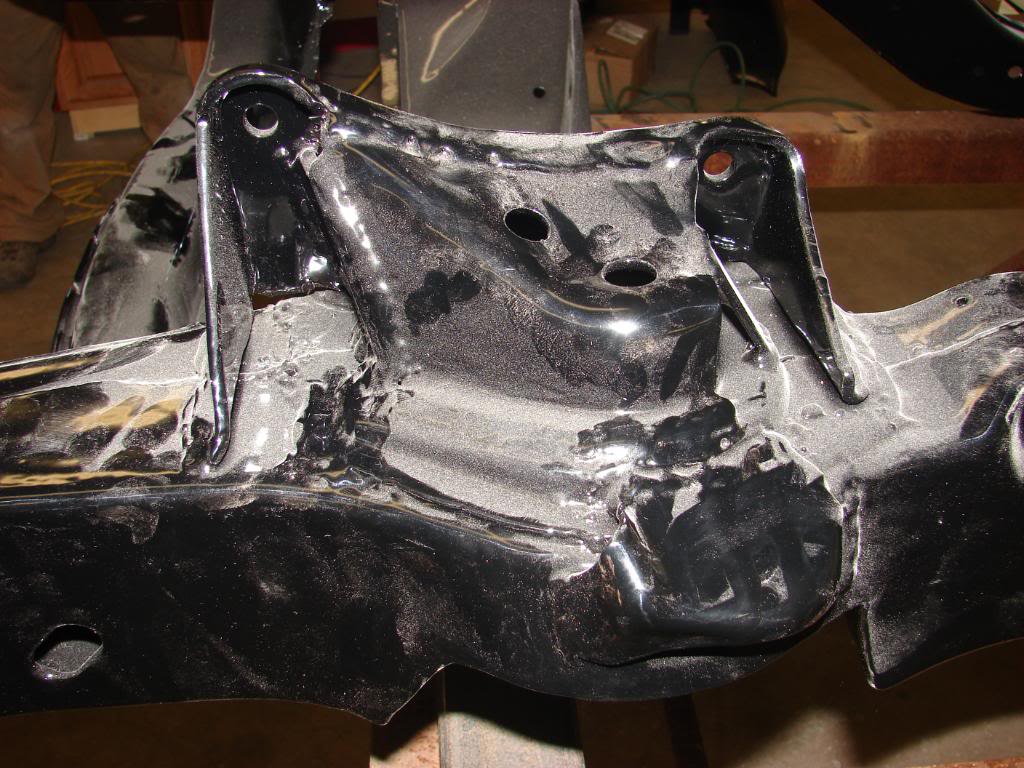
I just wanted to post a few pics of the car at the shop. Only been there 2 weeks and the sub-frame has been repaired (cracks and reinforcement needed for the air ride shocks) and sent off to powder coat. Body is on the rotisserie and blasted. Shop is really impressed with how good condition the body was actually in, which of course means I save some $$$. Floors need nothing, and there is some pitting in the trunk due to leaks around the rear window frame. They will replace the body panel making up the lower window frame (between rear window and trunk), and a couple small patches to the rear wheel wells is all that's really needed. I gave the shop until March before I needed the car done, so I can start putting it back together. I think I'll probably have it back by Thanksgiving. I just hope it continues to go this smoothly. I only have the shop blasting, straightening, gaps, and body reassembly, and custom paint. I'm doing the reassembly (I did the disassembly). The new parts going on when done include :
Billet RS tail lights and reverse lights
Electric door (shaving door handles and locks)
Anvil carbon fiber front/rear spoilers
Carbon fiber door sill plates
Big block Corvette style hood (stinger) also same as Yenko hood
new rear bumper
And a bunch of replacement parts such as wiring harnesses...
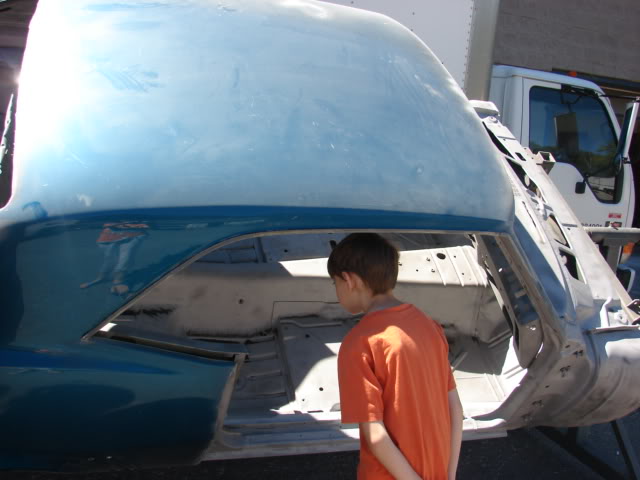
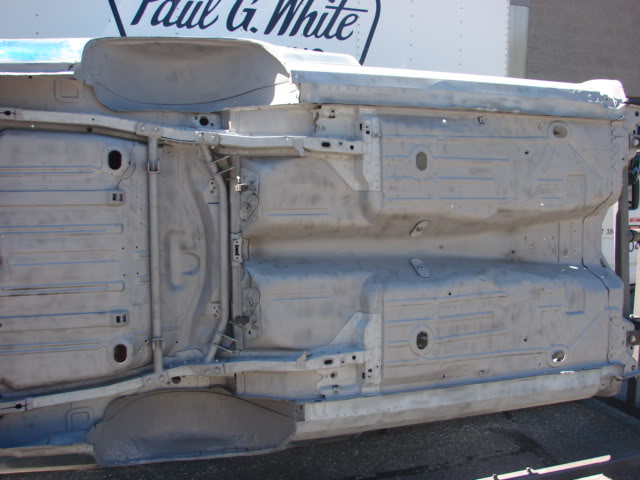
Here are a few pics of the car now.


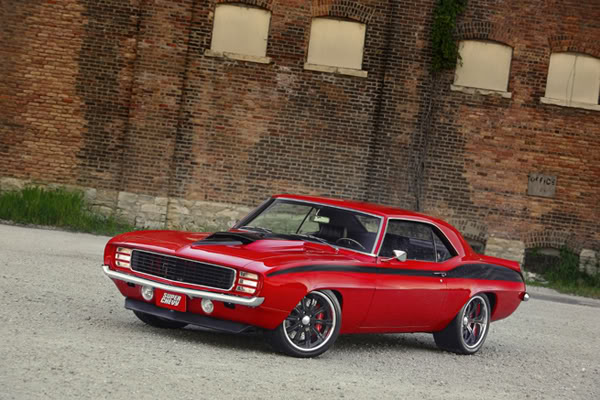
And this is still what I'm basing my build on. The car will be the Grey color of the "Elenaor Mustang" from Gone in Sixty Seconds instead of red, but the rest basically the same (including the ghost flags since I've been in the Navy 21 years, I Love the flag).
Derrick
Billet RS tail lights and reverse lights
Electric door (shaving door handles and locks)
Anvil carbon fiber front/rear spoilers
Carbon fiber door sill plates
Big block Corvette style hood (stinger) also same as Yenko hood
new rear bumper
And a bunch of replacement parts such as wiring harnesses...
Here are a few pics of the car now.
And this is still what I'm basing my build on. The car will be the Grey color of the "Elenaor Mustang" from Gone in Sixty Seconds instead of red, but the rest basically the same (including the ghost flags since I've been in the Navy 21 years, I Love the flag).
Derrick
Thread Starter
|
June 2011 ROTM
2011 RIDE OF THE YEAR
2011 RIDE OF THE YEAR
Joined: Oct 2008
Posts: 102
From: Rochester, NH
ROTM Winner's Club
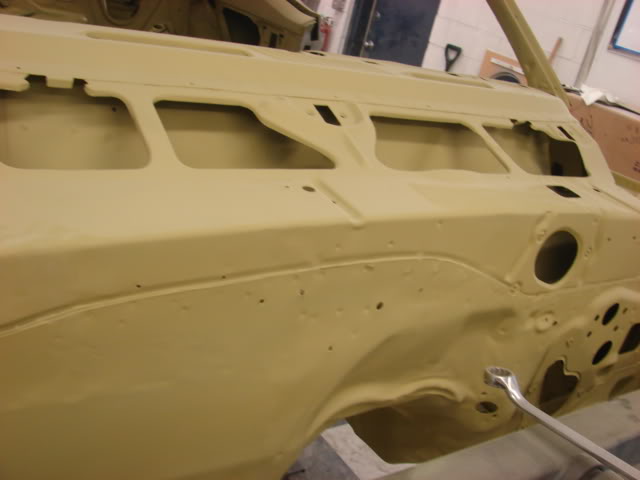
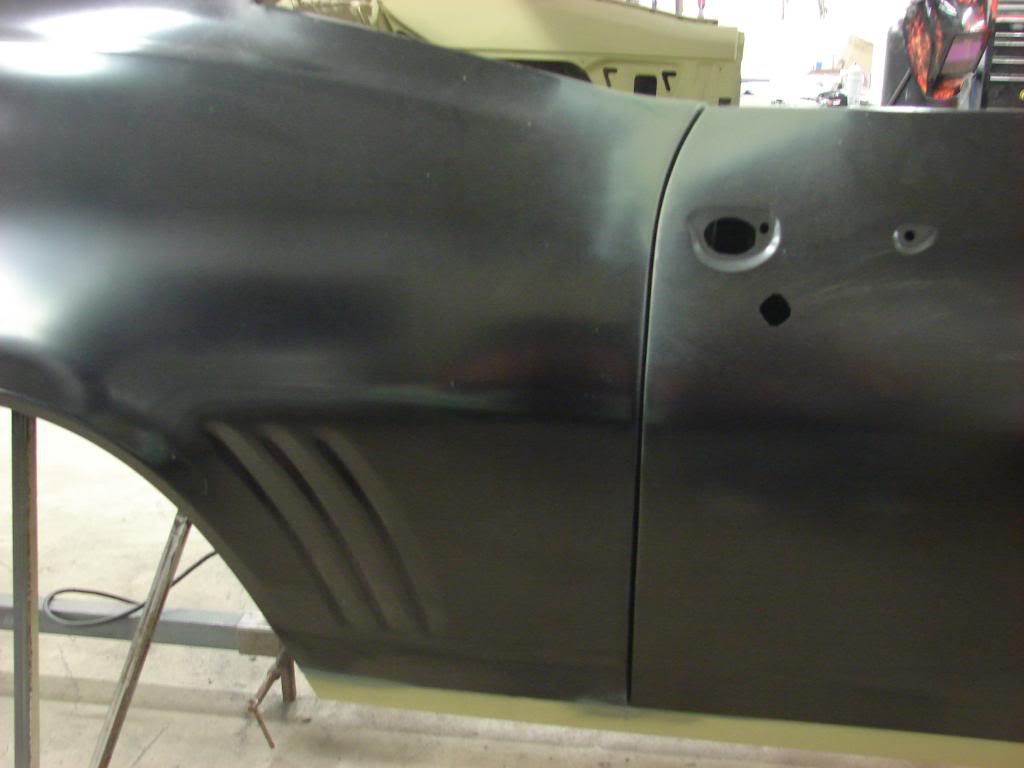
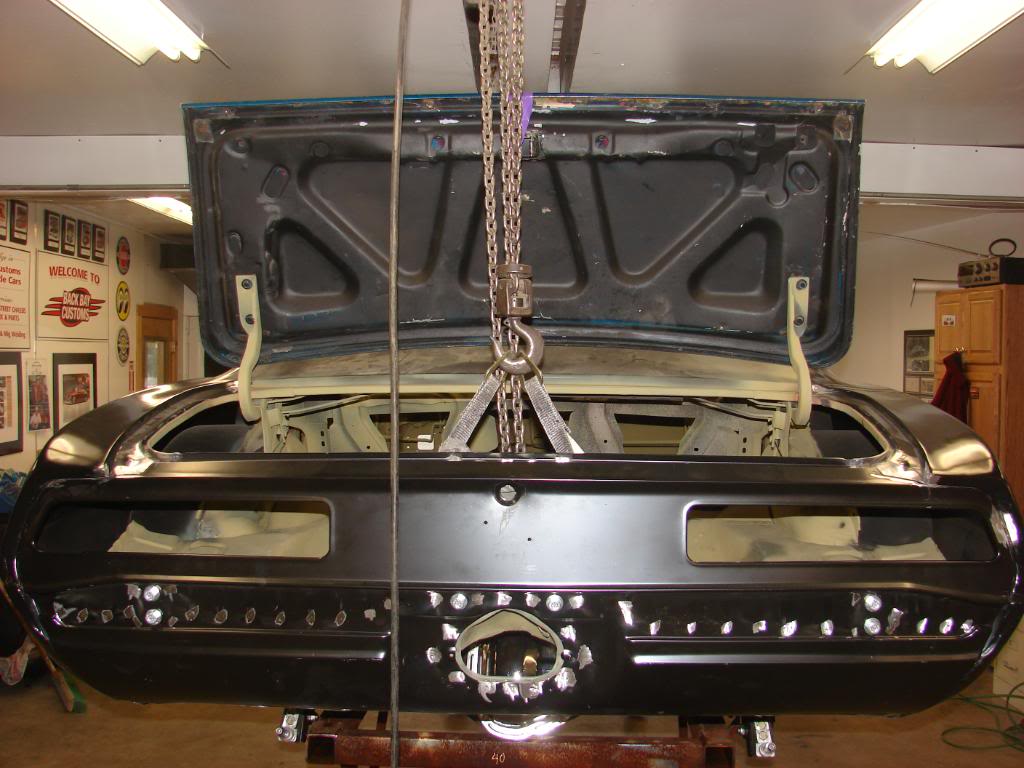
More pics from today. Turns out the rear quarters are in worse shape than I thought and will change them out. Although the bondo layer was not super thick, just too beat up from some p*ss poor prior repair.

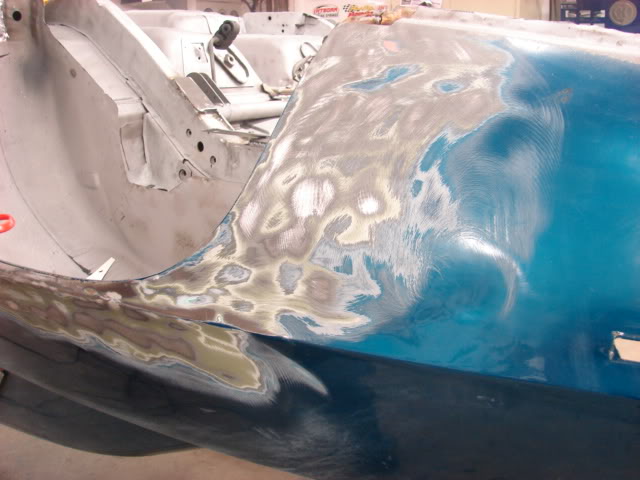
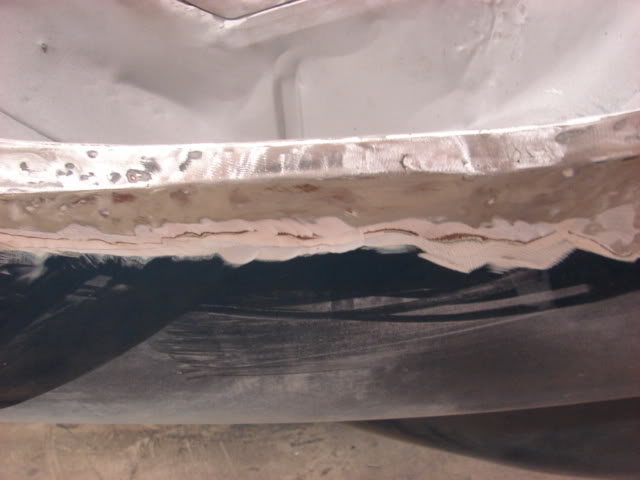
Derrick
Derrick
Thread Starter
|
June 2011 ROTM
2011 RIDE OF THE YEAR
2011 RIDE OF THE YEAR
Joined: Oct 2008
Posts: 102
From: Rochester, NH
ROTM Winner's Club
I decided to make some new brake lines using stainless steel lines. But I'm not sure which size tubing to get. What size is the stock tubing for a disc brake setup (inner diameter). I'm thinking it's 1/4" except the rear axle which may be 3/16". Is this right? I plan to get the tubing and make my own lines as i want to move the proportioning valve down to the frame rail and clean up the 'loop-d-loop' stock brake line setup by the master cylinder.
Thanks,
Derrick
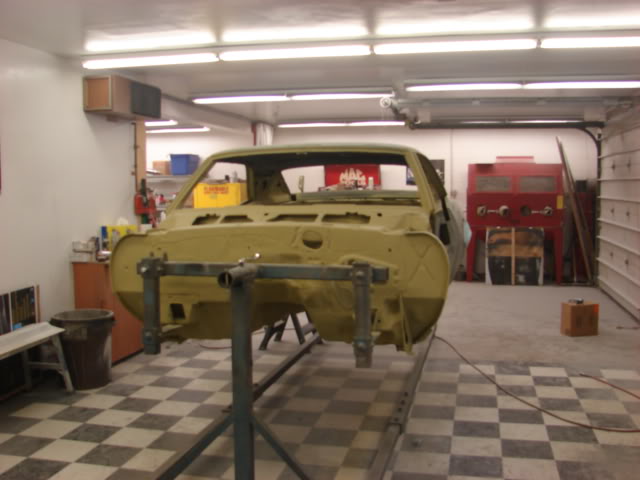
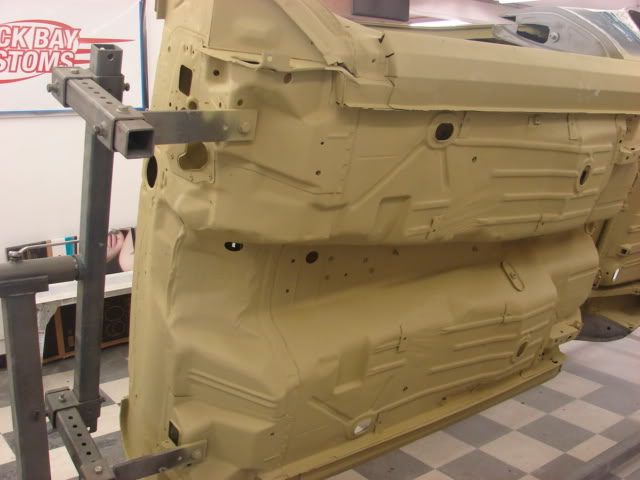
BTW, current pics as of 9/2.
Thanks,
Derrick
BTW, current pics as of 9/2.
Last edited by tazinhawaii; Sep 4, 2010 at 08:13 AM.
Thread Starter
|
June 2011 ROTM
2011 RIDE OF THE YEAR
2011 RIDE OF THE YEAR
Joined: Oct 2008
Posts: 102
From: Rochester, NH
ROTM Winner's Club
Derrick

Newbie
Joined: Aug 2010
Posts: 2
Did you order your air ride directly from Air Ride? I was also wondering where you ordered the rear end? I am in Victoria BC Canada, just starting my mods to 69 Camaro SS. I just love the stance of your car. I appreciate your help choosing vendors, that actually deliver what you order...
thanks Bill
thanks Bill
Thread Starter
|
June 2011 ROTM
2011 RIDE OF THE YEAR
2011 RIDE OF THE YEAR
Joined: Oct 2008
Posts: 102
From: Rochester, NH
ROTM Winner's Club
Did you order your air ride directly from Air Ride? I was also wondering where you ordered the rear end? I am in Victoria BC Canada, just starting my mods to 69 Camaro SS. I just love the stance of your car. I appreciate your help choosing vendors, that actually deliver what you order...
thanks Bill
thanks Bill
Thanks,
Derrick
Thread Starter
|
June 2011 ROTM
2011 RIDE OF THE YEAR
2011 RIDE OF THE YEAR
Joined: Oct 2008
Posts: 102
From: Rochester, NH
ROTM Winner's Club
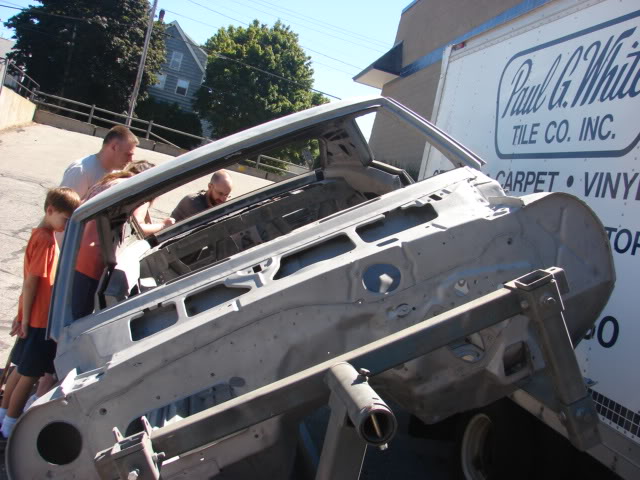
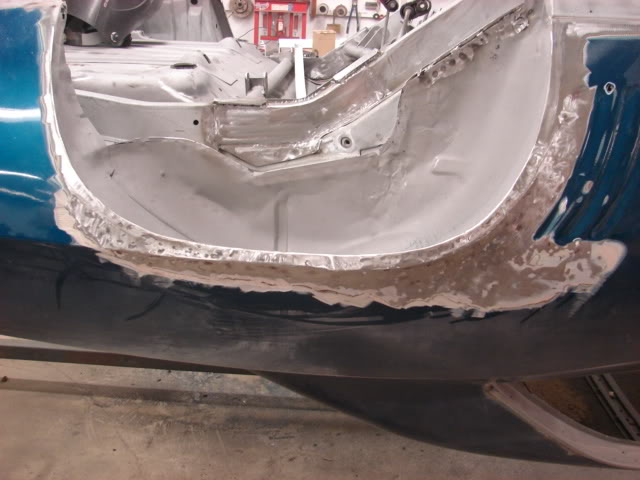
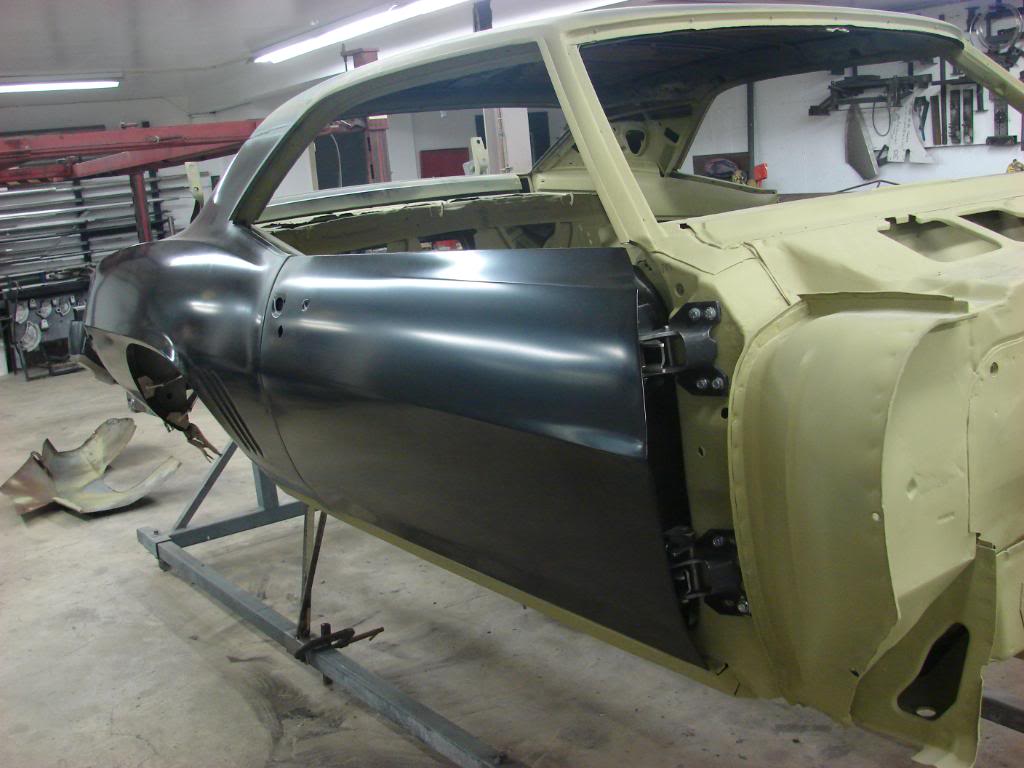
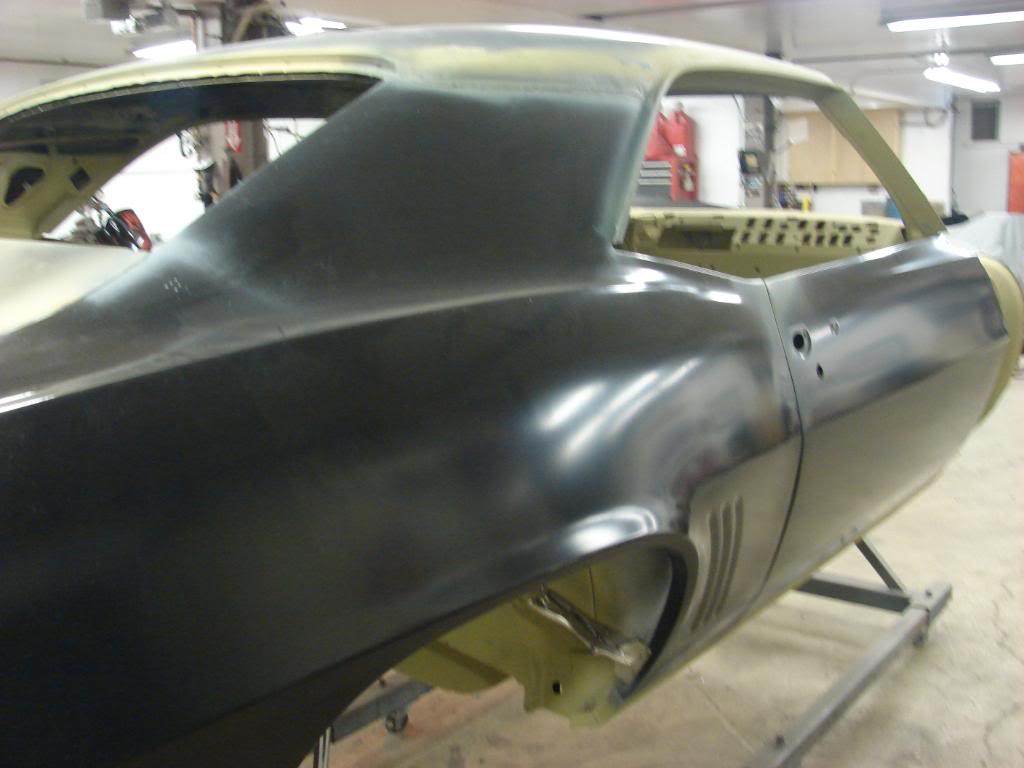
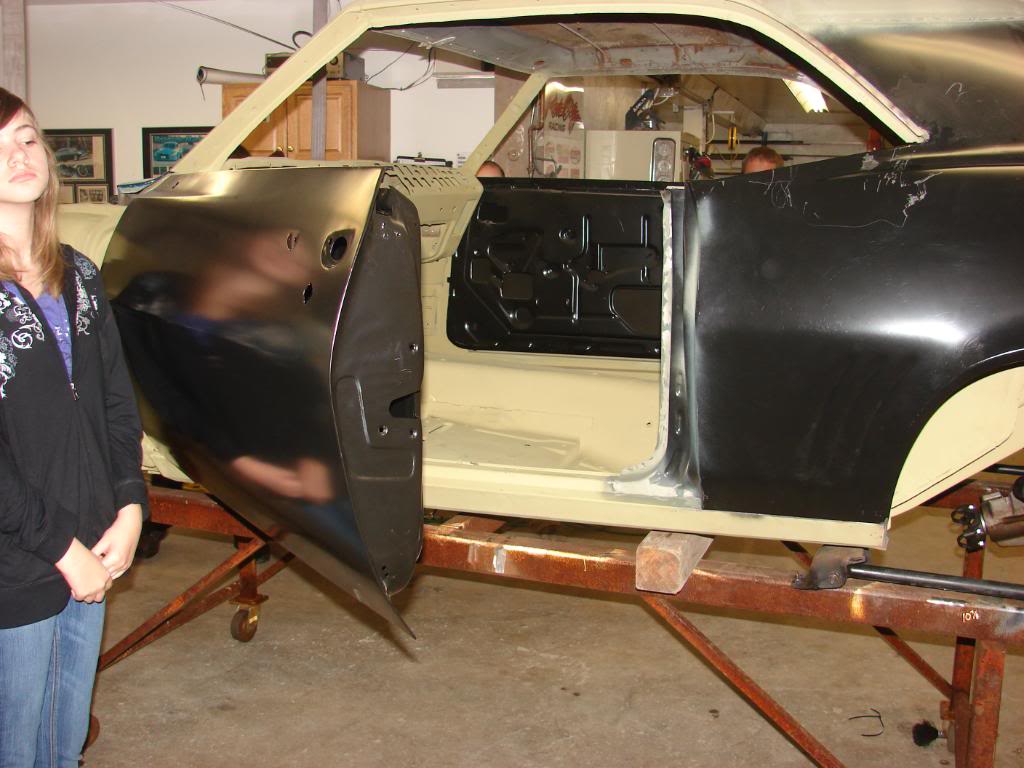
Here are a couple pics of the progress as of yesterday. The shop got the passenger rear quarter and door fit up. Still ahead of schedule. But damn, going through $$$$ FAST!
Derrick
Derrick
Thread Starter
|
June 2011 ROTM
2011 RIDE OF THE YEAR
2011 RIDE OF THE YEAR
Joined: Oct 2008
Posts: 102
From: Rochester, NH
ROTM Winner's Club
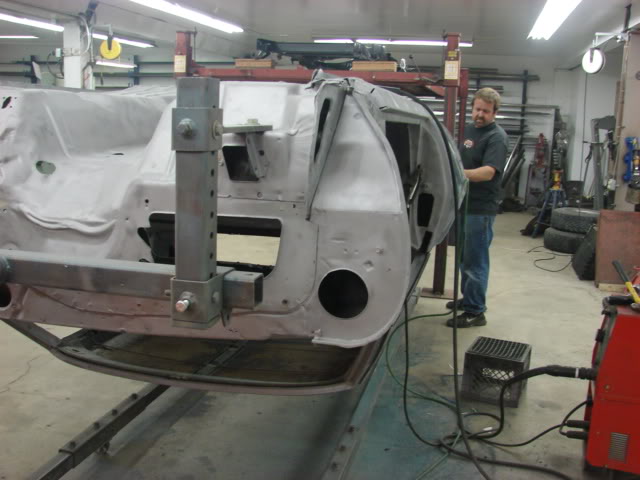
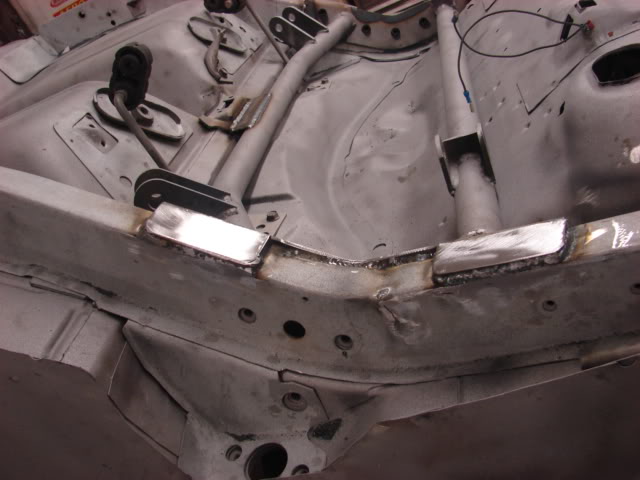
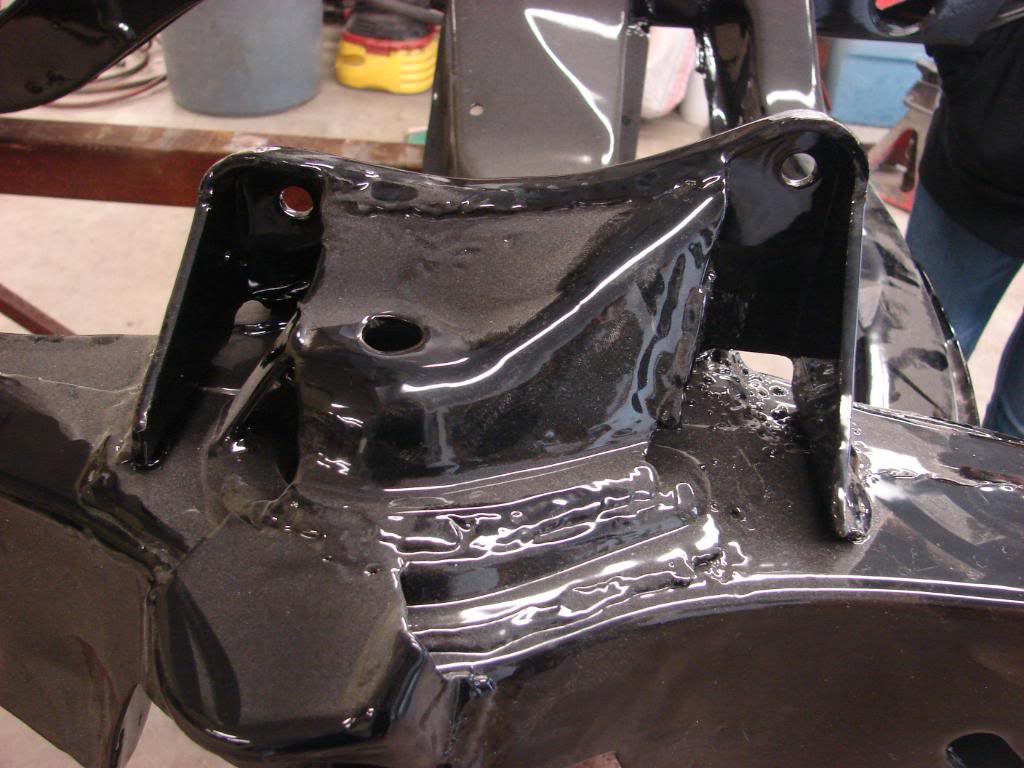
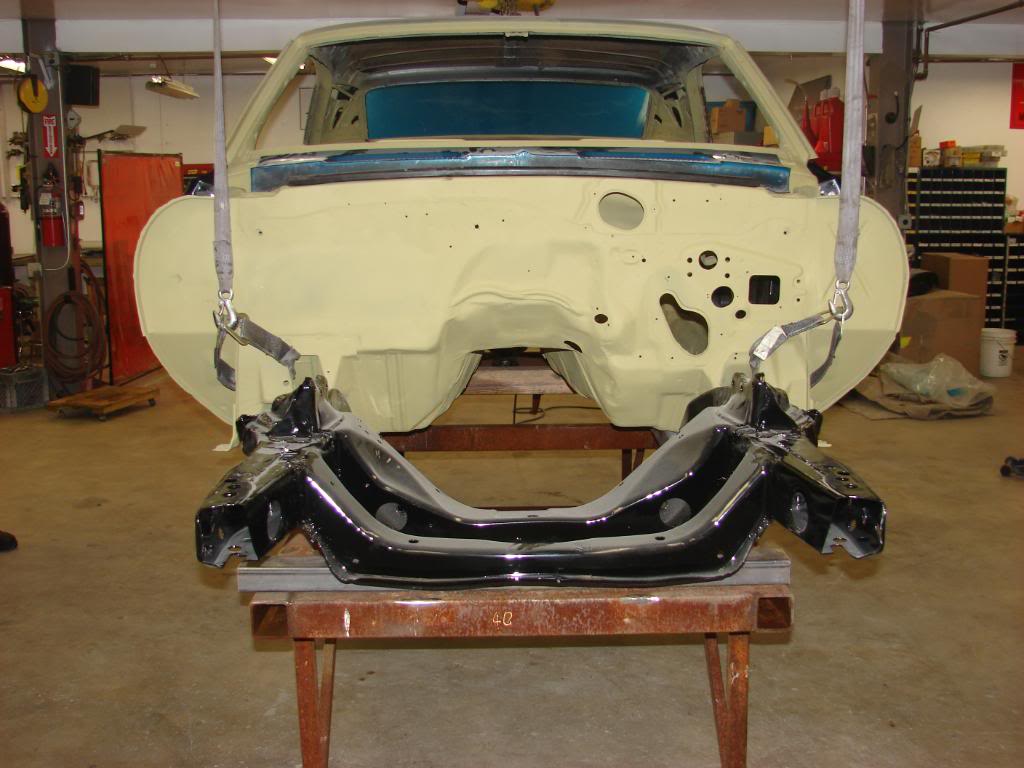
Went to check on the progress of the car today. Next week I have to make the final paint code decision so it's WAYYYY ahead of schedule. The shop was hanging the front end today. Interesting problem though that they worked through. The damn door hinges from Goodmark don't allow the doors to open all the way and fitment was HORRIBLE. Very disappointed. I finally got to see the frame today. Powdercoated gloss black and very pretty. Here are a couple pics. I included pics of he shock mounts with the reinforcements due to the air ride breaking the welds several times.
Derrick
Derrick

