My progress on my 69 street machine...to date


Thread Starter
|
1st Gear Member
Joined: Mar 2008
Posts: 104
From:
Okay, tried to log in here sunday evening and got hammered. My computer at home is absolutely blasted. Was the site down/hacked/infected? My computer at home is absolutely fried. I fear I may have lost all my data on my Camaro to date (Not to mention other stuff on there)
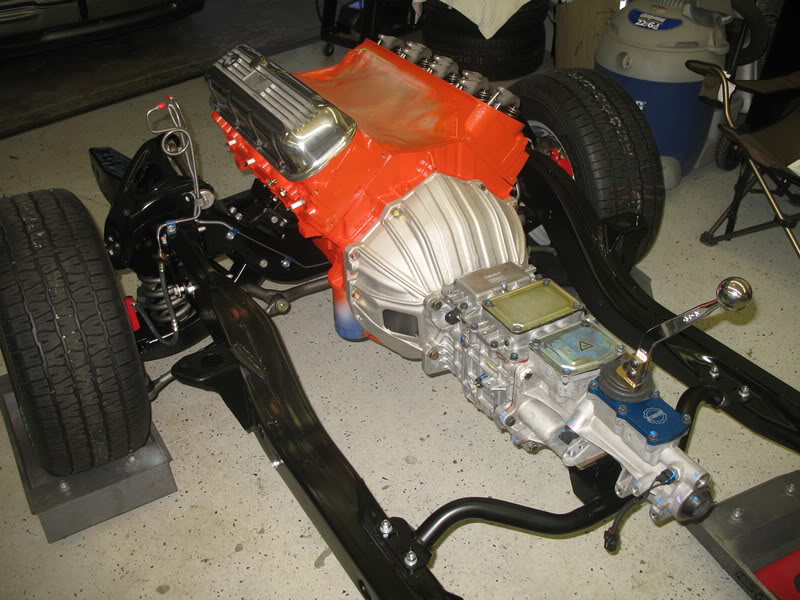
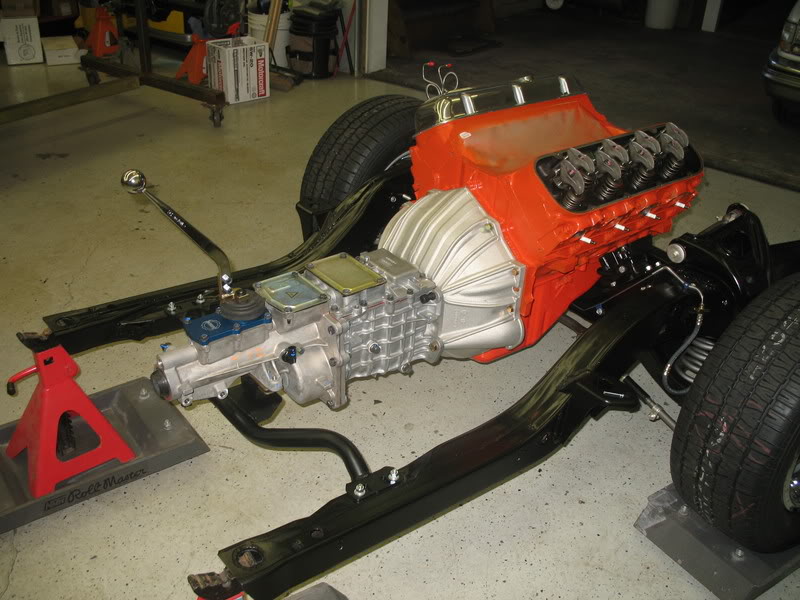
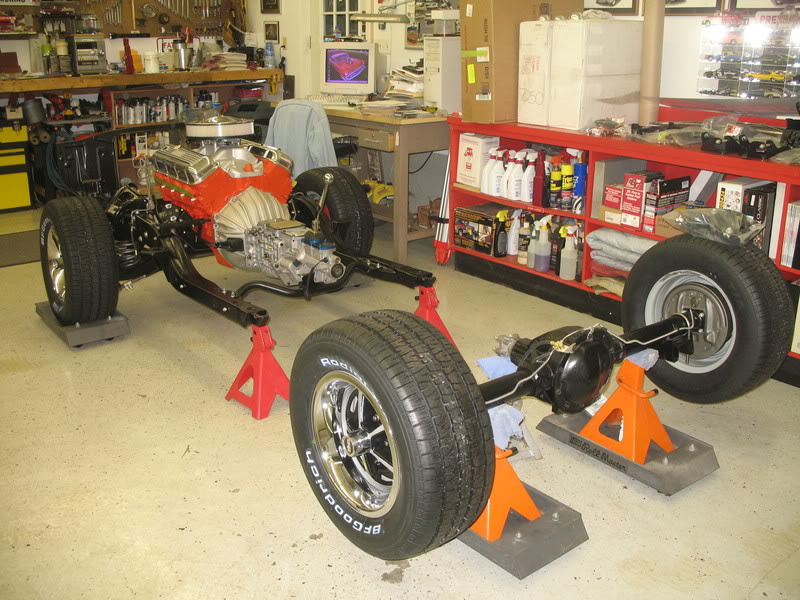
Now, on a positive note. Engine and transmission are in the sub-frame. I have to make some decisions on some of the things I am going to do from here. Here are a few pics.
Now, on a positive note. Engine and transmission are in the sub-frame. I have to make some decisions on some of the things I am going to do from here. Here are a few pics.
Thread Starter
|
1st Gear Member
Joined: Mar 2008
Posts: 104
From:
Well, finally got all the front suspension completed. Purchased and installed the final piece this week, which happened to be the Pitman Arm I had previously ordered. Here is a shot of the front suspension completed.
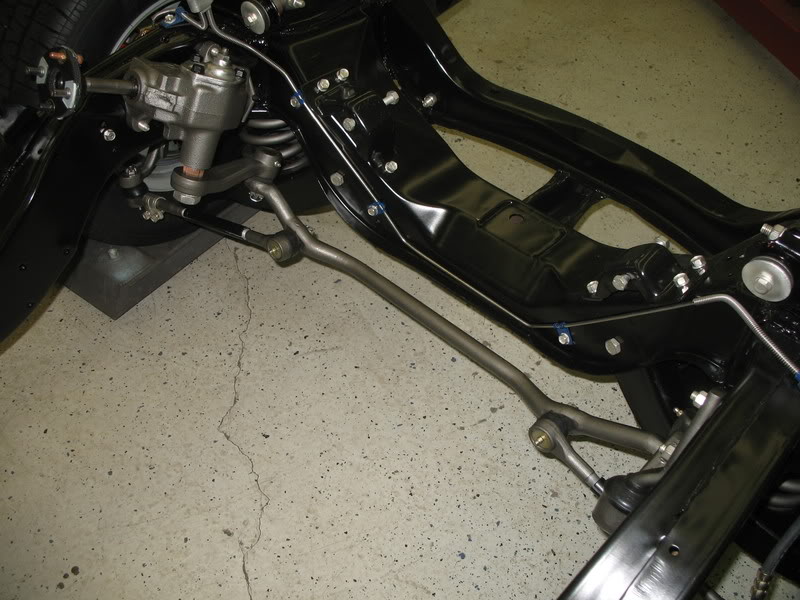
The suspension looks great, until you realize that the engine and transmission are no longer installed in the frame rails. See, if you don't have the centerlink in the proper position, then the oil pan clears with absolutely no problem. Install the pitman arm, and things change position. With Camaros being a rear-steer type chassis, the six quart oil pan will clear the crossmember, but not the centerlink. Furthermore, once the suspension is turned toward the left or right, then the centerlink moves further away from the crossmember, creating more interference. As one of my Millwright buddies always explains why something doesn't fit properly. "Clearance and Interference. Too much of one, and not enough of theother."
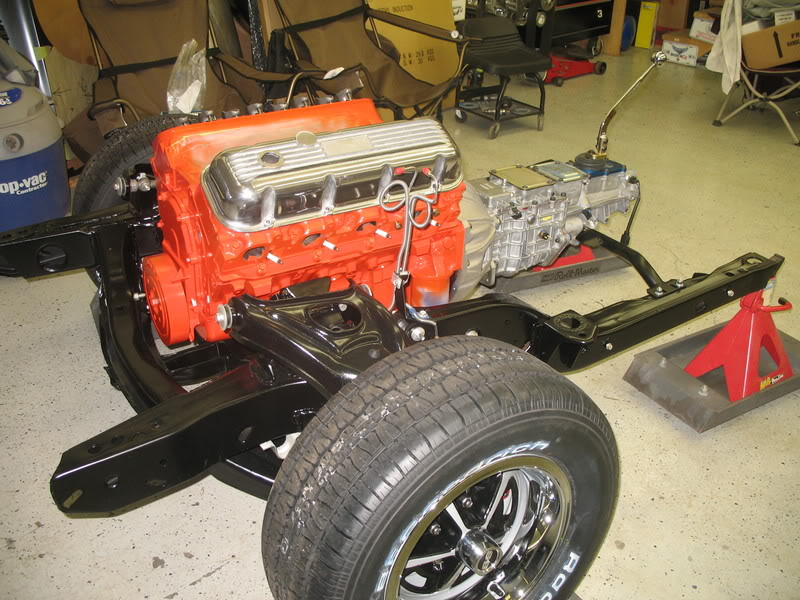
Looks like the 6 Quart pan will need about 1.125" modification to clear as shown in the next photos.


This actually will work out for the better anyhow. I had two options. One is to cut and modify the oil pan I have. I would still have to purchase gaskets, a dipstick, and a dipstick tube. I am going to opt for the option #2. A 4 Quart pan will be ordered from Summit Racing tonight.
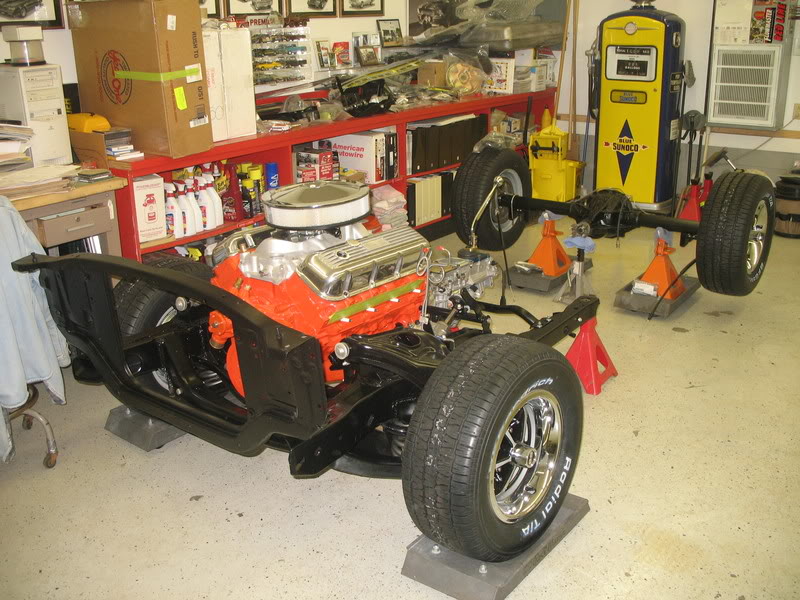
Part #NAL-12495360 which includes the pan, gasket, pickup tube, baffle, dipstick, and dipstick tube. Although I will lose 2 quarts capacity, I think the four in the pan with one in the filter should be adequate for the service this car will see. The 6 Quart pan seems to be about 2 inches closer to the ground than the crossmember anyhow. This image is the 502 minus the oil pan.
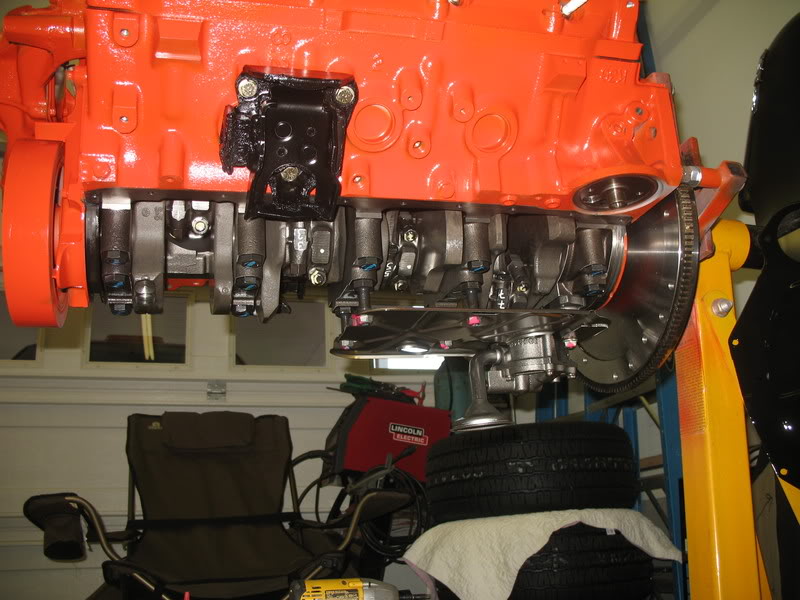
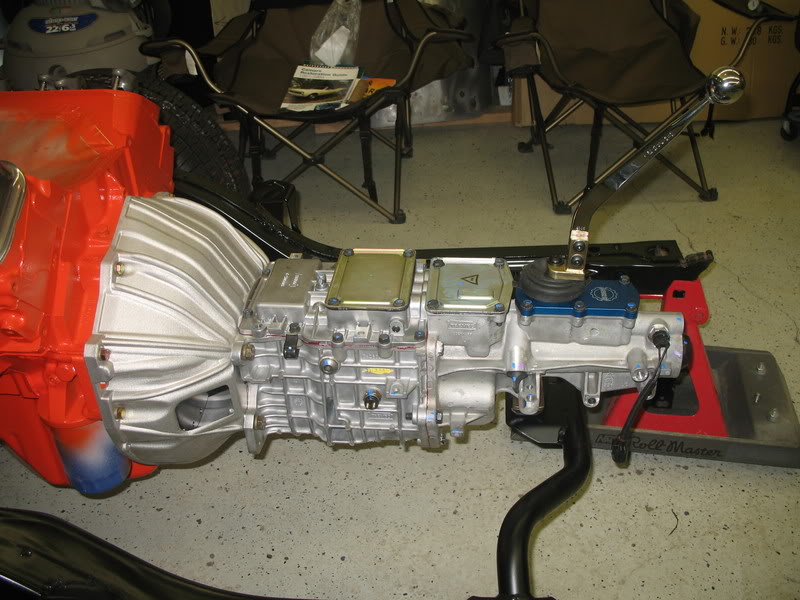
One other item that needs addressing. Since I am running a Tremec TKO-600 5 speed, I need to use a clutch. I have opted to go with the old mechanical style clutch, like my Camaro would have had from the factory. Since I am using the original style, I need to add a Z-Bar, which the crate 502 was not prepped for. The boss is already in the block, but is not drilled. This photo shows the pilot hole I drilled in preparation for the 27/64" finish hole I need to drill so that I may tap it for the GM style Ball-Stud. (Note the High-Tech spacers I used to keep from having to remove the flywheel.)

The suspension looks great, until you realize that the engine and transmission are no longer installed in the frame rails. See, if you don't have the centerlink in the proper position, then the oil pan clears with absolutely no problem. Install the pitman arm, and things change position. With Camaros being a rear-steer type chassis, the six quart oil pan will clear the crossmember, but not the centerlink. Furthermore, once the suspension is turned toward the left or right, then the centerlink moves further away from the crossmember, creating more interference. As one of my Millwright buddies always explains why something doesn't fit properly. "Clearance and Interference. Too much of one, and not enough of theother."
Looks like the 6 Quart pan will need about 1.125" modification to clear as shown in the next photos.
This actually will work out for the better anyhow. I had two options. One is to cut and modify the oil pan I have. I would still have to purchase gaskets, a dipstick, and a dipstick tube. I am going to opt for the option #2. A 4 Quart pan will be ordered from Summit Racing tonight.
Part #NAL-12495360 which includes the pan, gasket, pickup tube, baffle, dipstick, and dipstick tube. Although I will lose 2 quarts capacity, I think the four in the pan with one in the filter should be adequate for the service this car will see. The 6 Quart pan seems to be about 2 inches closer to the ground than the crossmember anyhow. This image is the 502 minus the oil pan.
One other item that needs addressing. Since I am running a Tremec TKO-600 5 speed, I need to use a clutch. I have opted to go with the old mechanical style clutch, like my Camaro would have had from the factory. Since I am using the original style, I need to add a Z-Bar, which the crate 502 was not prepped for. The boss is already in the block, but is not drilled. This photo shows the pilot hole I drilled in preparation for the 27/64" finish hole I need to drill so that I may tap it for the GM style Ball-Stud. (Note the High-Tech spacers I used to keep from having to remove the flywheel.)
Thread Starter
|
1st Gear Member
Joined: Mar 2008
Posts: 104
From:
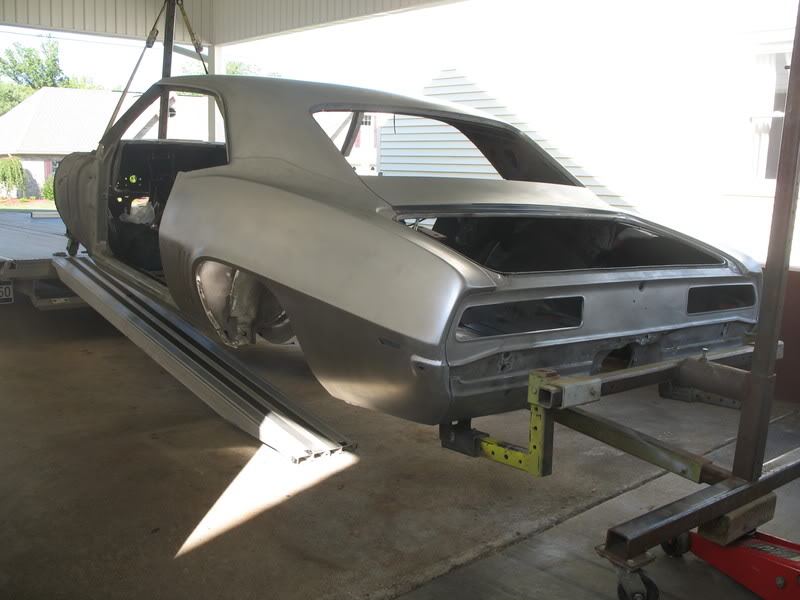
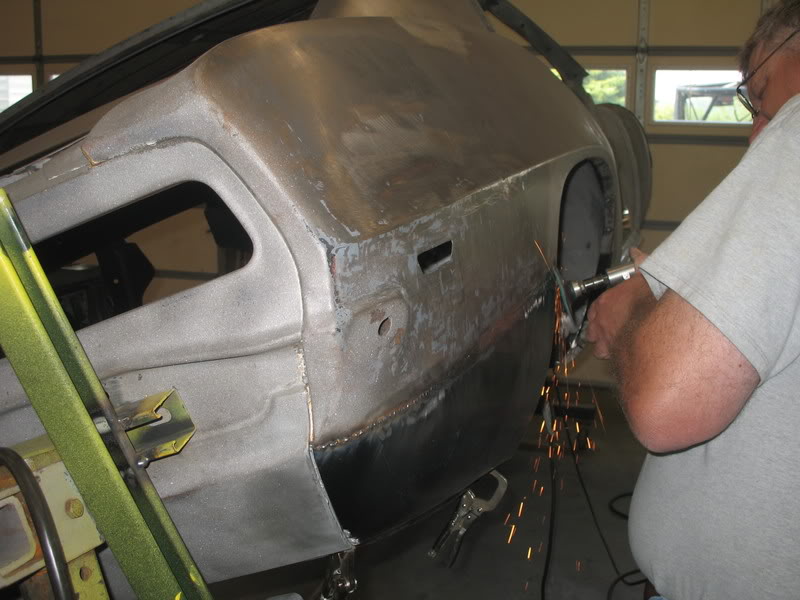
Not much of an update, but still fabricating and trying to get the rest of the metal ready to go to the paint shop. I have the right rear quarter-panel/trunk panel extension in and the outer wheel house in and completed. The lower quarter-panel is welded up and installed, but still needs some shaping. I am going to use a stud gun and try to pull some of the "Warp" out of the weld to minimize the putty we need to straighten this seam. Here are a few shots.
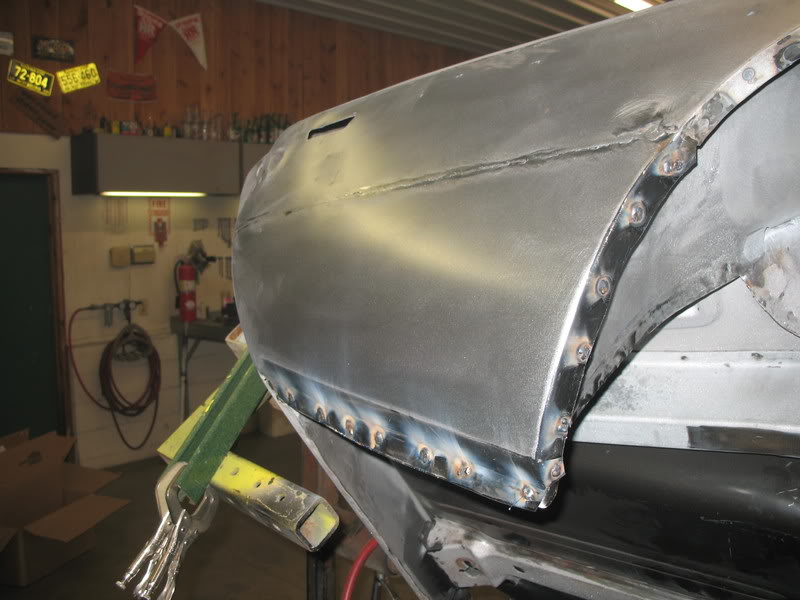
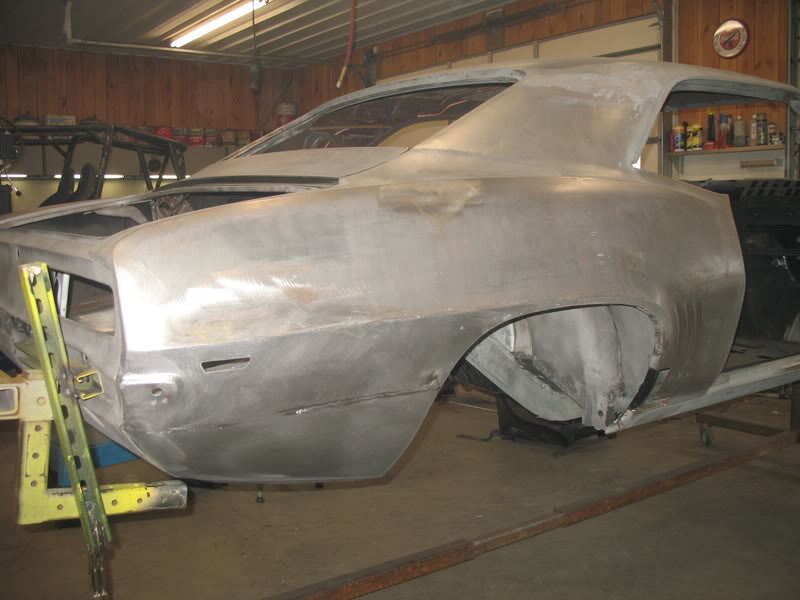
Also, the trunk floor is nearly completed. The only reason I didn't put an entire trunk floor in is because the area where the inner fenders meet the trunk floor are so nice, I didn't want to redo that section. This panel fit fairly well and once all three braces are backon the trunk floor and the smoothing is done, it will be a nice clean job.
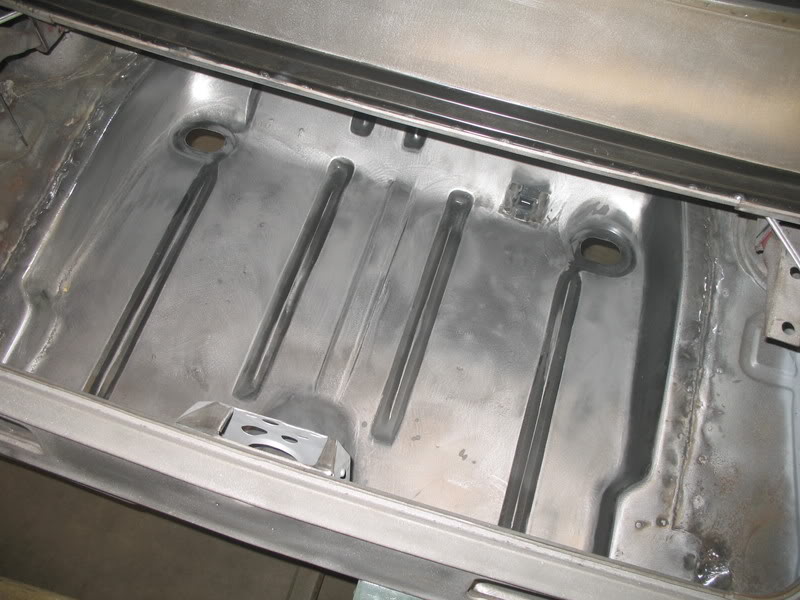

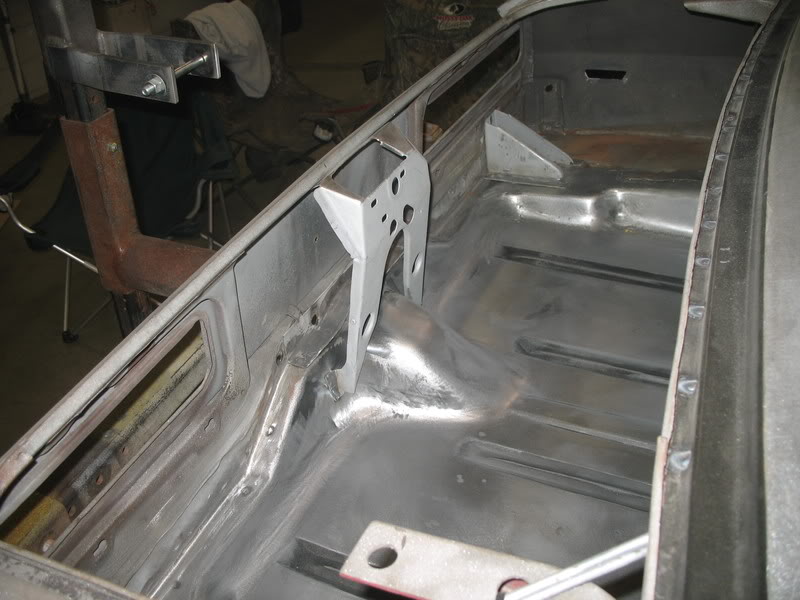
Also, the trunk floor is nearly completed. The only reason I didn't put an entire trunk floor in is because the area where the inner fenders meet the trunk floor are so nice, I didn't want to redo that section. This panel fit fairly well and once all three braces are backon the trunk floor and the smoothing is done, it will be a nice clean job.
Thread Starter
|
1st Gear Member
Joined: Mar 2008
Posts: 104
From:
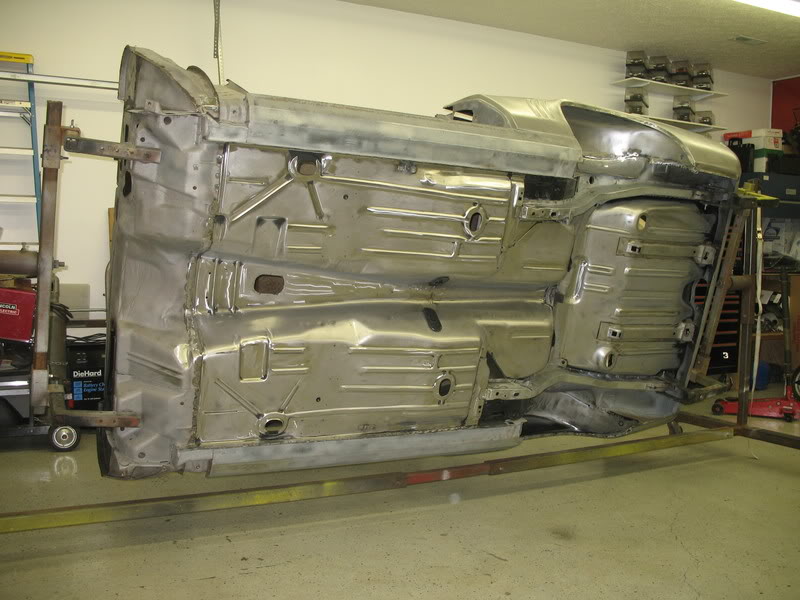
I am actually working this project from two different angles. I have the body in a friend of mine's shop who is helping me with the fabrication work. He is a wizz with sheetmetal work. I am working the chassis, wiring, engine, etc. here in my garage. I am hoping I can actually start the engine and maybe work some of the bugs out of it before I put the subframe under the body. Here are a couple of shots of it.

1st Gear Member
Joined: Aug 2007
Posts: 251
From:
.....I think I'm jealous...........Yeah,............. I am... JK. Looks great! It's alot of fun watching your progress, not to mention the nice tips I can use when starting the restoration on my car.
Thanks for the updates.
Thanks for the updates.
Thread Starter
|
1st Gear Member
Joined: Mar 2008
Posts: 104
From:
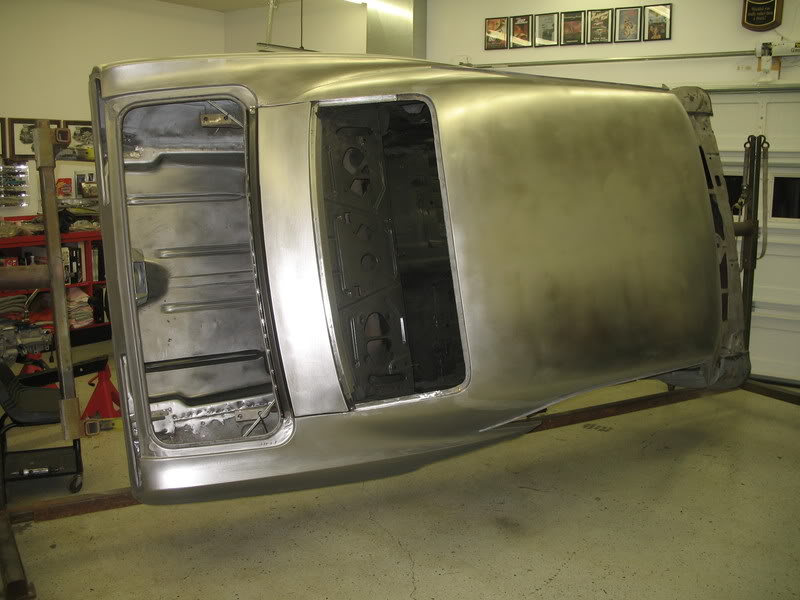
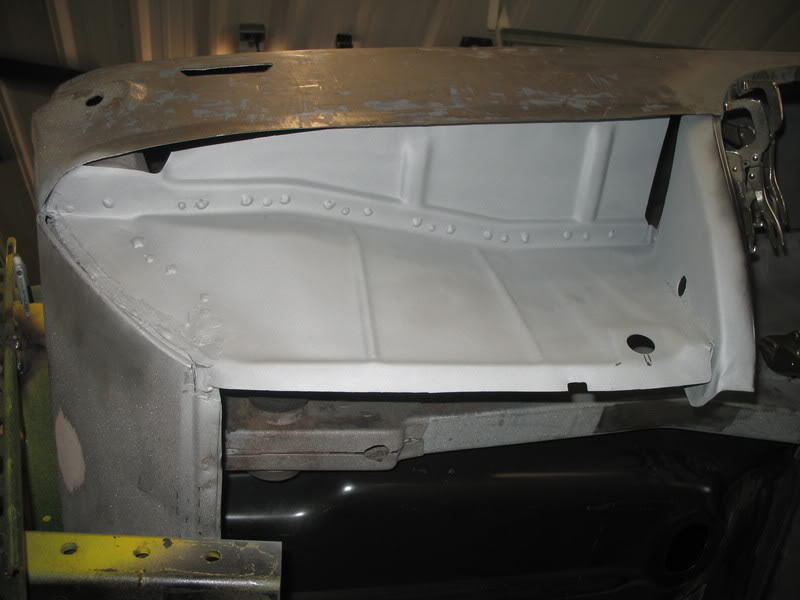
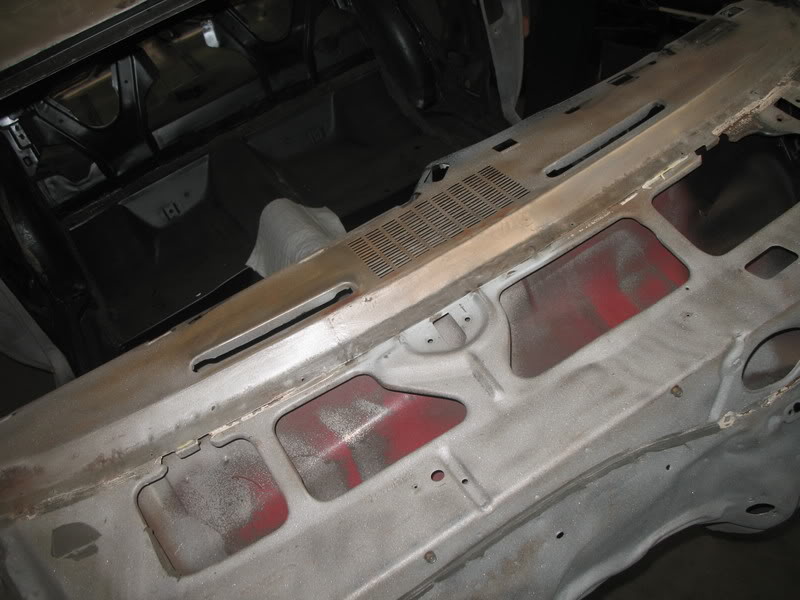
Thanks. We finished the metal work on the dash last weekend, and wanted to start replacing the outer wheel-housing (left). Unfortunately, I had received two right rear outer wheel-housings, so we will have to start on that next. Here is a photo of the finished dash repair awaiting final filling and paint.
Thread Starter
|
1st Gear Member
Joined: Mar 2008
Posts: 104
From:
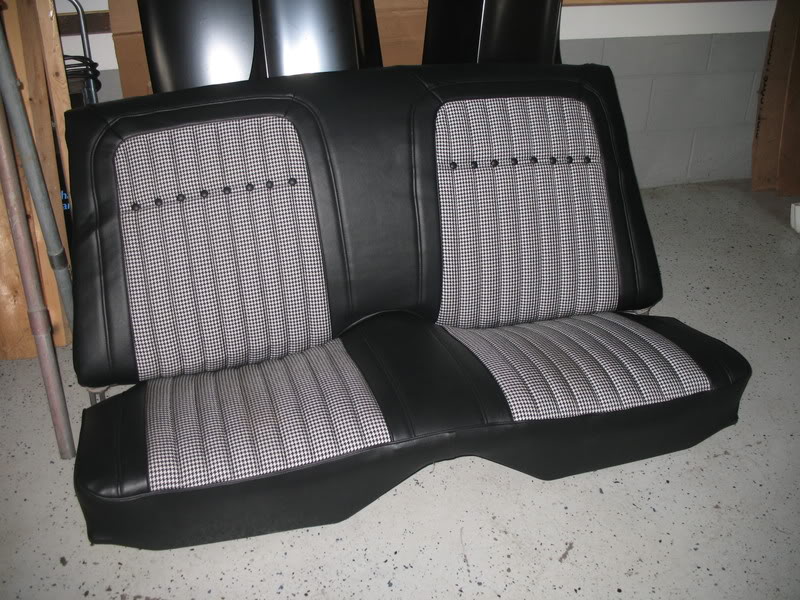
I haven't been able to get out to the shop to finish the metal work on my body, so I decided to do some work around here. First I recovered the rear seat.
The front seats were too tough for me, so I decided to do something I hate to do. I dropped them off to have someone else install the covers. I should have them back in a couple of weeks or so.
Next, I decided to go ahead and finish drilling my front fenders for emblems. I started off with the "502" emblems. First, I made a template so that I could be sure I lined it up properly with the front marker light. Then I drilled and test fitted the emblem.

I carefully located the template next, and drilled my holes.


Next, I started on the "Camaro" emblems, as well as the "SS". I made the template for my "Camaro" emblem off of my original fenders, which I know were never off the car.

I then took a straight-edge and layed-out the pin locations for the "SS" emblems. I spaced mine slightly lower than the others I had seen online, as I think a small opening between the letters looks more proportionate, However, these are very close to the original locations.

After the holes are drilled, I like to use a de-burring tool to smooth things up and assure the emblems lie flat.

Emblems require a very minor "Tweaking" to assure they lie flat. Be careful when you do this as any pot-metal emblem will snap quite easily.

Doesn't this look awsome?

Here is what my final template looked like. I like to keep these in case I ever do another car, or god forbid, I have to replace a fender.

I also scanned this template. If you want a copy of this, just send me your email address and I will be happy to forward these to you. But, KEEP IN MIND....This is only MY template, and not approved for concours restoration, however, they look fairly accurate.
The front seats were too tough for me, so I decided to do something I hate to do. I dropped them off to have someone else install the covers. I should have them back in a couple of weeks or so.
Next, I decided to go ahead and finish drilling my front fenders for emblems. I started off with the "502" emblems. First, I made a template so that I could be sure I lined it up properly with the front marker light. Then I drilled and test fitted the emblem.
I carefully located the template next, and drilled my holes.
Next, I started on the "Camaro" emblems, as well as the "SS". I made the template for my "Camaro" emblem off of my original fenders, which I know were never off the car.
I then took a straight-edge and layed-out the pin locations for the "SS" emblems. I spaced mine slightly lower than the others I had seen online, as I think a small opening between the letters looks more proportionate, However, these are very close to the original locations.
After the holes are drilled, I like to use a de-burring tool to smooth things up and assure the emblems lie flat.
Emblems require a very minor "Tweaking" to assure they lie flat. Be careful when you do this as any pot-metal emblem will snap quite easily.
Doesn't this look awsome?
Here is what my final template looked like. I like to keep these in case I ever do another car, or god forbid, I have to replace a fender.
I also scanned this template. If you want a copy of this, just send me your email address and I will be happy to forward these to you. But, KEEP IN MIND....This is only MY template, and not approved for concours restoration, however, they look fairly accurate.

Thread Starter
|
1st Gear Member
Joined: Mar 2008
Posts: 104
From:
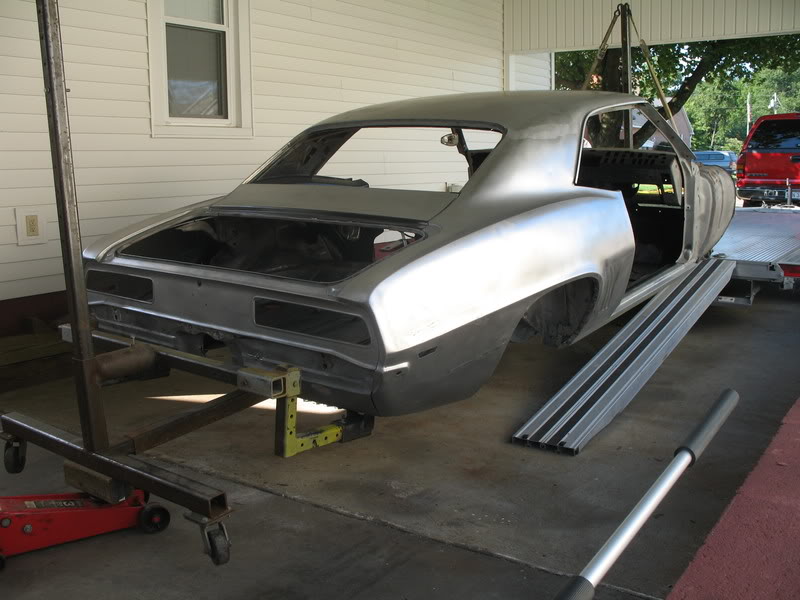
Well, been very busy as of late.....trying to get my metal-work finished. Today was a great day. Body was loaded up and is off to the painter. A few shots of where we are to date.