
Gman's '69 Project "BumbleBee"
#21
 01-10-2008, 06:22 PM


ORIGINAL: SS396
I am currently using a poor mans rottisorie, I have a 4x4 12 ft long bolted to the rafters of my garage. One in front of the car, one in the rear. Each 4x4 has 2 eyebolts (bolts go all the way thru and bolt to backside, not the screw in type) then I welded up some brackets to where the front clip bots in and two for the rear going to the frame rail.
Each of those brackets have eyebolts welded into it. Then you run some heavy duty rope from left front body mount to 4x4 eyebolt left front; then to 4x4 eyebolt right front and down to the right front body mount. Repeat for the back. Then jack it up in the air and tie off the rope.
Now to spin it all I have to do is pull in on one rope toward the center of the car, which raises it in the air, creating a short rope on one side, and a longer rope bent in where you are pulling on it, when you release, the short rope stays and the longer rope extends and you have spun the car.
It won't get you 90 degree's, but I am in the process of replacing the floorpans, and I have it at about a 45 degree angle, easy access, cost me about 50 from lumberyard.
As for safety, I have oneside of the cartouching 4x4 blocks on the floor and longer lengths cut for the side that is in the air when I am banging, cutting, grinding, etc. on it.
It also is a great for stange looks and conversation from people passing by.
Gman
#22
01-10-2008, 08:21 PM
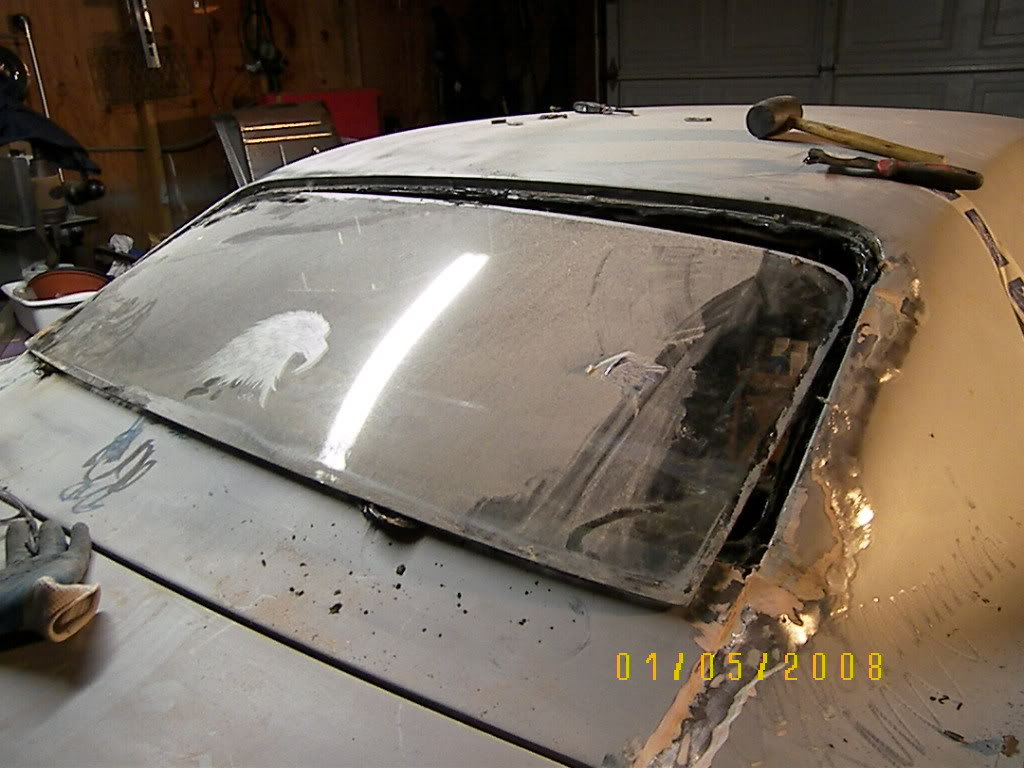
Got the back window out. That was tough, that rubber goey stuff is hard to remove. The bottom however had pleanty of rust to act as a bond breaker 
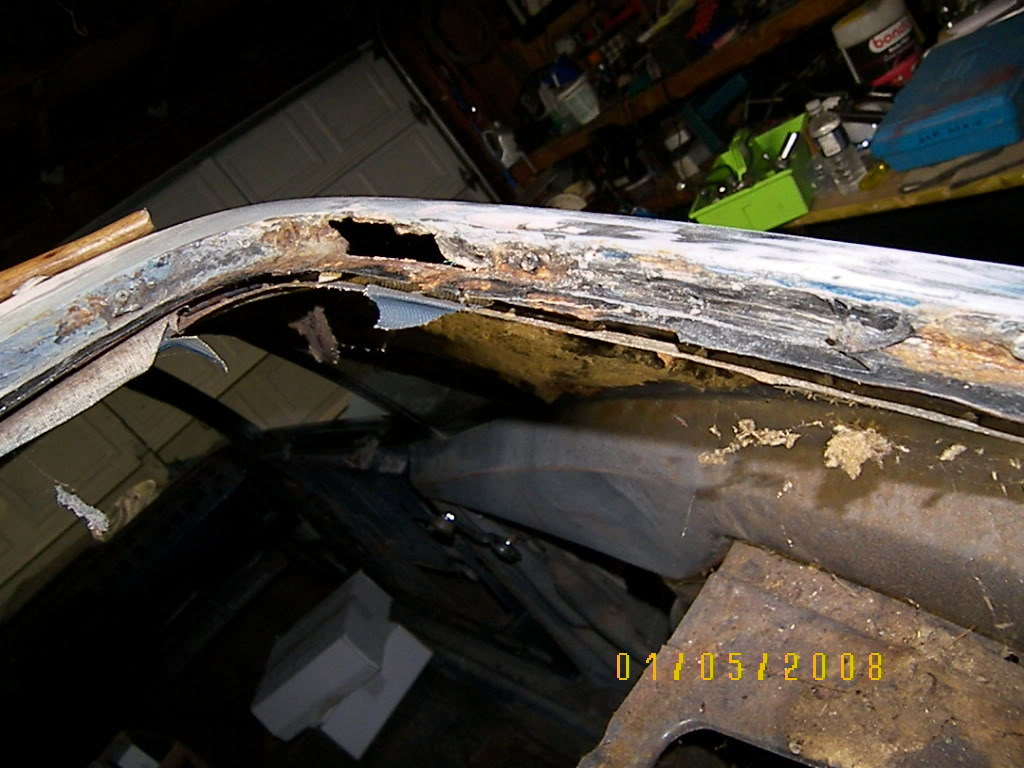
I found out I have rust up the side of the back window. I see other guys have this same issue and did not replace the sail portion of the quarter panel. Not sure how they fixed this. I dont see anyone that offers just the sail repair panel by itself, as I was thinking of sectioning in the bad sections of it. Any ideas how to replace pieces of rusted out edge like this?
Out she goes... Notice the fancy eagle head etched in the glass.. anyone want to trade back windows ?
Not sure how to fix this rust along the window side. I was not planning on full quarters with the sail...
oh, you can see that big ole bucket of Bondo in the background.. I better make comment on that. This was left over from my 'last' '69 Camaro projectsix years ago... really. I aint gunna use it on this car.. ever hear of how a drunk or a smoker that is quiting the habit will leave a beer or pack of smokeson the table? Well there ya go.... I am doing this one right... well as close to right as I can anyway..
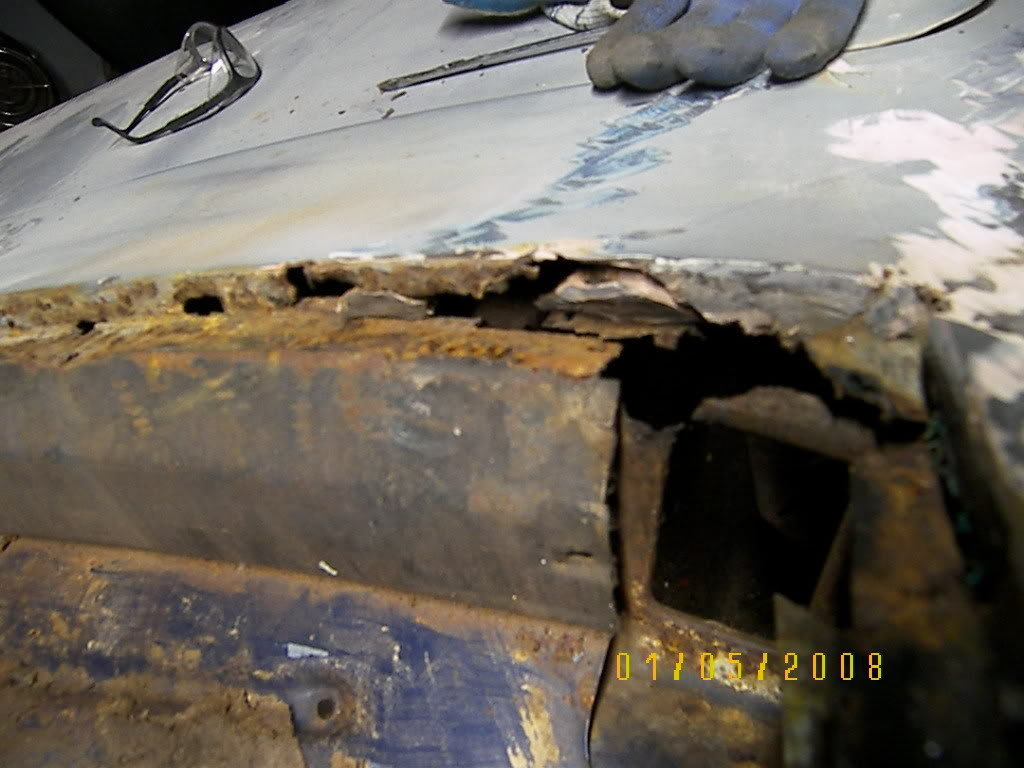
Rust down low. I already figured I would have to replace this piece between the trunk and window..
[IMG]local://upfiles/11104/5307C26F5AA84DF095D19B96B5826FE8.jpg[/IMG]
I found out I have rust up the side of the back window. I see other guys have this same issue and did not replace the sail portion of the quarter panel. Not sure how they fixed this. I dont see anyone that offers just the sail repair panel by itself, as I was thinking of sectioning in the bad sections of it. Any ideas how to replace pieces of rusted out edge like this?
Out she goes... Notice the fancy eagle head etched in the glass.. anyone want to trade back windows ?
Not sure how to fix this rust along the window side. I was not planning on full quarters with the sail...
oh, you can see that big ole bucket of Bondo in the background.. I better make comment on that. This was left over from my 'last' '69 Camaro projectsix years ago... really. I aint gunna use it on this car.. ever hear of how a drunk or a smoker that is quiting the habit will leave a beer or pack of smokeson the table? Well there ya go.... I am doing this one right... well as close to right as I can anyway..
Rust down low. I already figured I would have to replace this piece between the trunk and window..
[IMG]local://upfiles/11104/5307C26F5AA84DF095D19B96B5826FE8.jpg[/IMG]
#23
01-10-2008, 08:35 PM
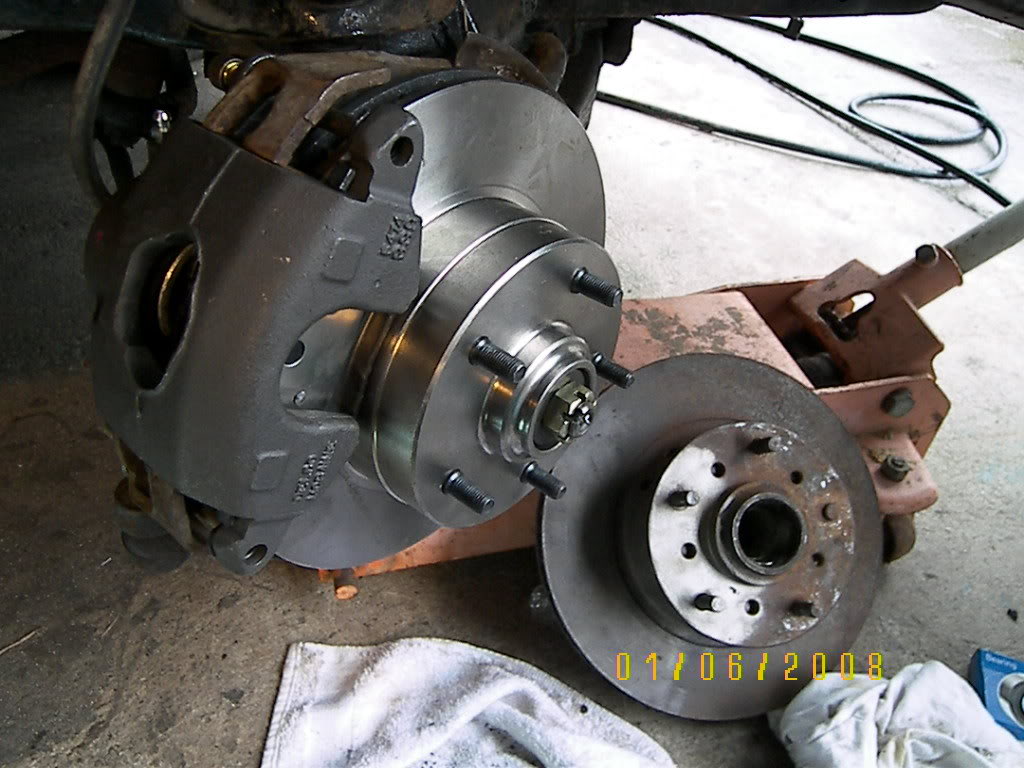
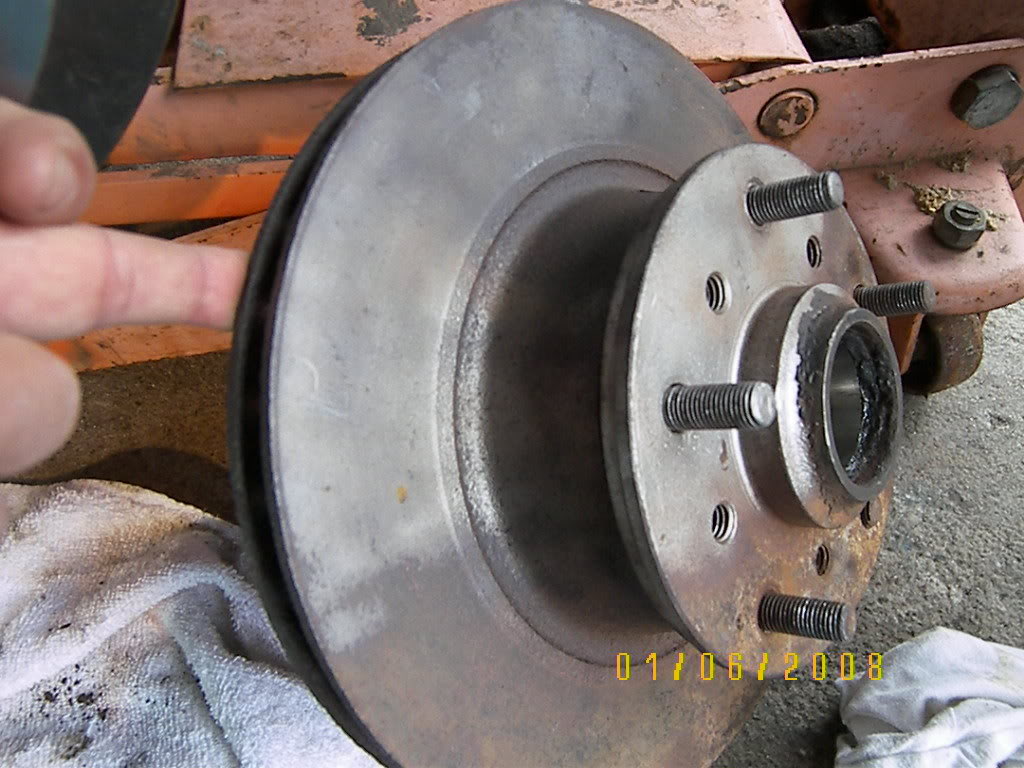
Last weekend I also bought some aftermarket front disc brake parts. I might return the one-piece rotors, my original two piece jobslook good if I can find someone to turn them. I went ahead and bead blasted one of them to show ya what they look like under that rust ..whatcha guys think? I will grab my caliper and see whats left of them..but I dont even see a ridge on themas if they were close tonew. Oh yea, I bought a bead blaster last weekend too! Makes life much easier and was only $60. Money well spent..
Anyway, I test fit the parts as you can see. It was a pretty tight fit between the back pad and the new rotor and I do have the piston all the way depressed. Thosesingle piston Caliperswere only $20 each at Kragen's... however, I did not have any on the car to start so I gotta pay $25 for core charge Here are some pics..
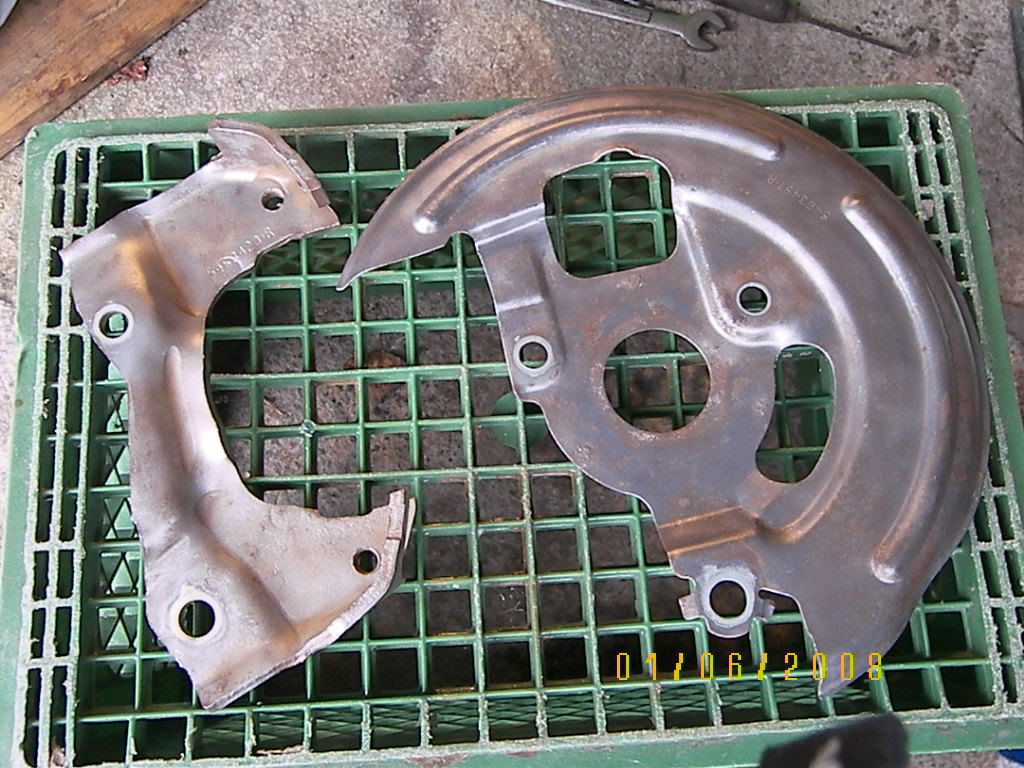
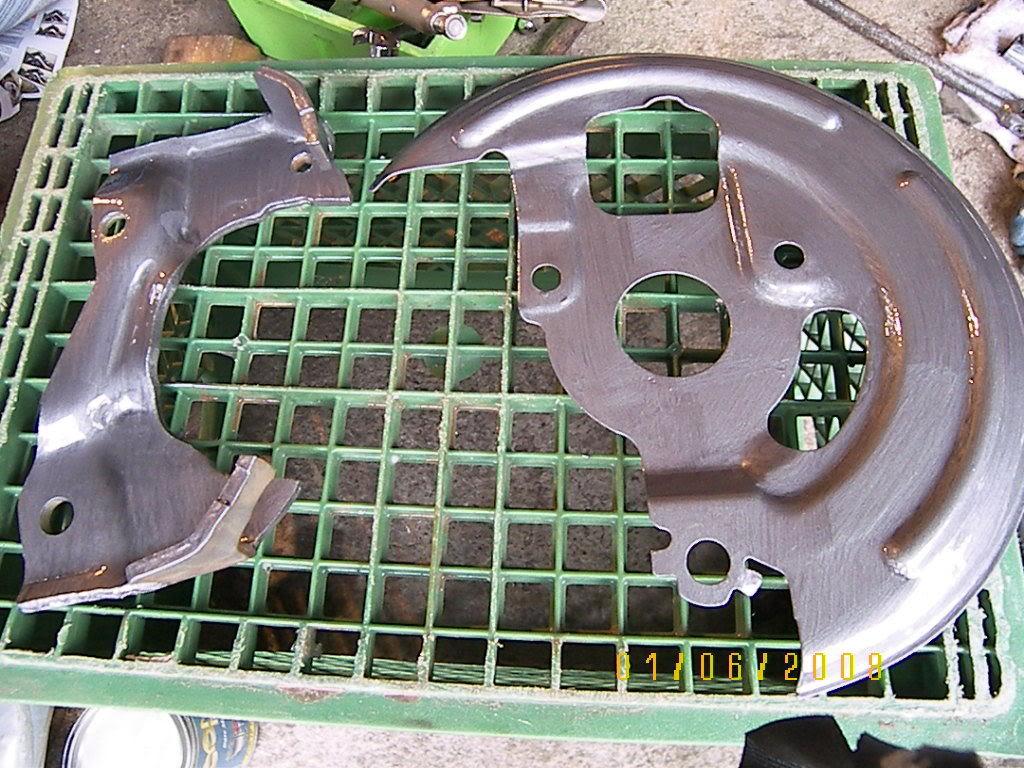
The backing plate and caliper bracket cleaned up nice in the bead blaster.. I think these parts were zinc plated or something. However, now they show bits of rust so i am coating all parts that were originally bare metal with POR-15 bare metal mask.. this stuff is great. Has heavy metal pigment in it and is a very close color to bare steel. The pic below is right after I put on a coat,... all those streaks flatten out (asusual with POR-15) and the final product looks great. I will post pics later when I get a chance to take more..
[IMG]local://upfiles/11104/8B14C8260354471F9E640E2D59263B37.jpg[/IMG]
Anyway, I test fit the parts as you can see. It was a pretty tight fit between the back pad and the new rotor and I do have the piston all the way depressed. Thosesingle piston Caliperswere only $20 each at Kragen's... however, I did not have any on the car to start so I gotta pay $25 for core charge
Here are some pics..The backing plate and caliper bracket cleaned up nice in the bead blaster.. I think these parts were zinc plated or something. However, now they show bits of rust so i am coating all parts that were originally bare metal with POR-15 bare metal mask.. this stuff is great. Has heavy metal pigment in it and is a very close color to bare steel. The pic below is right after I put on a coat,... all those streaks flatten out (asusual with POR-15) and the final product looks great. I will post pics later when I get a chance to take more..
[IMG]local://upfiles/11104/8B14C8260354471F9E640E2D59263B37.jpg[/IMG]
#24
01-11-2008, 07:21 AM

Making up repair patches is part of the movie you have coming. I would also like to recommend the paintucation video “Metal Prep & Rust Repair”. You need to get that rust out of there if you want this car to last. If you do a sloppy patch job and coat it with Por’s 5 years from now that body will be un-fixable.
IMO you should jack the car up as high as you can and blast that questionable spots on the frame and floor. You do not want to put time/money in a car to find out the frame rails are just too far gone to save. I talked to a guy that dips cars in acid for a living. He said nothing surprises him, sometimes a frame will look decent but after a short time in the bath it comes out in pc’s. Other times frames are completely covered in rust and look good after the dip. He thinks it depend if the rust starts on the inside of the frame or if it starts on the outside. One thing is for sure is the frame that came out in pc’s would not hold up to real any stress.
IMO you should jack the car up as high as you can and blast that questionable spots on the frame and floor. You do not want to put time/money in a car to find out the frame rails are just too far gone to save. I talked to a guy that dips cars in acid for a living. He said nothing surprises him, sometimes a frame will look decent but after a short time in the bath it comes out in pc’s. Other times frames are completely covered in rust and look good after the dip. He thinks it depend if the rust starts on the inside of the frame or if it starts on the outside. One thing is for sure is the frame that came out in pc’s would not hold up to real any stress.
#25
01-11-2008, 04:32 PM

I agree, the bead blaster/sand blaster is a must for anyone restoring/ rebuilding a car. I bought mine for $100 that is about 24 x 18 and 16 deep. Its amazing the difference that makes. Nice before and after pics of the POR-15. I will definatly be picking some of that bare matal looking stuff up along with the black.
For all those interseted (or amused) I will post some pics of the poor man's rottisorie on another post Monday, so I don't steal g'mans post. Lots of good pics and info here. Now I gotta go clean my garage and take pics...
For all those interseted (or amused) I will post some pics of the poor man's rottisorie on another post Monday, so I don't steal g'mans post. Lots of good pics and info here. Now I gotta go clean my garage and take pics...
#26
01-20-2008, 08:39 PM
I did'nt get much done to the camaro this last week or so. Been real busy at work. I did do a parts run to the big city this weekend.. kinda the same as working on it! I had sourced some seats for the car down there.. I also need a LH Quarter and they wanted over a hundred bucks to ship that.. so I figured I would make thefive hour drive and pick up all the big parts I needed for the car....various repair panels, bumpers, grill,front and back seats. it sure looks nice with seats in it... wish I knew who owned it prior.. the original seats are probably in the back yard or something... oh well. I spent this weekend for part as much as I spent on the car... bet this will not be the last time I say that! I also scored a complete front-end rebuild kit (tie rods, bushings.. etc etc) and also the subframe kit... all in Poly as opposed to rubber. NOt sure if it will make a differance.. but why not, gotta be more solid that rubber.
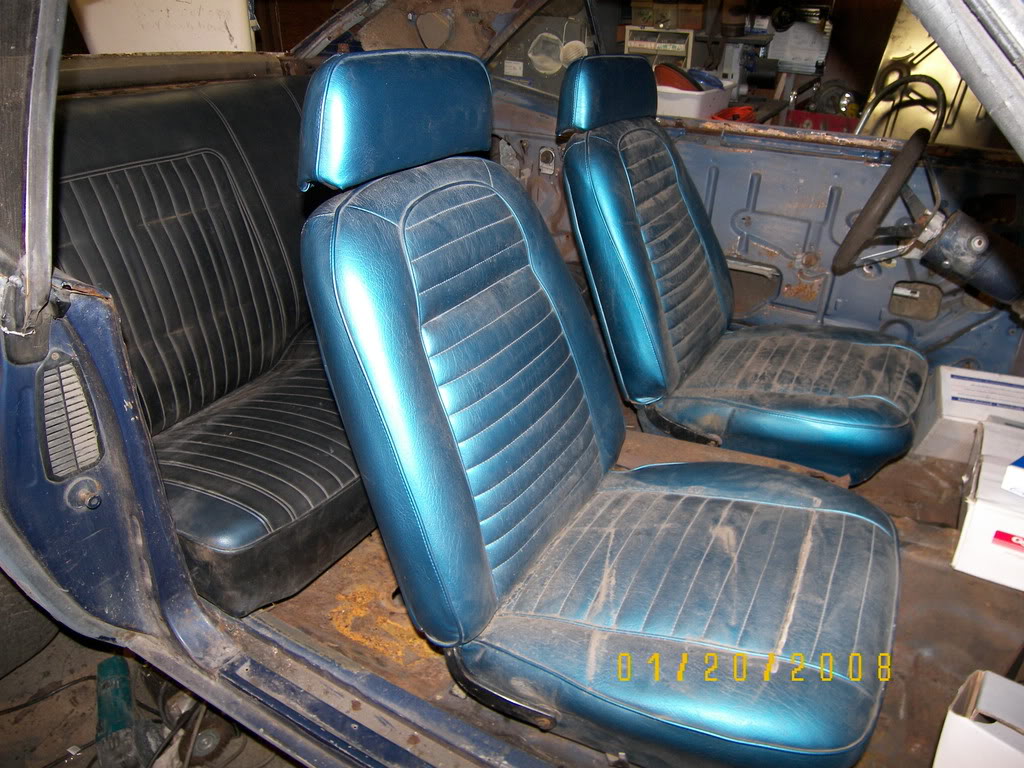
The back seat is cherry! The front seats are... well, nice shape. Both had great springs, not rusted out. Gotta be firebird front seats with that fancy turquise color going on.. doh! I just noticed the headrests kinda fit funky.. maybe incorrect? Maybe right.. but all in all,better than I had and much cheaper than buying on erape. It will be all matching once I get to the interior.. and that will be the very last thing I do to this car.
[IMG]local://upfiles/11104/74E705BCD8D44E96A7D751552EF32A6D.jpg[/IMG]
#27
03-26-2008, 09:26 PM
I am still kickin around on this car. Been awhile since I made post. Been working on getting a engine together (fun stuff), wheelin and dealinand not doing much in the way of body work
I want a Big Block, but I am on aVW budget now. I found a cheap priced running 1969 gmc truck witha numbers matching 396 in it complete and bone stock with all brackets, factory AC, PS, etc. I was thinking this would make a nice transplant. I had this not a week then decided I really need to go with a 454 or bigger. I want this thing to rumble. So I am selling or trading this truck. Trying to swap it for some performance BBC stuff or a rearend.
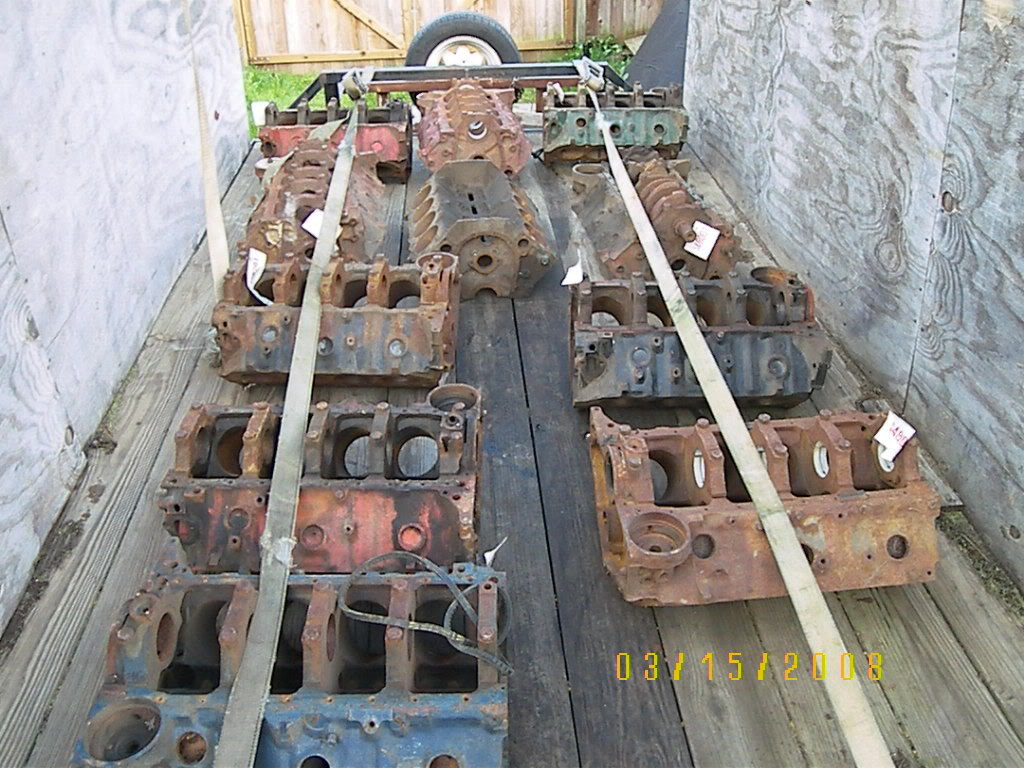
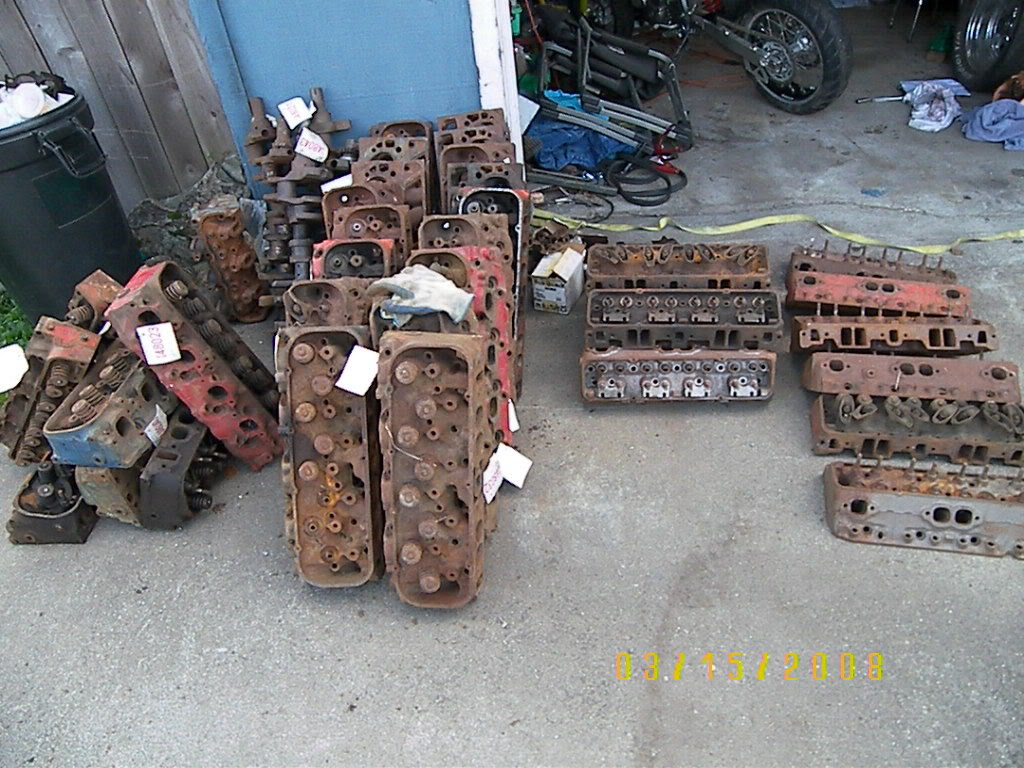
Last week I found an local ad for a four bolt block. Turns out it was a machine shop and he was retiring and I came home with 11 BBC blocks and a **** load of heads. Wife was not pleased but he basically gave me all the stuff. Turns out some of the stuff was early 390 gt heads and manifoldsand some double hump head sets, and a set of dz 302 heads. Needless to sayI got my moneysback anda free four bolt blockafter selling onlya few parts and I got about 2 tons more of stuff to hawk or take to the scrap yard. Should do OK on getting a rat motor together. Anyone need a mid 60's 396 block? or some early big oval port heads?
More later, getting amp'ed to dig into my quarter panel replacements and back window metal. After that, I will remove the front end and get that body in the air for some underneath work.
[IMG]local://upfiles/11104/8276C29EDEA64830835B45B093D98CDC.jpg[/IMG]
I want a Big Block, but I am on aVW budget now. I found a cheap priced running 1969 gmc truck witha numbers matching 396 in it complete and bone stock with all brackets, factory AC, PS, etc. I was thinking this would make a nice transplant. I had this not a week then decided I really need to go with a 454 or bigger. I want this thing to rumble. So I am selling or trading this truck. Trying to swap it for some performance BBC stuff or a rearend.
Last week I found an local ad for a four bolt block. Turns out it was a machine shop and he was retiring and I came home with 11 BBC blocks and a **** load of heads. Wife was not pleased but he basically gave me all the stuff. Turns out some of the stuff was early 390 gt heads and manifoldsand some double hump head sets, and a set of dz 302 heads. Needless to sayI got my moneysback anda free four bolt blockafter selling onlya few parts and I got about 2 tons more of stuff to hawk or take to the scrap yard. Should do OK on getting a rat motor together. Anyone need a mid 60's 396 block? or some early big oval port heads?
More later, getting amp'ed to dig into my quarter panel replacements and back window metal. After that, I will remove the front end and get that body in the air for some underneath work.
[IMG]local://upfiles/11104/8276C29EDEA64830835B45B093D98CDC.jpg[/IMG]

Thread
Thread Starter
Forum
Replies
Last Post
notjustshrawan
2010+ General
0
11-01-2010 05:07 AM