Strange 12 Bolt Install
#1
 03-14-2015, 02:48 PM


I decided to make this thread because while searching for info on Strange 12 bolts, I didn't find much. There is lots of info on Moser stuff but I was looking for Strange specific stuff. I chose a 12 bolt because A. the car is an auto, B. I can build rear ends myself so if it breaks there is no labor charge, and C. it was recommended to me as the best fitting bolt in rear end from someone more experienced then me that I trust. So I PM'd a few vendors here, and looked elsewhere and got a quick response from Carl @ CRP. He was very helpful and seemed like a good all around guy, so I bought from him. A couple of things to say first, I have spoken with Carl AND Strange directly multiple times, and both have been very helpful each time. Second, they sent the rear out with no 3 channel ABS sensor block-off plate (I have a 4 channel setup) and Carl took care of it and I have it now. Third, the axle instructions F-ing suck. In hindsight they are correct but ****, me and a buddy scratched our heads and played with parts for like two hours trying to be 100% sure we were going to assemble it correctly. I used a 12 ton HF press to assemble it, and it worked fine except it needed to be put on a pallet to gain the ground clearance for the axles. I bought just the housing and axle package from CRP, all the assembly and internal parts selection was on me. On to the eye candy...............As a tidbit, when picking the empty unit up it was very light, I did not weigh it but I can bet it doesn't gain anything over the heavy 10 bolt. I still may weigh it.
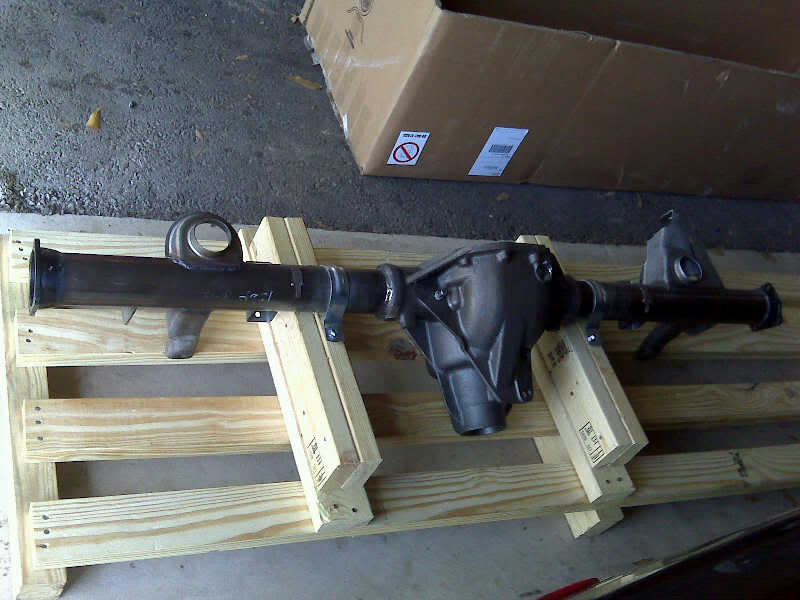
She arrives: I selected a bare finish
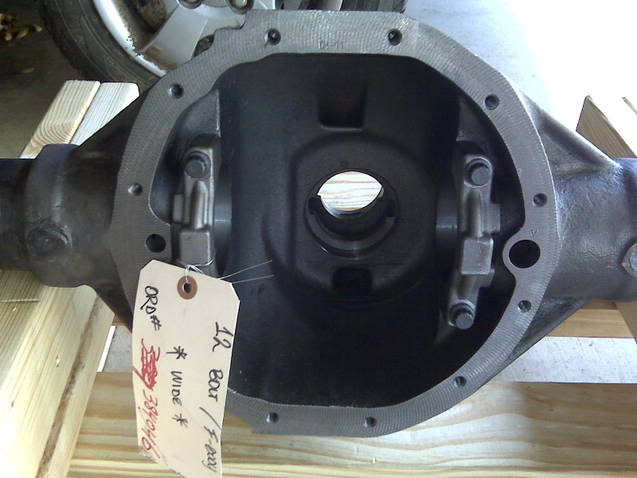
This is the standard bearing caps. Billet ones are available. They are marked for sides which is really helpful during assembly. 10 bolt caps are not marked to side BTW.
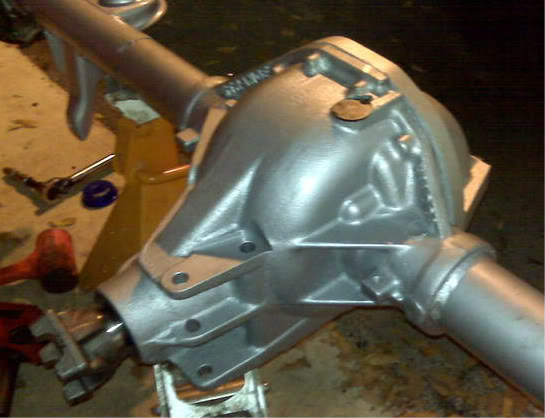
MIG welds looked good. Center housing is supposed to be new, as well as the axle tubes, but when comparing the brackets to the stock 10 bolt, they appear to be seasoned stockers that are transferred over because they are literally identical. This may be common practice and cheaper then making new ones from scratch.

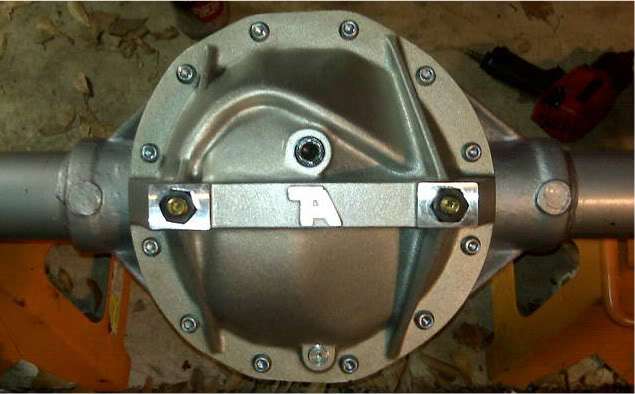
Went with Rustoleum Hammertone Silver:

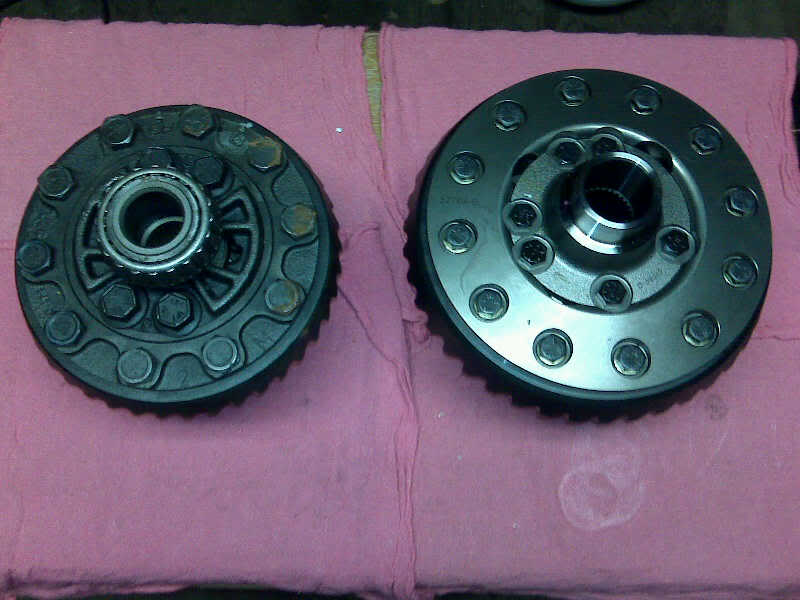
10 bolt Torsen on the left, Eaton Detroit TruTrac on the right:
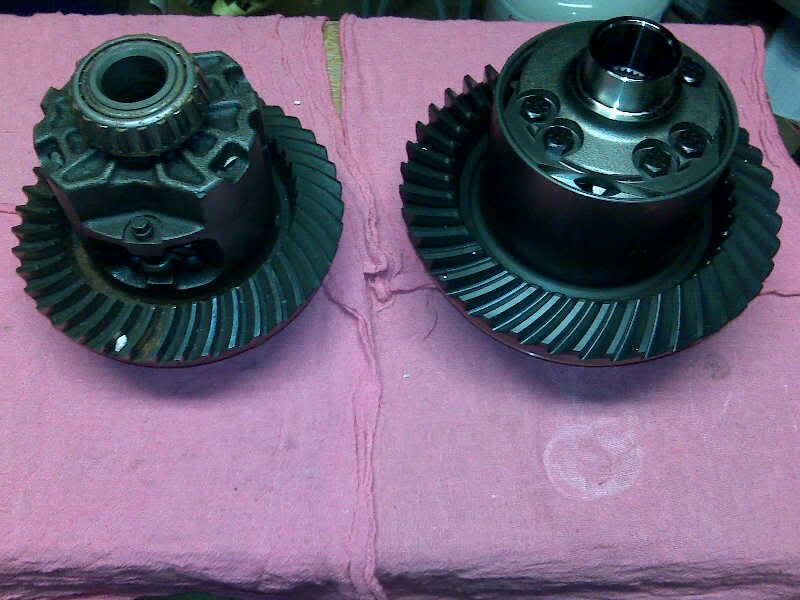
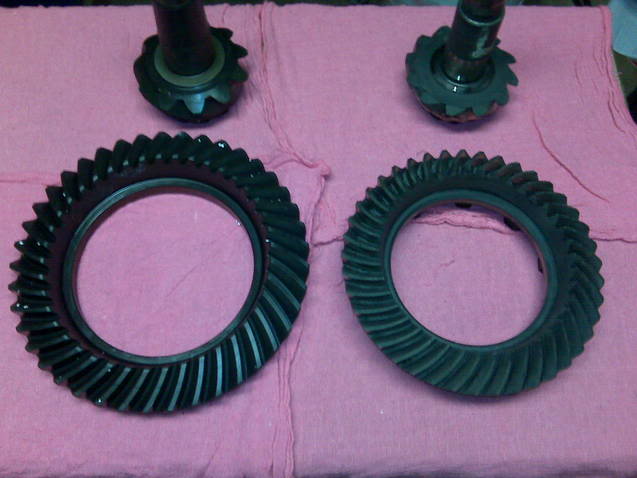
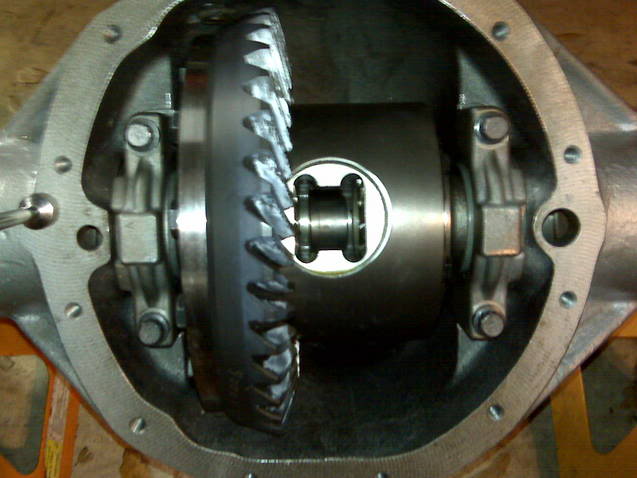
12 bolt 8.8 gear on the left, 10 bolt 7.5 gear on the right:
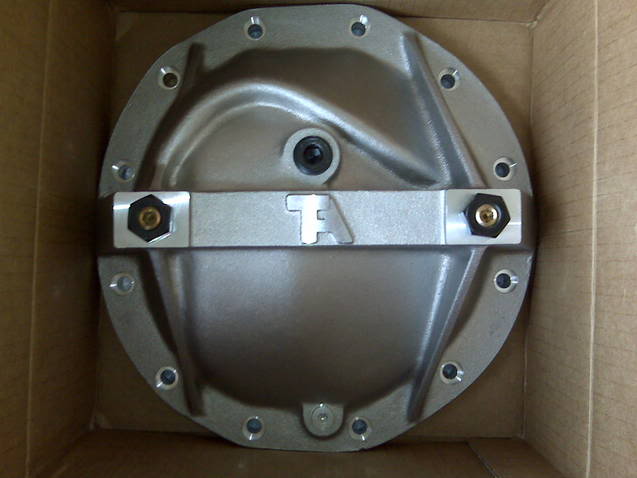
Some extra eye candy. I added a few coats of clear to it so it would be easier to clean greasy hand prints off of it later down the line:
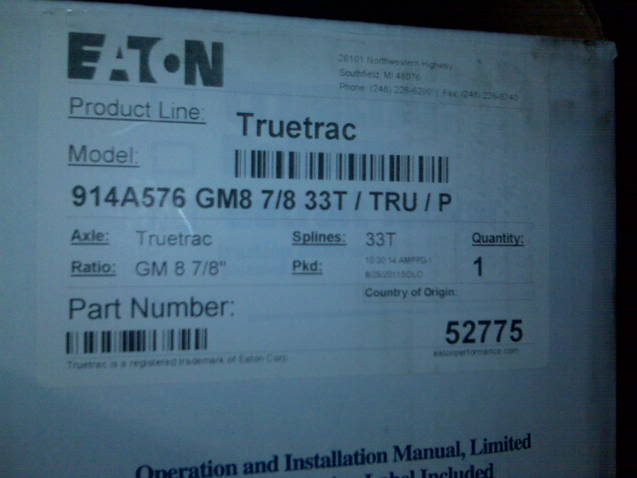
Trutrac part number:
She arrives: I selected a bare finish
This is the standard bearing caps. Billet ones are available. They are marked for sides which is really helpful during assembly. 10 bolt caps are not marked to side BTW.
MIG welds looked good. Center housing is supposed to be new, as well as the axle tubes, but when comparing the brackets to the stock 10 bolt, they appear to be seasoned stockers that are transferred over because they are literally identical. This may be common practice and cheaper then making new ones from scratch.
Went with Rustoleum Hammertone Silver:
10 bolt Torsen on the left, Eaton Detroit TruTrac on the right:
12 bolt 8.8 gear on the left, 10 bolt 7.5 gear on the right:
Some extra eye candy. I added a few coats of clear to it so it would be easier to clean greasy hand prints off of it later down the line:
Trutrac part number:
#2
03-14-2015, 02:48 PM
Bob @ Brute Speed hooked me up with this: the DS not the beer :jest:
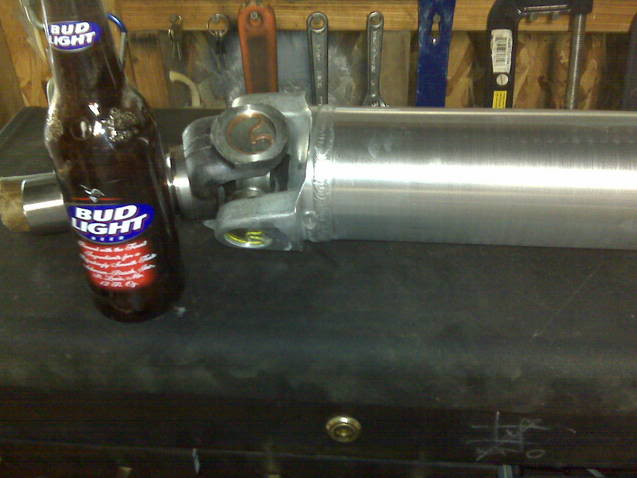
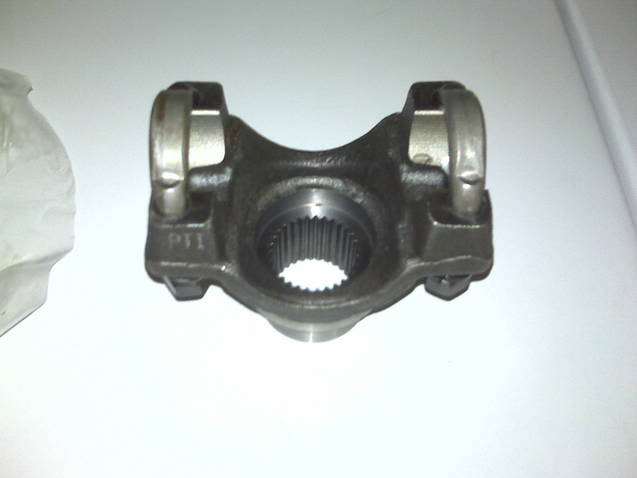
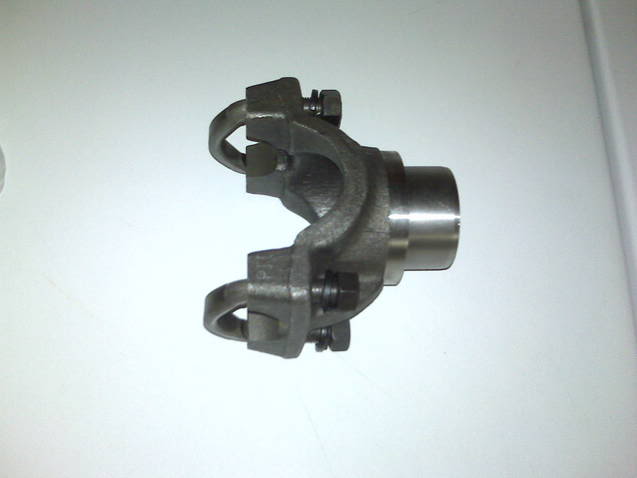
Forged front yoke of the 1350 variety:
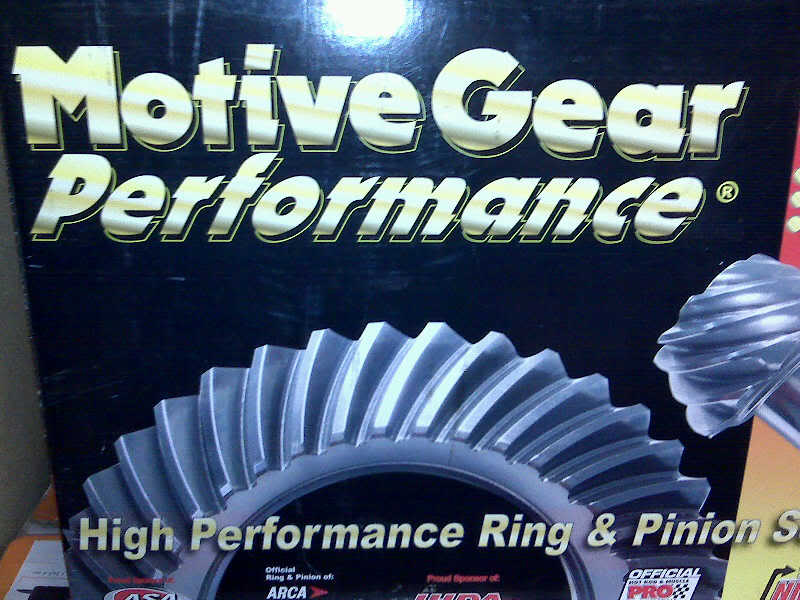
Motive 3.73s are going in this
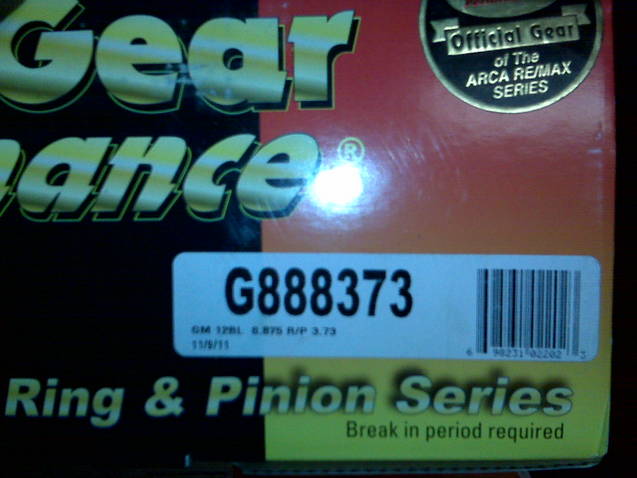
Part number for the gears:
12 bolt housing ends:
Posi/gears being setup, but this isn't a gear install thread, there are plenty of those already.
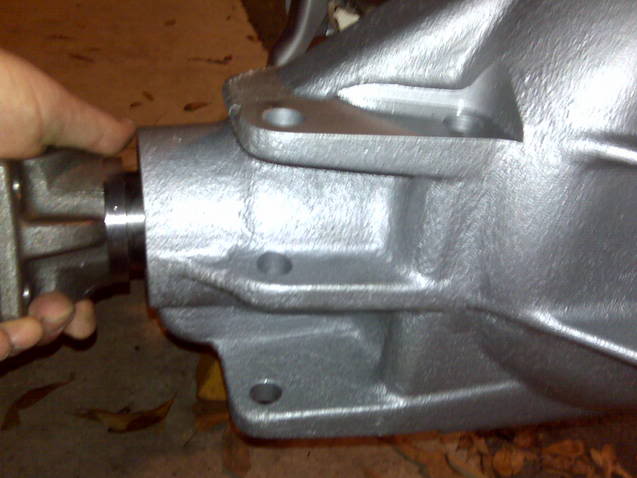
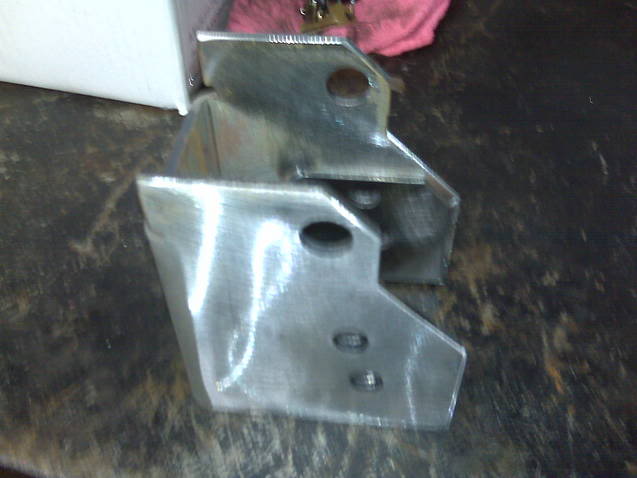
The torque arm mounting area:
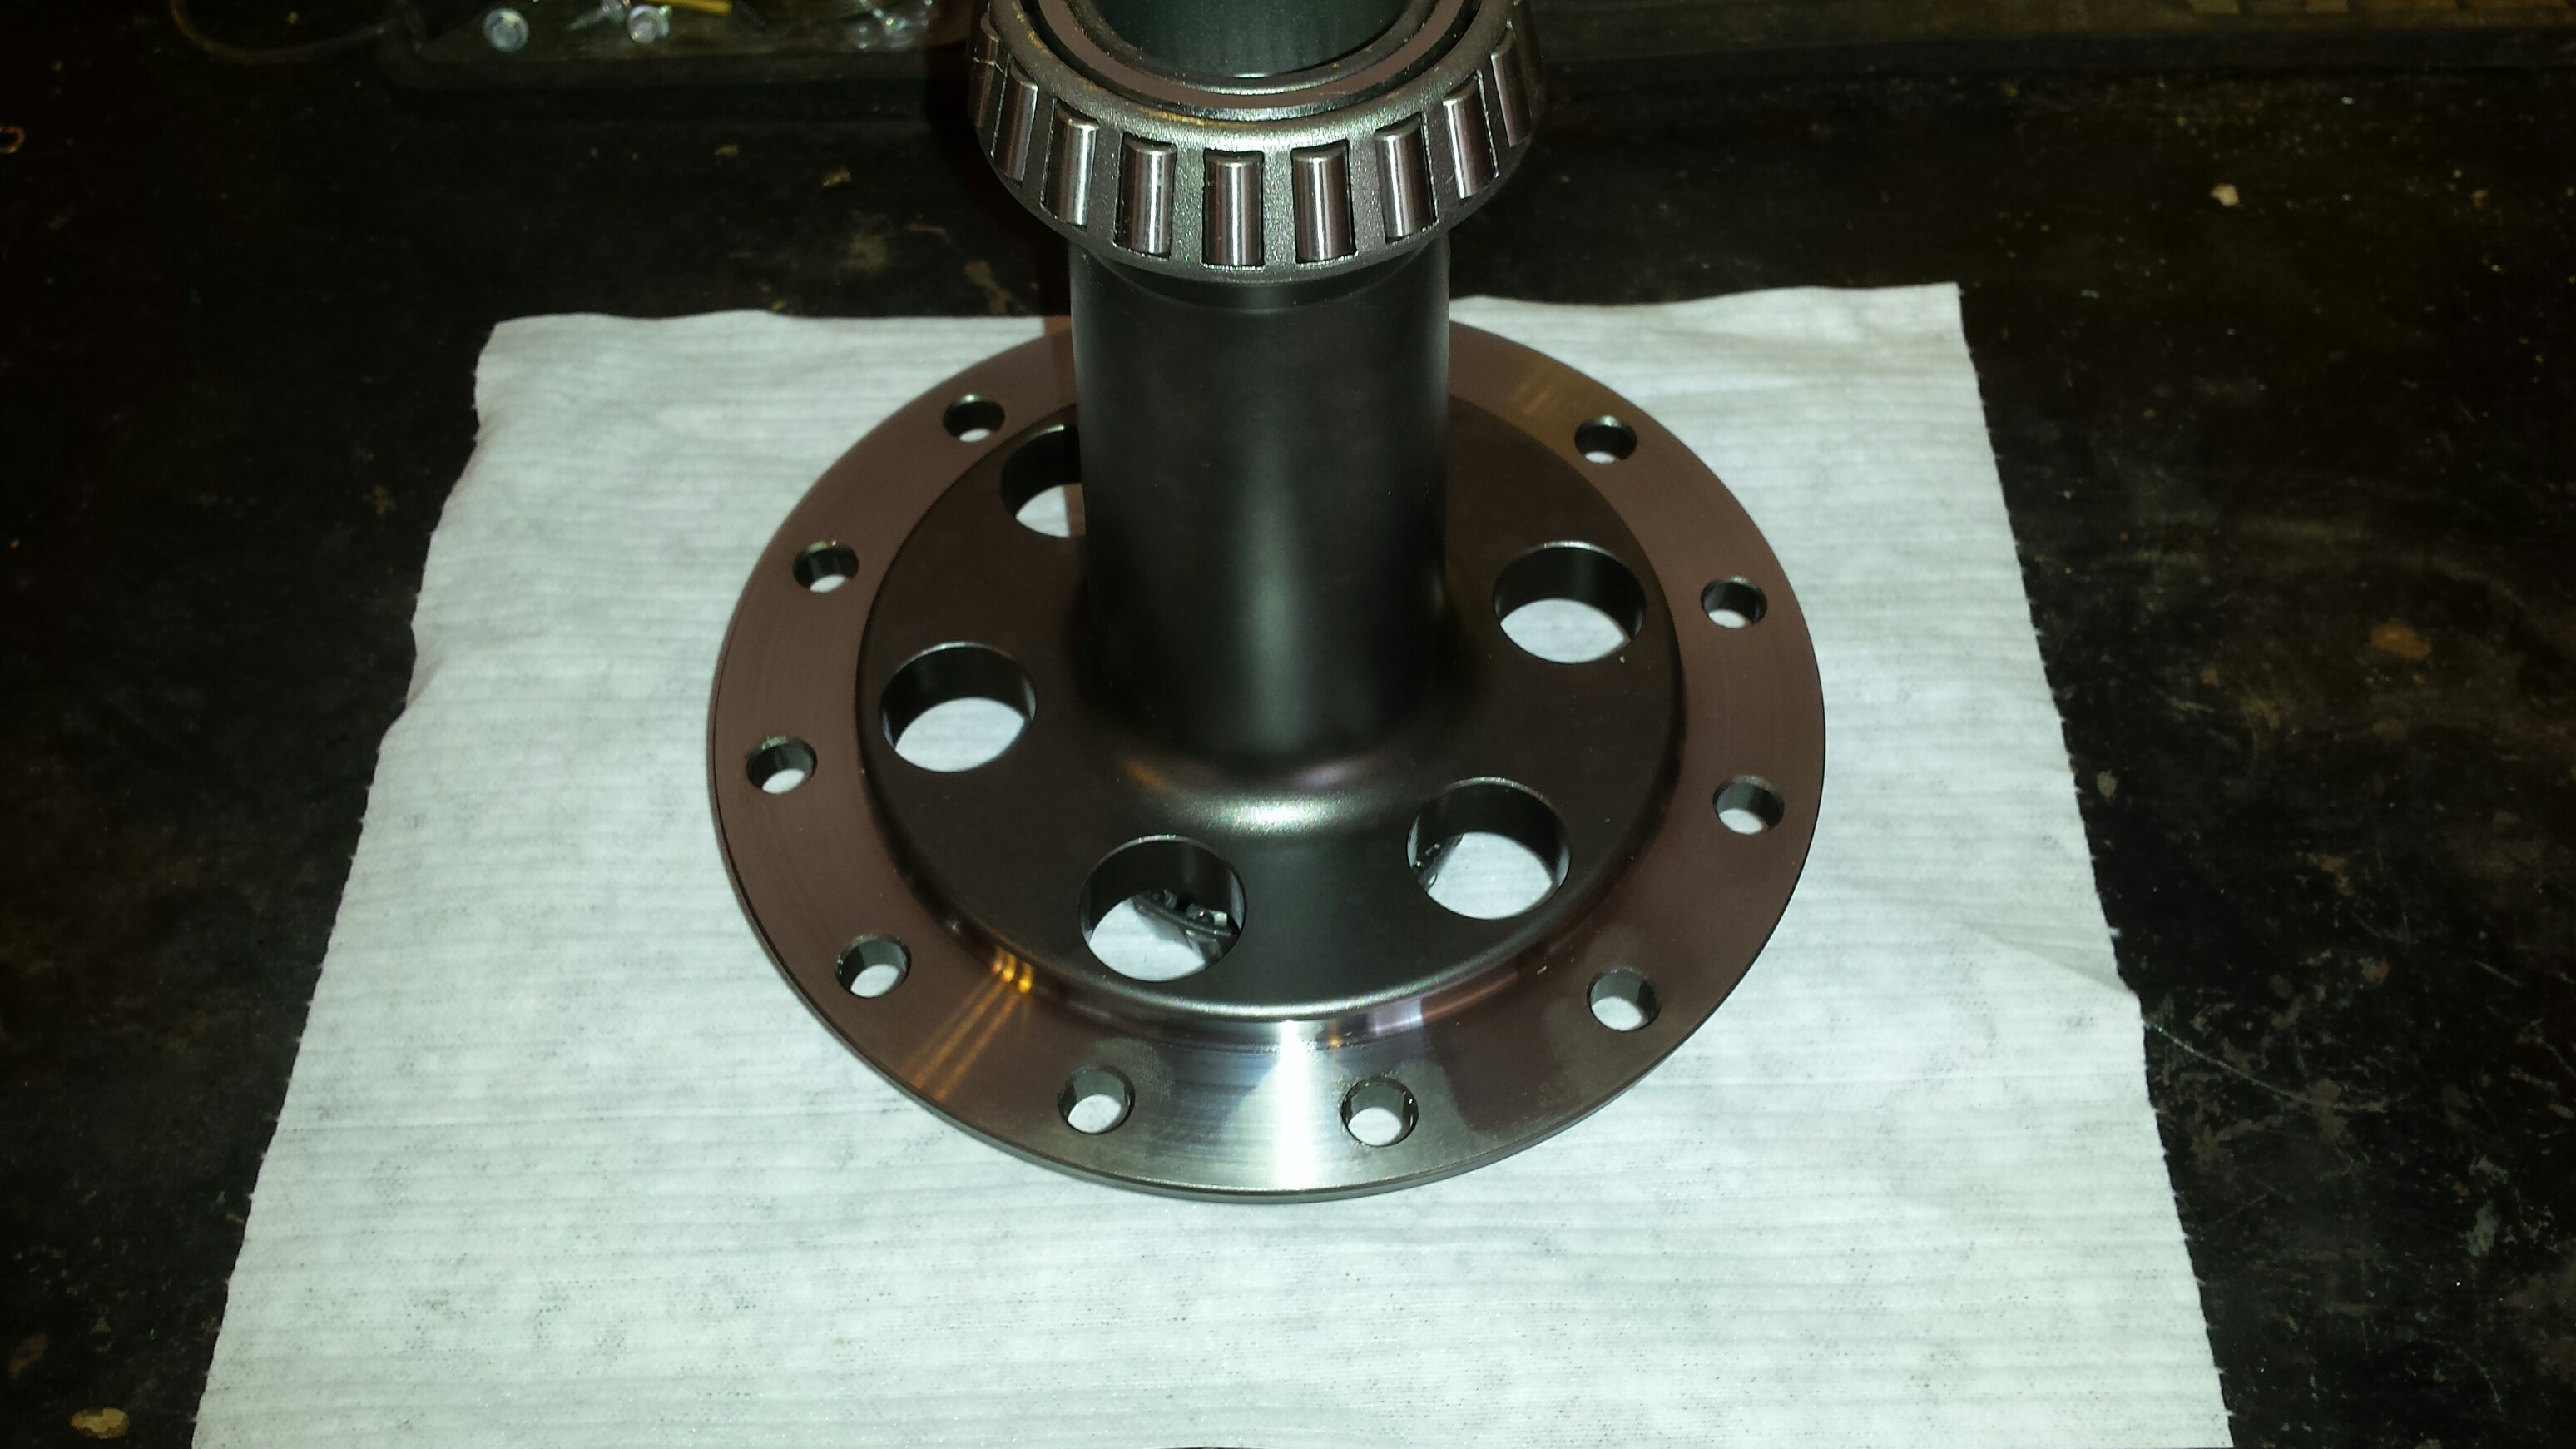
I had to get the ABS rings off the stock axles. So I applied heat via a propane torch and had a buddy stand on one side and me on the other and we both pried in unison as the heat was applied. After about 5 minutes the rings were able to be persuaded off. They get pressed onto an aluminum adapter (I wapped them with a dead blow hammer) then the adapter gets pressed on the new axle. First you install your wheel studs, then add your ABS ring if applicable. Next step will be bearings and seals.

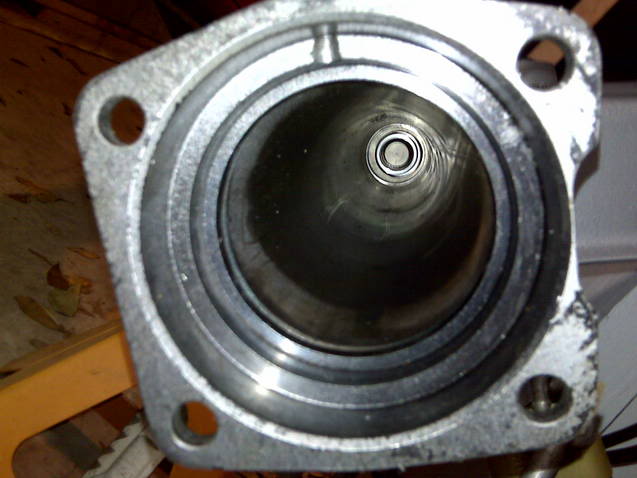
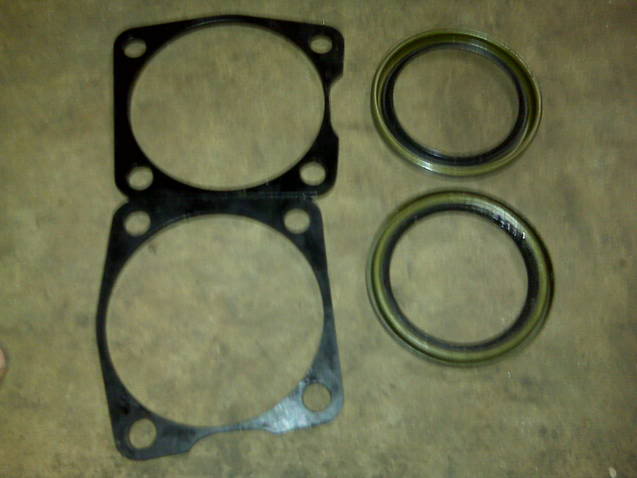
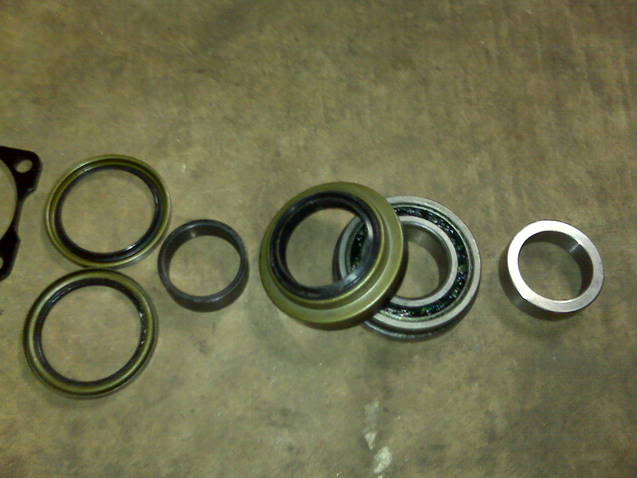
This is a backing plate spacer and an inner seal oring. These get lightly tapped into the housing ends first and the spacers get set aside until final assembly. The oring at the top is what you should see looking into the housing. The one on bottom is the backside. The perimeter lip tells the story.
Here's the axle hardware. I laid it out in the final order its in. So we know where the orings and backing plate spacers go, so we will start with the black ring on the left. That is a bearing spacer. It positions the wheel bearing the correct distance from the flange and gives the bearing a solid surface to seat against. It goes on first, then the backing plate must be dropped on. It does not press, it is a loose fit. Then you press the main housing end seal (which just slides on) and bearing assembly. After that is seated against the black spacer ring, then you press the final silver wedding ring in-place. You're done.
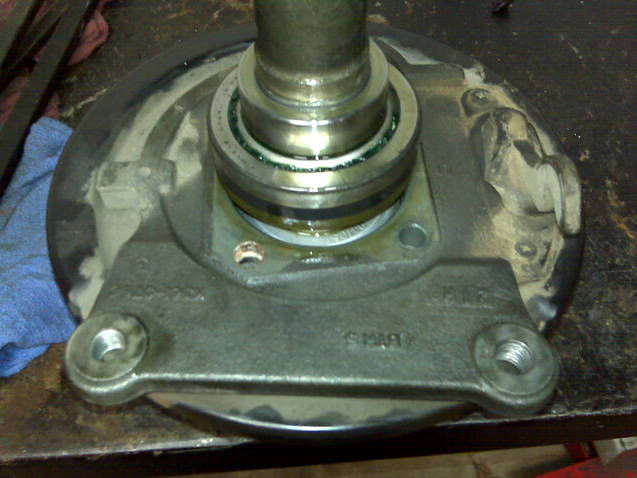
Here it is completed. Pretty simple if you're handy with a press.
Final installed pics to come.
Forged front yoke of the 1350 variety:
Motive 3.73s are going in this
Part number for the gears:
12 bolt housing ends:
Posi/gears being setup, but this isn't a gear install thread, there are plenty of those already.
The torque arm mounting area:
I had to get the ABS rings off the stock axles. So I applied heat via a propane torch and had a buddy stand on one side and me on the other and we both pried in unison as the heat was applied. After about 5 minutes the rings were able to be persuaded off. They get pressed onto an aluminum adapter (I wapped them with a dead blow hammer) then the adapter gets pressed on the new axle. First you install your wheel studs, then add your ABS ring if applicable. Next step will be bearings and seals.
This is a backing plate spacer and an inner seal oring. These get lightly tapped into the housing ends first and the spacers get set aside until final assembly. The oring at the top is what you should see looking into the housing. The one on bottom is the backside. The perimeter lip tells the story.
Here's the axle hardware. I laid it out in the final order its in. So we know where the orings and backing plate spacers go, so we will start with the black ring on the left. That is a bearing spacer. It positions the wheel bearing the correct distance from the flange and gives the bearing a solid surface to seat against. It goes on first, then the backing plate must be dropped on. It does not press, it is a loose fit. Then you press the main housing end seal (which just slides on) and bearing assembly. After that is seated against the black spacer ring, then you press the final silver wedding ring in-place. You're done.
Here it is completed. Pretty simple if you're handy with a press.
Final installed pics to come.
#3
03-14-2015, 02:49 PM
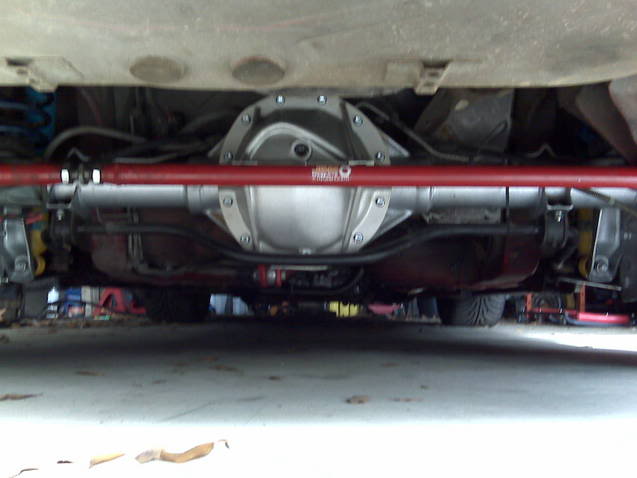
Completed (except e-brakes) and ready for the install.......

Just got these in from Spohn:
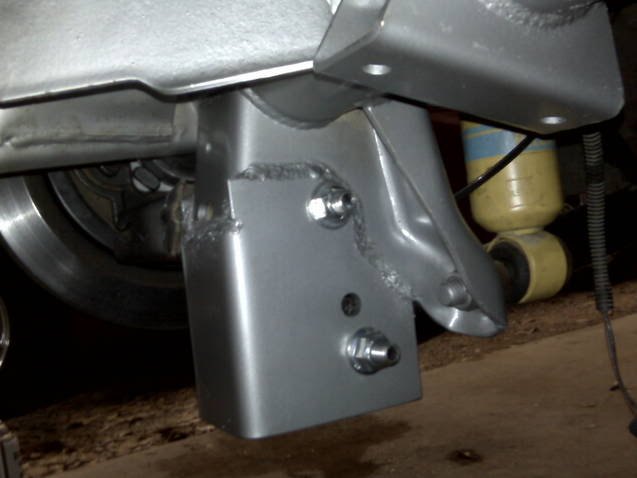
Installed/painted:
From the back...
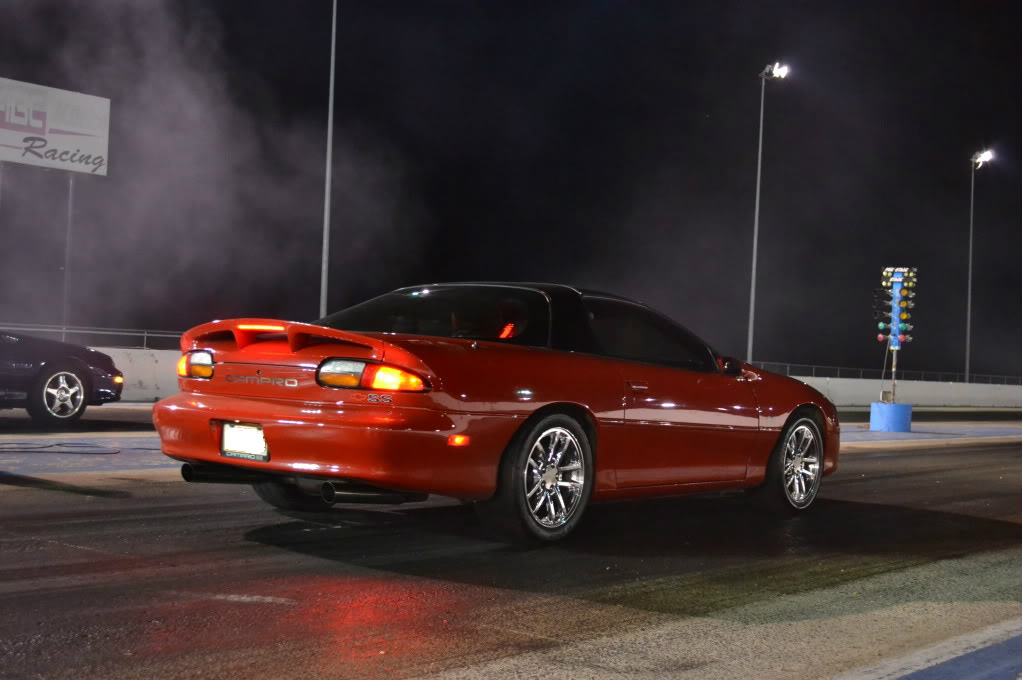
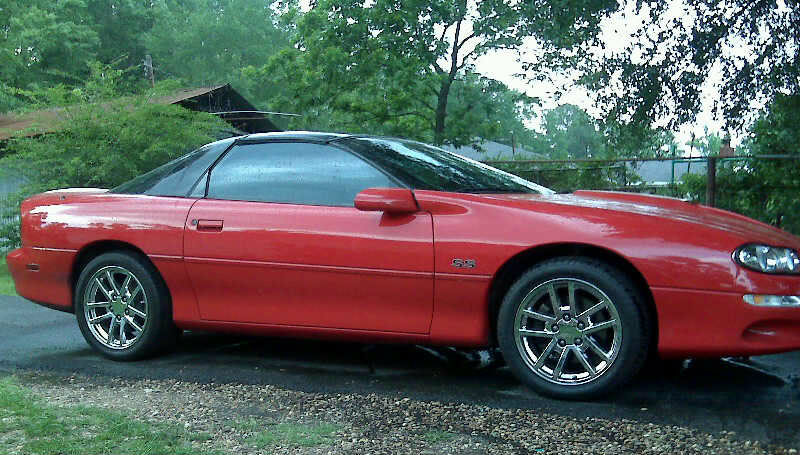
Here is how she sat before:
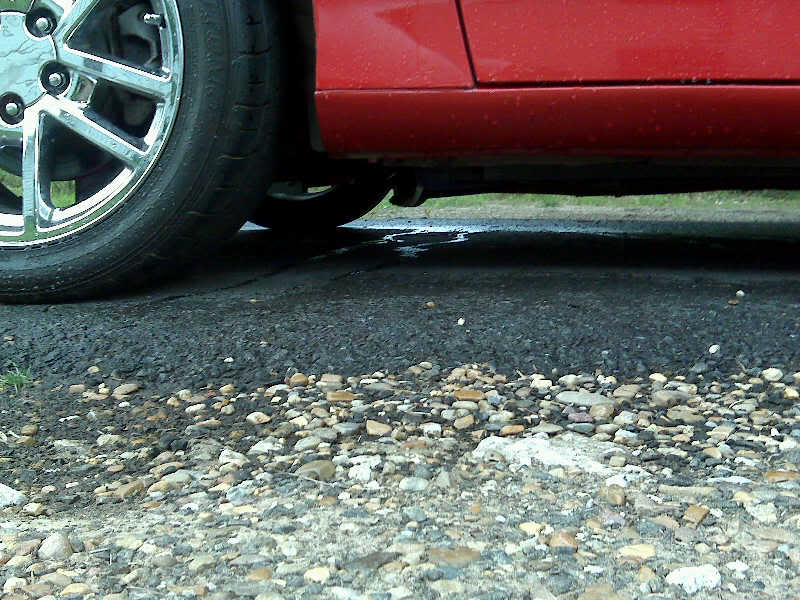
This is when I first sat it on the ground: I added some heater hose to the top and bottom spring coils to help bringing it up some for ground clearance reasons. So that plus the rear end is what you are seeing.
Tucking a 4 inch Y pipe with a QTP cutout.
Spring/Shock setup currently on the car. Yes I cleaned the other one too.

Here's an issue with the big rear aluminum cover. I was afraid that the rear cover would have a collision with the upper panhard support during a hard launch or a big bump. It wasn't worth risking so I notched the stock piece out.
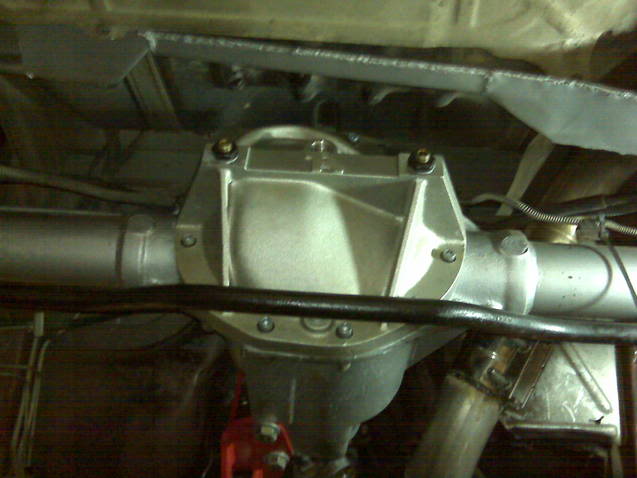
Looking straight up from under the rear end, if the stock piece wasn't notched, the two would cross paths at some point of suspension travel, it's definite.

EDIT: 1/17/15.....Going more track oriented. Strange D1540 lightweight steel spool weighs about 8 lbs, the Trutrac weighed about 28.
Just got these in from Spohn:
Installed/painted:
From the back...
Here is how she sat before:
This is when I first sat it on the ground: I added some heater hose to the top and bottom spring coils to help bringing it up some for ground clearance reasons. So that plus the rear end is what you are seeing.
Tucking a 4 inch Y pipe with a QTP cutout.
Spring/Shock setup currently on the car. Yes I cleaned the other one too.
Here's an issue with the big rear aluminum cover. I was afraid that the rear cover would have a collision with the upper panhard support during a hard launch or a big bump. It wasn't worth risking so I notched the stock piece out.
Looking straight up from under the rear end, if the stock piece wasn't notched, the two would cross paths at some point of suspension travel, it's definite.
EDIT: 1/17/15.....Going more track oriented. Strange D1540 lightweight steel spool weighs about 8 lbs, the Trutrac weighed about 28.

#6
03-16-2015, 06:42 AM
what is the ballpark price to do this conversion? I'm looking to do it to my 02 Formula, then my Z28.
#7
03-16-2015, 07:00 AM
if I'm looking to change gears, am I better off going to go to the 12 bolt? is that better than changing them in a 10 bolt? one car is running about 50 horsepower over stock the other was running a 100 hp overstock. when is it time to upgrade from a 10 bolt with 12 bolt.?
#8
03-16-2015, 11:09 AM

if I'm looking to change gears, am I better off going to go to the 12 bolt? is that better than changing them in a 10 bolt? one car is running about 50 horsepower over stock the other was running a 100 hp overstock. when is it time to upgrade from a 10 bolt with 12 bolt.?
I'd run the rear as is and save up the dough for when it does break. That way, if you feel you want to change gears you can do it and upgrade to a better rear in one shot.
#10
03-16-2015, 03:08 PM
When it breaks. Haha. Seriously though it depends. Auto or manual, street tires or slicks? Auto is easier on the rear as are street tires while a manual and slicks can destroy it on the first run. Traction plays a big part too.
I'd run the rear as is and save up the dough for when it does break. That way, if you feel you want to change gears you can do it and upgrade to a better rear in one shot.
I'd run the rear as is and save up the dough for when it does break. That way, if you feel you want to change gears you can do it and upgrade to a better rear in one shot.

