How to install an aftermarket steering wheel (4th gen)
#1
 10-14-2012, 05:22 PM


Ok, so this is my first write-up on this site, so bear with me. If I get any terms wrong or miss a step, please let me know either in a reply or in a PM and I'll gladly go back and fix it. For the record, I used all NRG products for the aftermarket pieces, but you are free to use whatever you like. I will provide links to the product page at the bottom in case you are interested in purchasing any one of these products. So, let's get started.
Here's what you'll need:
-Your camaro (Or someone else's, maybe it's a surprise!)
-Aftermarket Short Hub Adapter
-Aftermarket Quick-Release
-Aftermarket Steering Wheel
-T30 Torx head/key
-Socket wrench
-8mm socket
-15/16" socket
-Steering wheel puller
-Wire cutters
-3.5mm hex bit (or use supplied allen key from quick release unit)
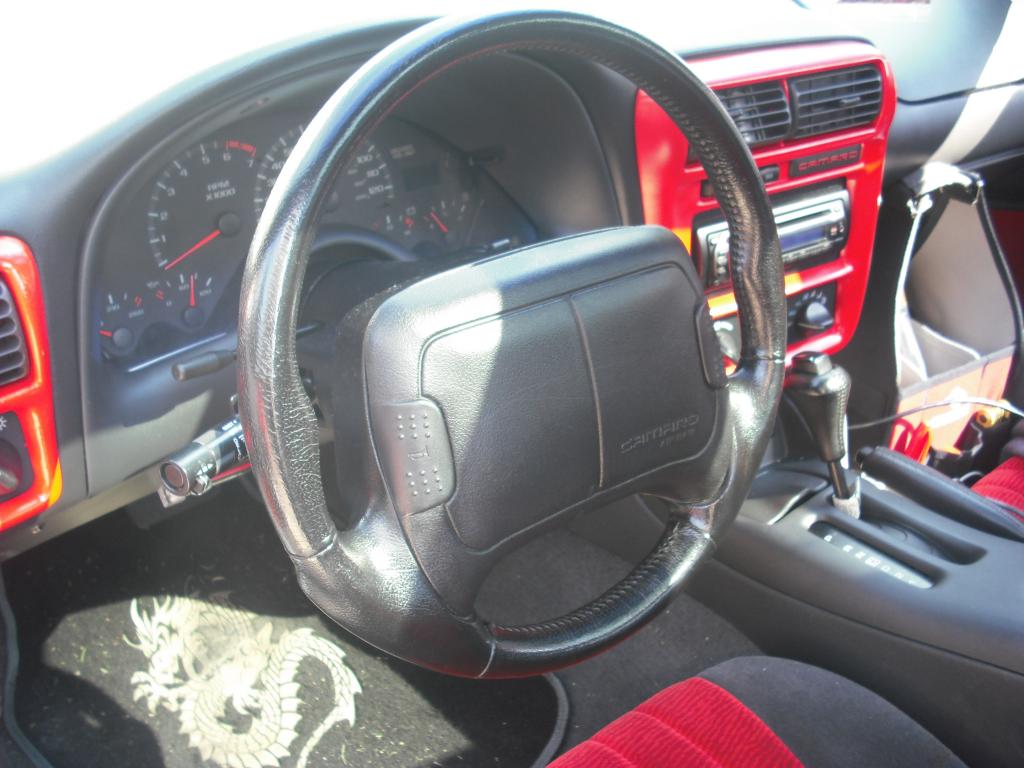
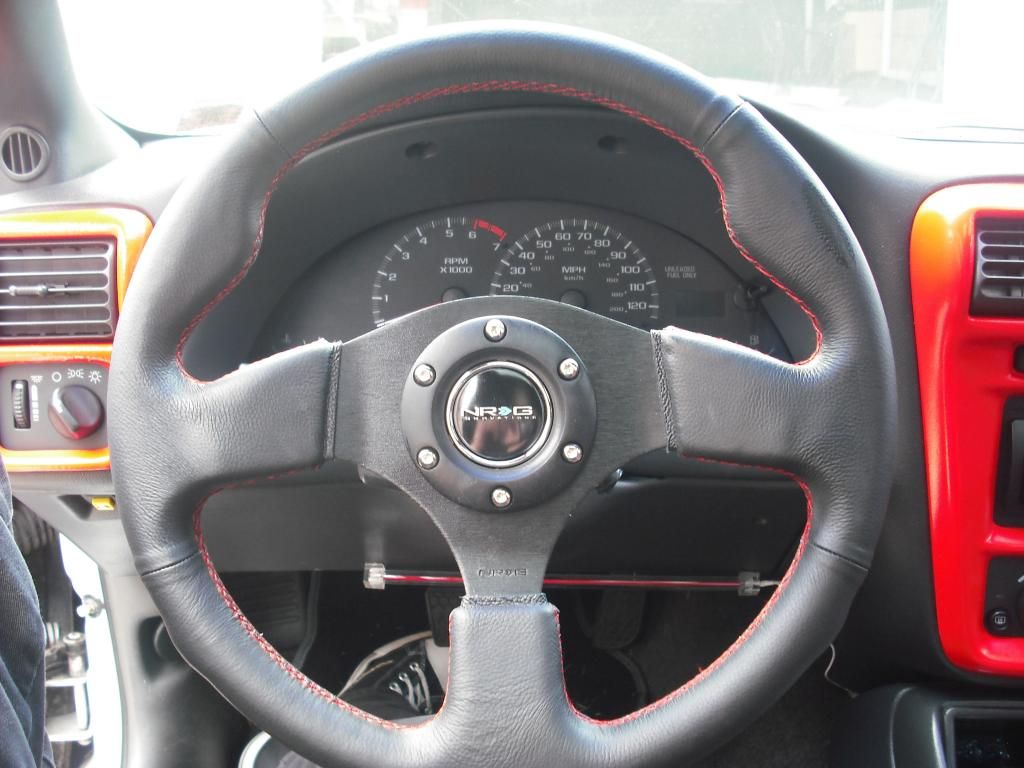
The first thing you'll need to do is make sure your wheels are perfectly straight, and your steering wheel is aligned properly. Example:
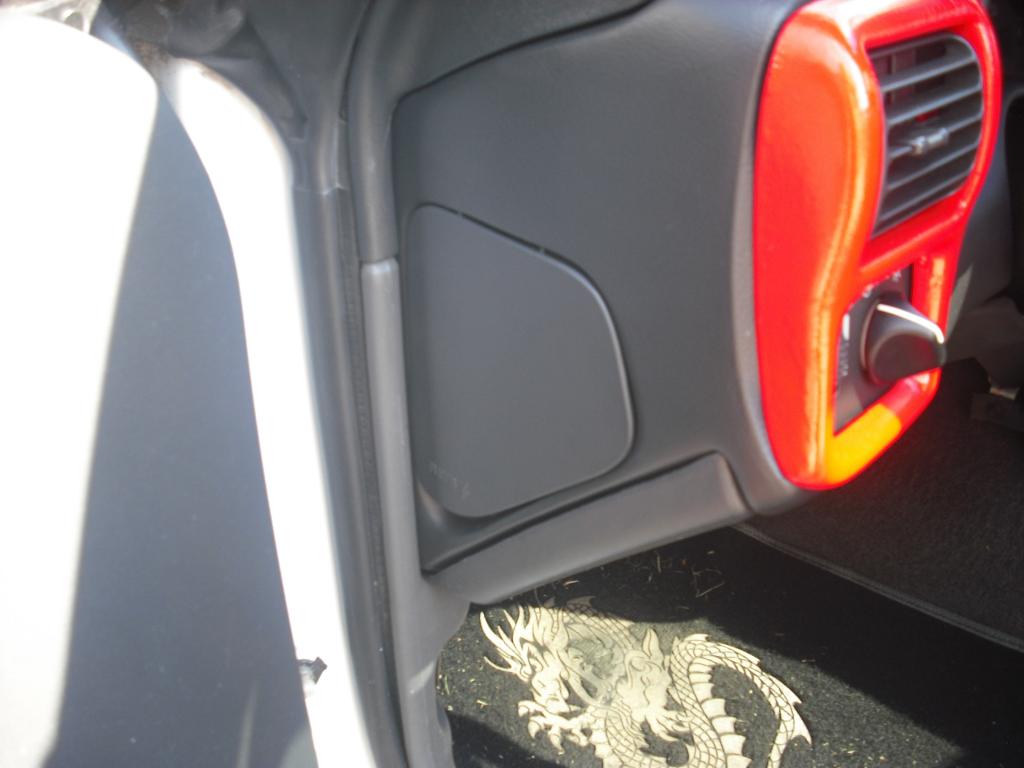
Next, turn off the car, lock the wheel in place, and use the 8mm socket to disconnect the negative terminal on the battery. Once the negative terminal is removed, locate the fuse box in the driver's side door jamb:
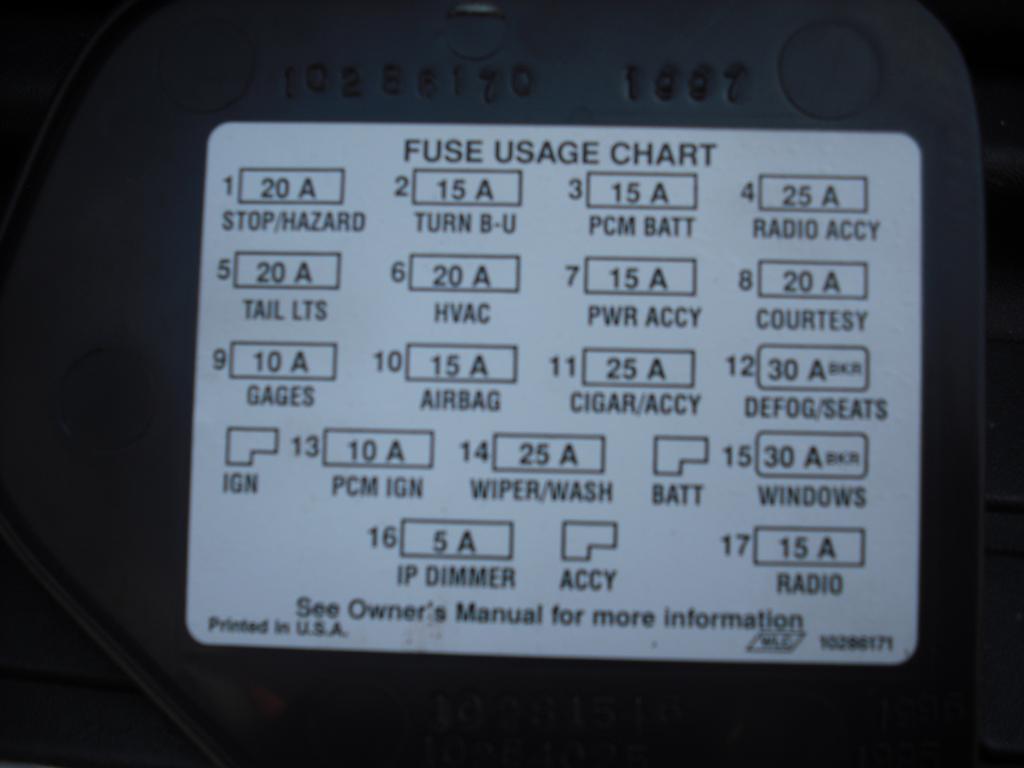
Once you pull the cover, you'll see this diagram:
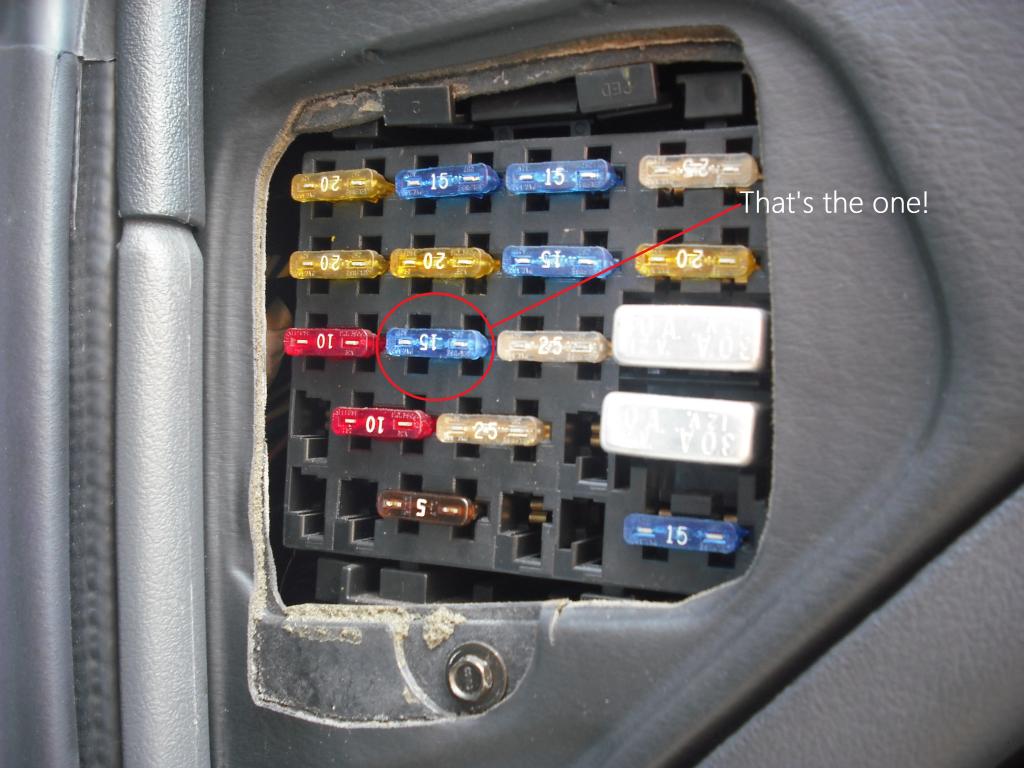
We want to pull the fuse labeled "Airbag". It is a blue 15A fuse right around the middle of the block:
Pull the fuse and leave it off to the side in a safe place. Now we can get started on the wheel itself. Once the wheel is locked, locate the 4 torx bolts in the back side of the wheel:
Use the T30 torx head to remove each of the bolts, and CAREFULLY remove the airbag from the wheel. To do this, you're going to see a yellow wire hooked up to the airbag with a blue tab locking it place:
Remove the blue tab, then you can take out the plug from the airbag:
Next, you're going to see the inside of the steering wheel:

There are plenty of tutorials online that say you can take off the wheel using brute force, but that is incredibly difficult. I say save your time and just get a steering wheel puller. Remove the nut using the 15/16" socket and install the puller like so:
Make sure the two outside bolts are tight before tightening the middle bolt. CAREFULLY tighten the bolt in the middle until the steering wheel comes free. Notice that red wire going to the two horn buttons? Cut the two wires about an inch away from the horn buttons, then you can remove the wheel and put it off to the side.
Now we're up to the fun part; installing the new wheel! Once you remove the factory wheel, you'll see the clockspring:
You don't need to do anything here, so leave it in place and grab your short hub adapter.
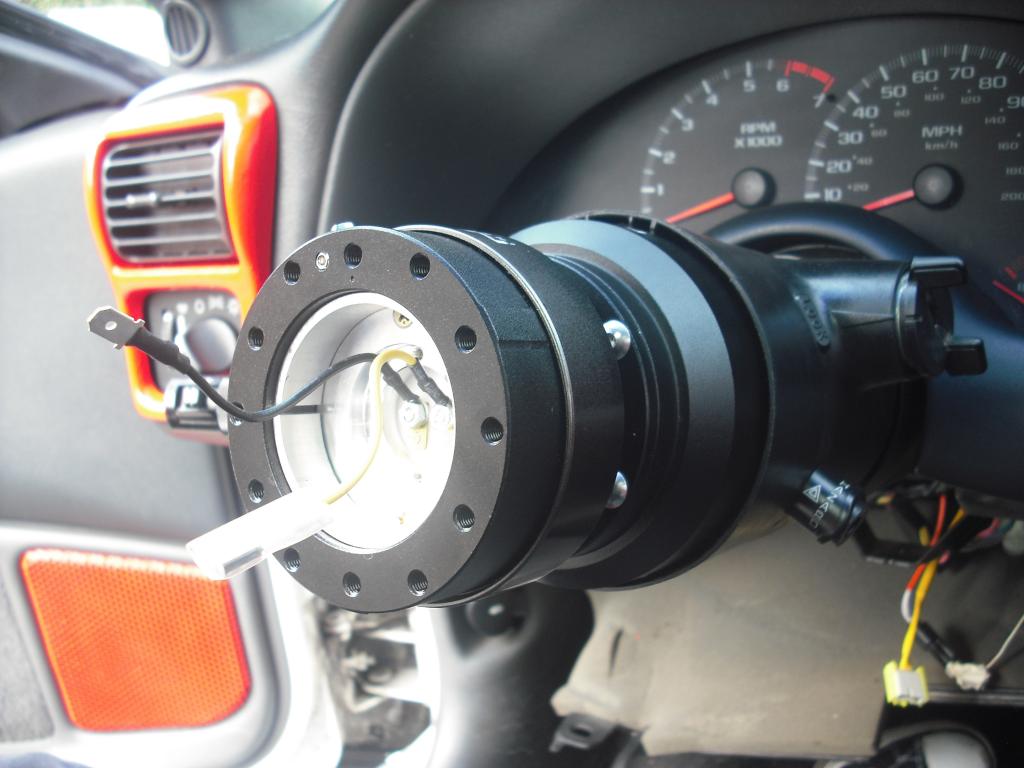
Now, we already made sure the wheels were locked and the steering column was straight, so we can go ahead and throw the short hub adapter in place, lining it up with the horn wire:
You'll notice the airbag wire is missing from that picture. The new wheel does NOT have an airbag, so I simply cut the wire and tucked it away behind the short hub adapter. If you want to keep it for posterity or in case you want to re-install the old wheel at some point in time, you're welcome to do so. Put the nut back on the steering column shaft and make it snug. Too tight and the clockspring will move when you turn the wheel, causing all kinds of problems.
Next, we have the quick-release. Take the horn wire you cut earlier, splice it, and wire it up to the positive/hot wire on the BOTTOM PIECE of the quick-release. For me, the positive wire was yellow, but yours may differ. Then, take the negative/ground wire on the short hub and insert it into the negative/ground on the quick-release. Then tuck away the cables and install the quick-release like so:
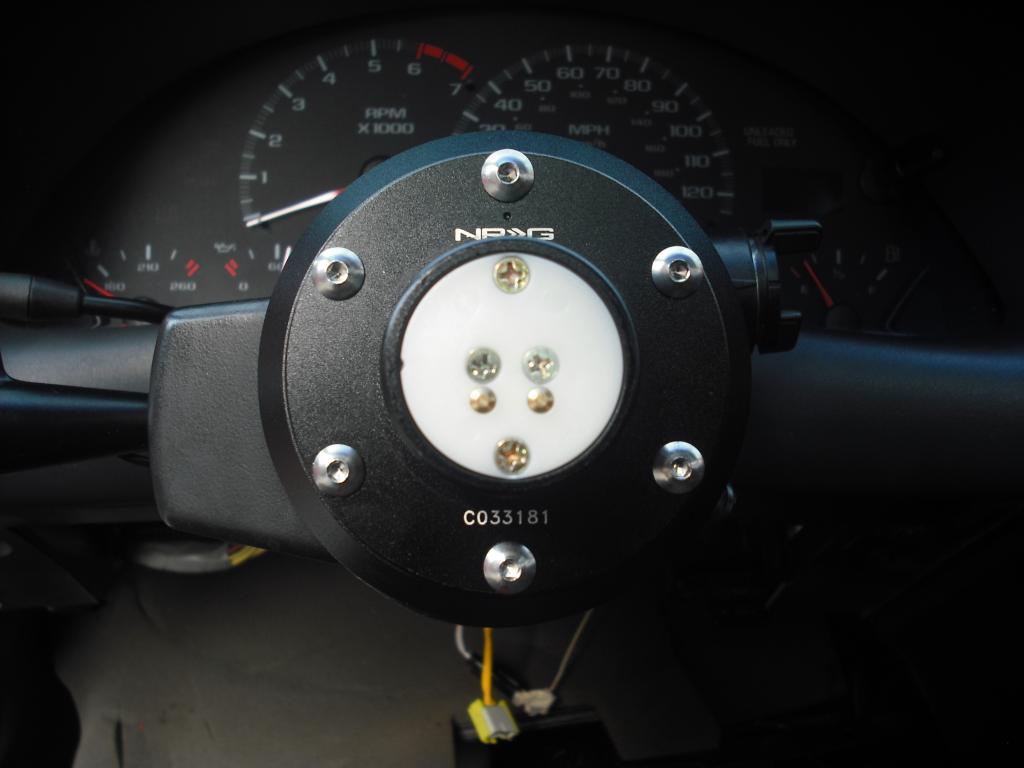
Using the 3.5mm hex head or the supplied allen key, tighten the bolts on the quick-release until they're nice and snug. No need to go hulk on them. Next, attach the top half of the quick release and it should look a lot like this:
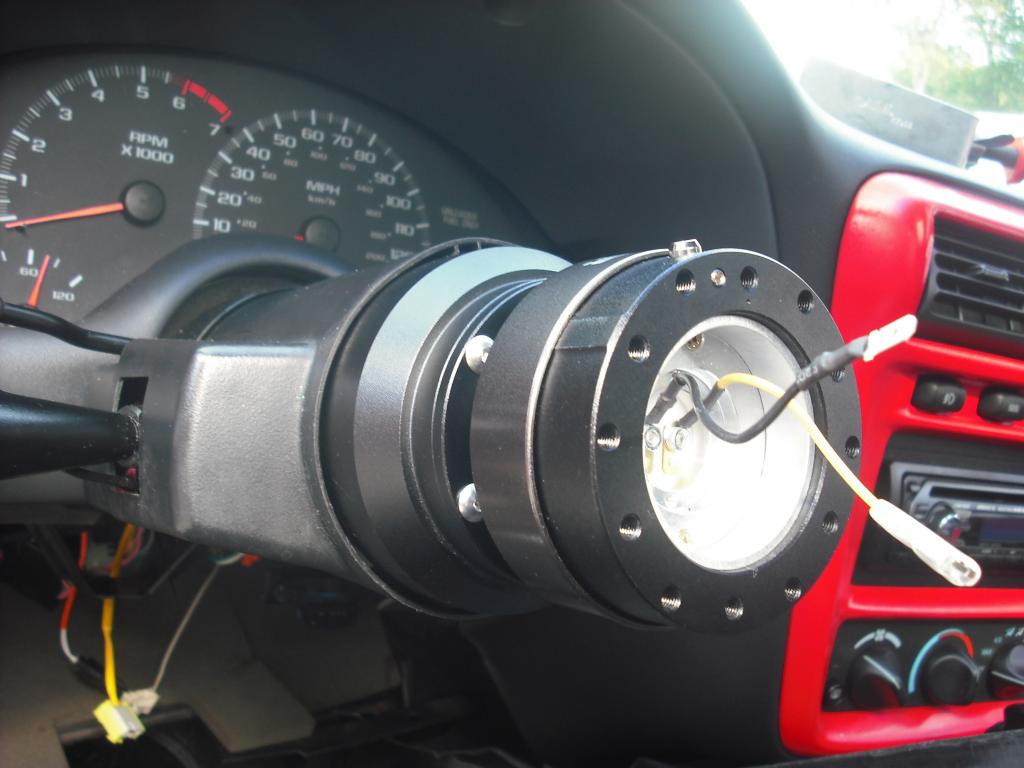
You should have gotten a metal ring with the quick-release. Install it now (pictured above) and get ready for the wheel.
To install the wheel, place it in the appropriate position and use three of the bolts that came with the wheel to hold it in place. Next, wire up the positive and negative wires to the horn button and place the horn button in the middle of the wheel like so:
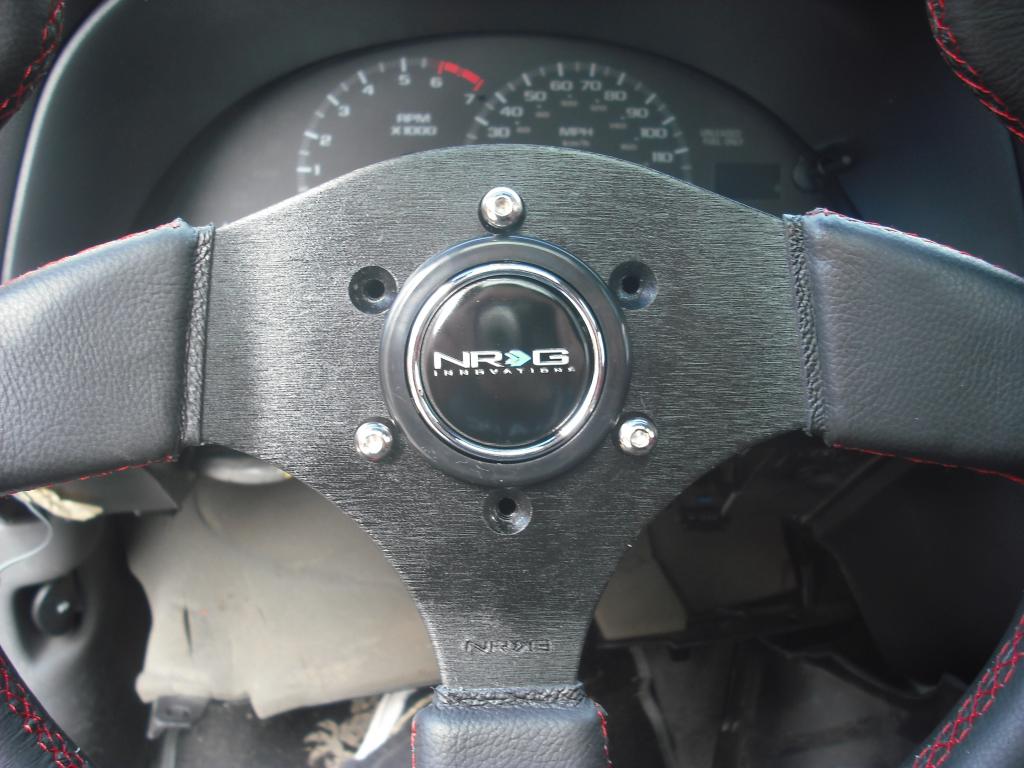
Once you're sure the horn button is lined up and straight, go ahead and push it the rest of the way in, remove the three bolts, and line up the retainer ring on the wheel. Once everything is lined up, install the wheel bolts and tighten then up using the 3.5mm hex head or supplied allen key.
Replace the Airbag fuse, re-connect the negative battery terminal, and turn on the car. The SRS/Airbag light should go off on the console, but that is normal. If you're certain everything is where it's supposed to be, go ahead and take a spin around the block. Once you're done, park your car and remove the wheel. To do this, depress the silver button on the top of the quick-release and pull the sleeve towards you. The wheel should come right off, and can be put back on by simply lining it up and pushing it in.
Here's what you'll need:
-Your camaro (Or someone else's, maybe it's a surprise!)
-Aftermarket Short Hub Adapter
-Aftermarket Quick-Release
-Aftermarket Steering Wheel
-T30 Torx head/key
-Socket wrench
-8mm socket
-15/16" socket
-Steering wheel puller
-Wire cutters
-3.5mm hex bit (or use supplied allen key from quick release unit)
Pre-Op
The first thing you'll need to do is make sure your wheels are perfectly straight, and your steering wheel is aligned properly. Example:
Next, turn off the car, lock the wheel in place, and use the 8mm socket to disconnect the negative terminal on the battery. Once the negative terminal is removed, locate the fuse box in the driver's side door jamb:
Once you pull the cover, you'll see this diagram:
We want to pull the fuse labeled "Airbag". It is a blue 15A fuse right around the middle of the block:
Removing The Wheel
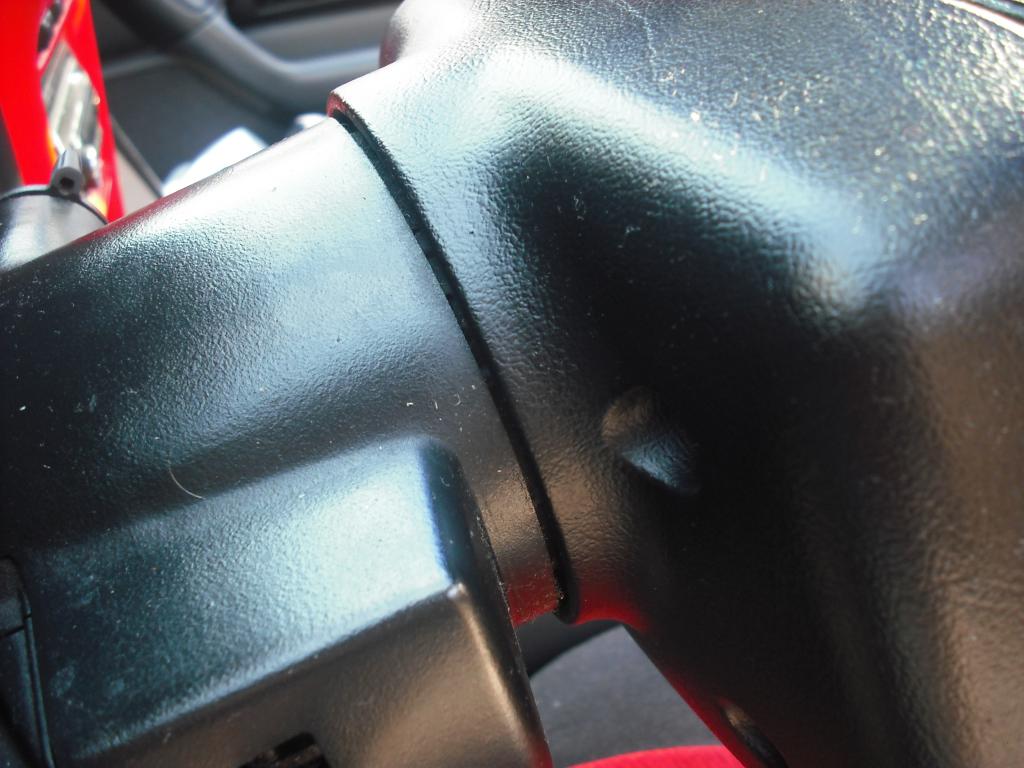
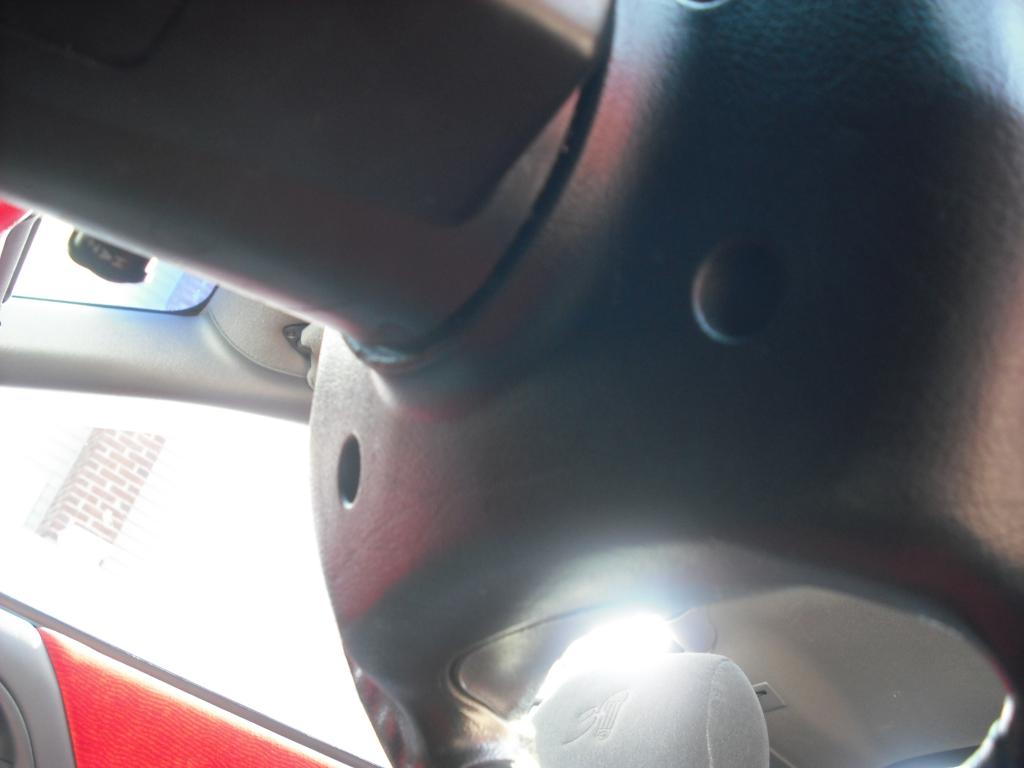
Pull the fuse and leave it off to the side in a safe place. Now we can get started on the wheel itself. Once the wheel is locked, locate the 4 torx bolts in the back side of the wheel:
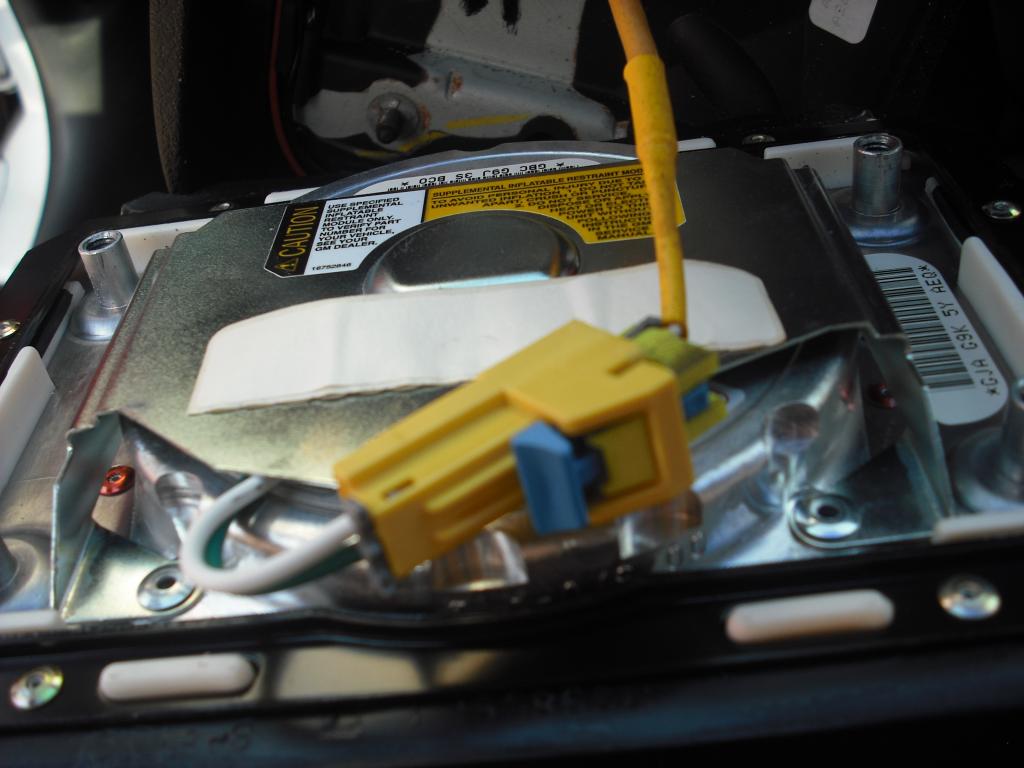
Use the T30 torx head to remove each of the bolts, and CAREFULLY remove the airbag from the wheel. To do this, you're going to see a yellow wire hooked up to the airbag with a blue tab locking it place:
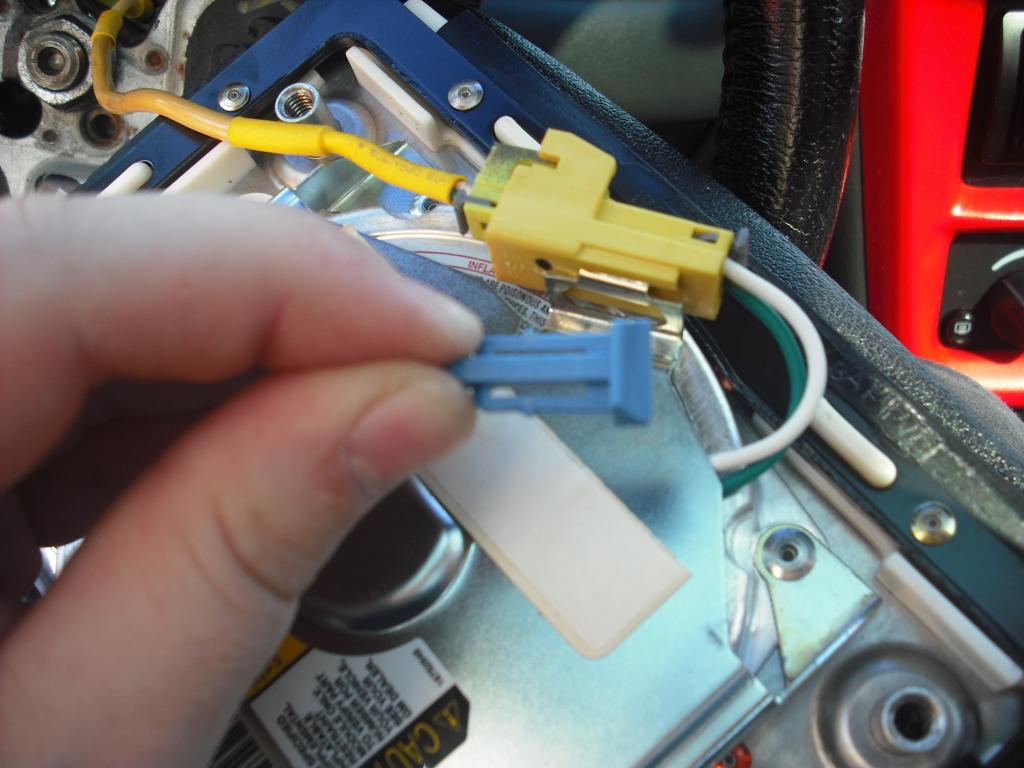
Remove the blue tab, then you can take out the plug from the airbag:
Next, you're going to see the inside of the steering wheel:
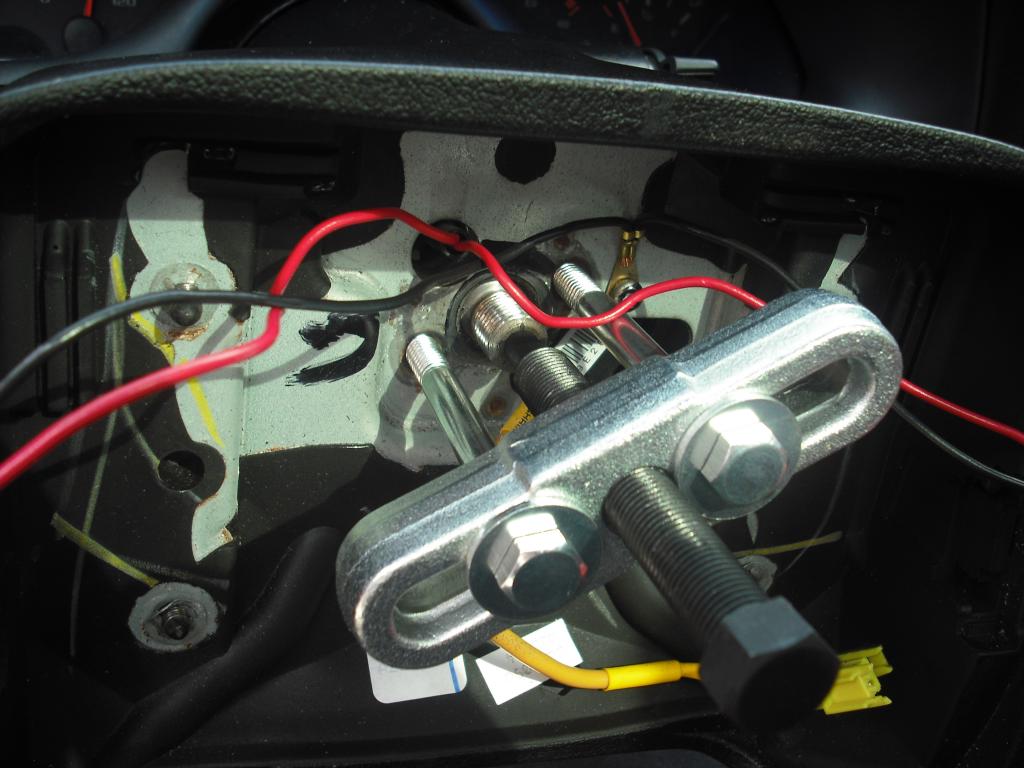
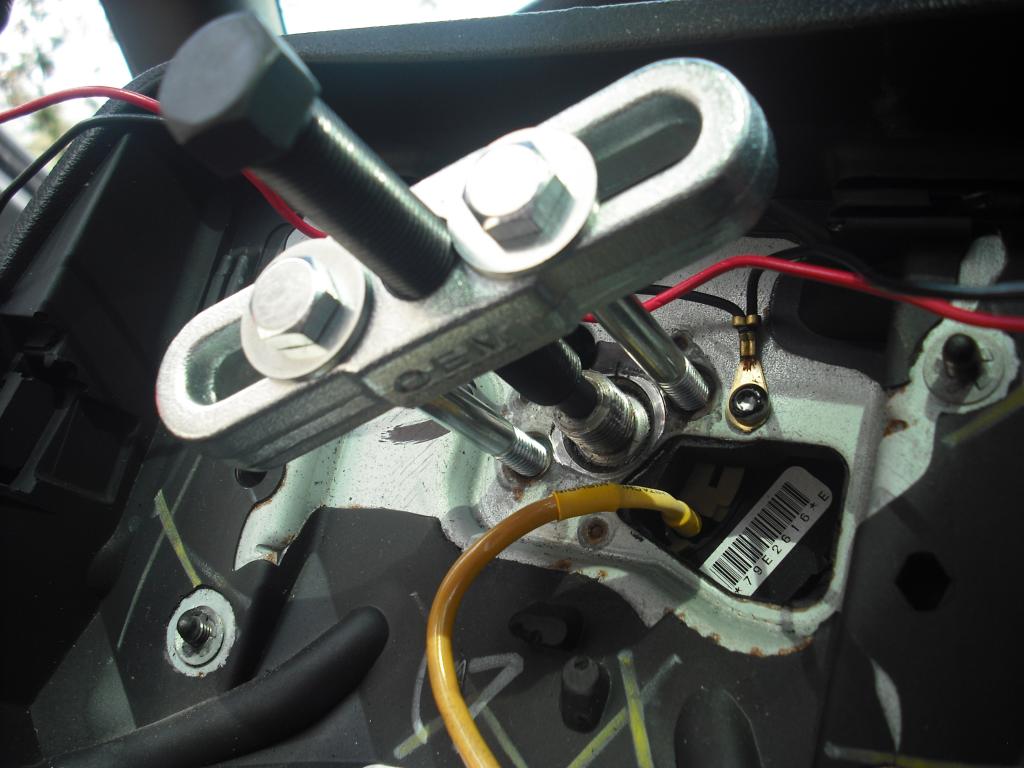
There are plenty of tutorials online that say you can take off the wheel using brute force, but that is incredibly difficult. I say save your time and just get a steering wheel puller. Remove the nut using the 15/16" socket and install the puller like so:
Make sure the two outside bolts are tight before tightening the middle bolt. CAREFULLY tighten the bolt in the middle until the steering wheel comes free. Notice that red wire going to the two horn buttons? Cut the two wires about an inch away from the horn buttons, then you can remove the wheel and put it off to the side.
Installing The New Wheel
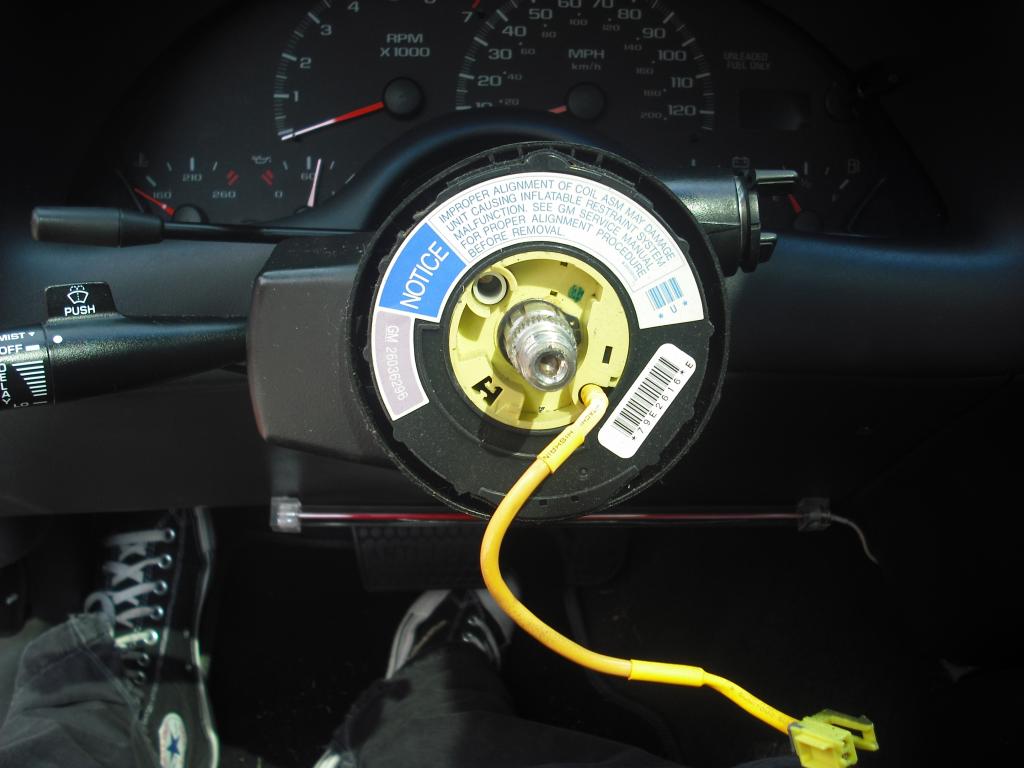
Now we're up to the fun part; installing the new wheel! Once you remove the factory wheel, you'll see the clockspring:
You don't need to do anything here, so leave it in place and grab your short hub adapter.
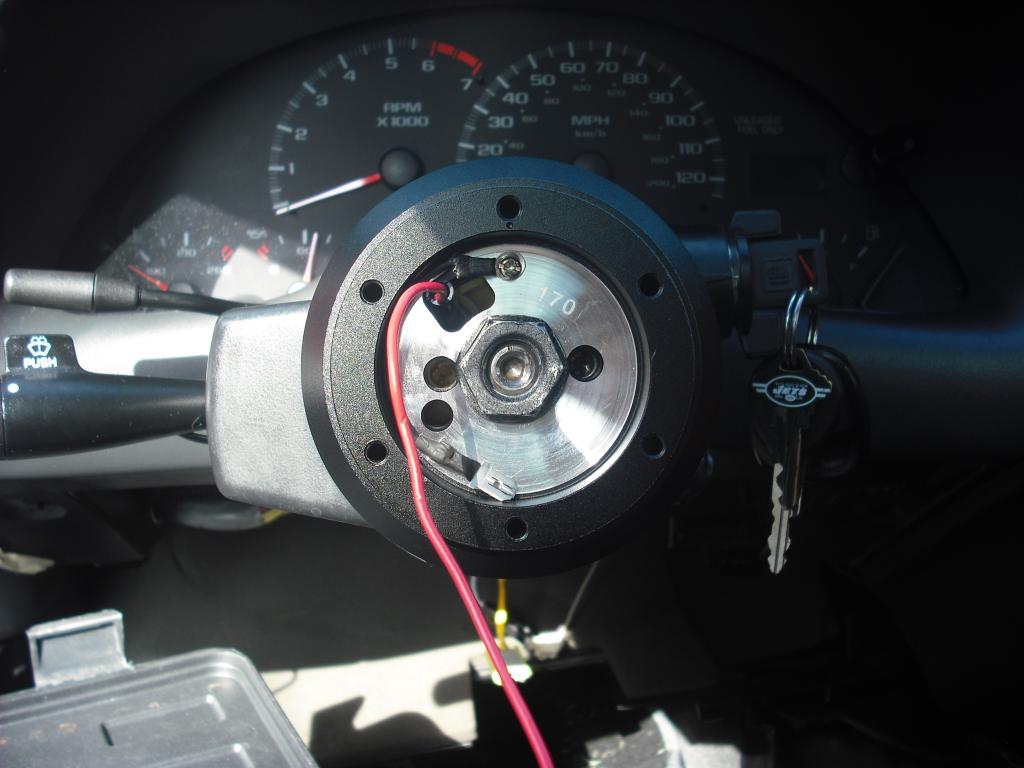
Now, we already made sure the wheels were locked and the steering column was straight, so we can go ahead and throw the short hub adapter in place, lining it up with the horn wire:
You'll notice the airbag wire is missing from that picture. The new wheel does NOT have an airbag, so I simply cut the wire and tucked it away behind the short hub adapter. If you want to keep it for posterity or in case you want to re-install the old wheel at some point in time, you're welcome to do so. Put the nut back on the steering column shaft and make it snug. Too tight and the clockspring will move when you turn the wheel, causing all kinds of problems.
Next, we have the quick-release. Take the horn wire you cut earlier, splice it, and wire it up to the positive/hot wire on the BOTTOM PIECE of the quick-release. For me, the positive wire was yellow, but yours may differ. Then, take the negative/ground wire on the short hub and insert it into the negative/ground on the quick-release. Then tuck away the cables and install the quick-release like so:
Using the 3.5mm hex head or the supplied allen key, tighten the bolts on the quick-release until they're nice and snug. No need to go hulk on them. Next, attach the top half of the quick release and it should look a lot like this:
You should have gotten a metal ring with the quick-release. Install it now (pictured above) and get ready for the wheel.
To install the wheel, place it in the appropriate position and use three of the bolts that came with the wheel to hold it in place. Next, wire up the positive and negative wires to the horn button and place the horn button in the middle of the wheel like so:
Once you're sure the horn button is lined up and straight, go ahead and push it the rest of the way in, remove the three bolts, and line up the retainer ring on the wheel. Once everything is lined up, install the wheel bolts and tighten then up using the 3.5mm hex head or supplied allen key.
Replace the Airbag fuse, re-connect the negative battery terminal, and turn on the car. The SRS/Airbag light should go off on the console, but that is normal. If you're certain everything is where it's supposed to be, go ahead and take a spin around the block. Once you're done, park your car and remove the wheel. To do this, depress the silver button on the top of the quick-release and pull the sleeve towards you. The wheel should come right off, and can be put back on by simply lining it up and pushing it in.
Closing Notes

Here are a couple of tips to help along the way and make this whole process easier:
-Before doing anything, put the car on jack stands to get free movement from the wheels
-If you are having trouble getting to the Torx bolts to remove the airbag, turn the key to disengage the wheel lock and turn the steering wheel (Placing the car on jack stands helps with this). Just make sure to re-align the steering column before removing the wheel
-You will have two sets of bolts when everything is together. Here's something to remember which bolts came with what piece: The head size and thread pattern are identical, but the bolts to attach the quick-release to the short hub adapter are shorter in length. Think of it this way: you have the steering wheel bolts, and the SHORT hub bolts. Makes sense, does it not?
Links
Here are the following parts I used:
-NRG Short Hub Adapter: SRK-170H - Short Hub Domestic; Dodge, GM, GMC, Cheverolet, Jeep, Pontiac | NRG Innovations
-NRG Quick-Release Gen 2.0: Gen 2.0 | NRG Innovations
-NRG Race Series Steering Wheel: Race Series | NRG Innovations
-NRG Short Hub Adapter: SRK-170H - Short Hub Domestic; Dodge, GM, GMC, Cheverolet, Jeep, Pontiac | NRG Innovations
-NRG Quick-Release Gen 2.0: Gen 2.0 | NRG Innovations
-NRG Race Series Steering Wheel: Race Series | NRG Innovations
Last edited by DDRDiesel; 10-14-2012 at 10:55 PM.


#3
10-14-2012, 07:36 PM


Join Date: Mar 2009
Location: Tokeland, Washington
Posts: 21,645
added to the how to and faq sticky here https://camaroforums.com/forum/93-02...rt-here-38462/ thanks very much
#4
10-14-2012, 07:46 PM
Thanks! Was pretty frustrating flying blind, using videos of ricer wheel installs
Yay, my first sticky! 
added to the how to and faq sticky here https://camaroforums.com/forum/93-02...rt-here-38462/ thanks very much
#6
10-14-2012, 10:14 PM
I figured it couldn't hurt, and I spliced the wires together, hoping it would reset the system, or trip it and turn off the Air Bag light. I need to find out how to reset the light in order to test my theory, though
#7
10-14-2012, 10:41 PM

Join Date: Oct 2007
Location: The 'Burbs of Chicago
Posts: 18,306
I saw in your other thread where you said the hub is shaky (loose) because you'd otherwise have a binding issue against the clock spring. How come you didn't just remove the clock spring then?
#8
10-14-2012, 10:47 PM
I've been thinking about it, bit I don't think it's going to solve the shaking issue. There would be nothing to support the back of the hub from pitch/yaw at all. At least this gives the hub some backbone. Also, I'm a bit worried about the wire for the horn connector getting damaged or otherwise if I remove the clockspring
#9
10-14-2012, 11:46 PM
Join Date: Oct 2007
Location: The 'Burbs of Chicago
Posts: 18,306
How about a steel collar/spacer, short section of pipe, or stack of washers to back up the hub?
#10
10-15-2012, 01:10 PM
Been giving it some consideration. I'd have to size it up perfectly, to give the hub some support and keep from getting in the way of the horn wire. Could be interesting. I'll report back when I find out, probably going to be this weekend