3rd Gen Camaro Street Stock build thread
#1
 05-15-2009, 05:13 PM


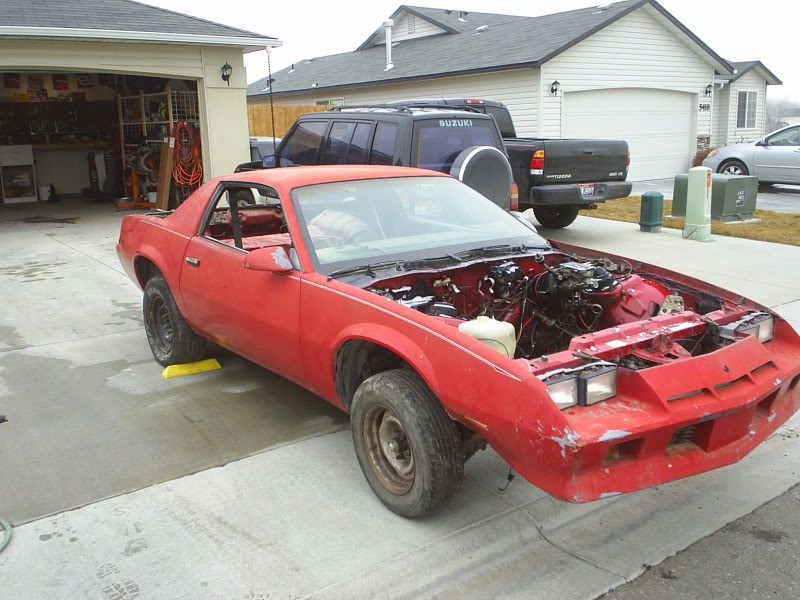
Late last Fall, my buddy Nick came by and informed me that he wanted me to go with him to look at a Camaro he saw on craigslist. He said it didn’t have an engine or tranny, but it was only $100 and had a “clean title”. We drove out to the address on the listing and checked it out. Instead of being a car minus an engine and tranny, it turned out to be a shell. It had no interior except for an unbolted driver seat, no engine, no tranny, no wheels and tires, resting on a tree stump and some cinder blocks in an overgrown barnyard, beat up hood laying in the weeds, etc, etc. I tried to talk him out of buying it and I thought that I had succeeded, because he was convinced that it needed more work than he wanted to do to become streetable. Since we didn’t bring a trailer anyway, we left and he spent the night thinking it over. The next day he informed me that he was going to buy it and build a street stock, so we grabbed his trailer, swung by the junkyard to get some wheels tires,and lugnuts, then went and retrieved one slightly used 1984 Camaro.
First off, let me tell you something about us. Nick owns the car and will be driving it. My name is Zane. I am donating labor to help him get racing. I am a mechanic, not a “race car guy”, but I can fabricate. Nick has been around racing much more than me, and actually has pretty good contacts around town. He has crewed (donated labor) on some pretty high dollar (locally speaking) race teams and done a lot of travelling to races here in the west. He has never driven though, so this will be a first for him. We will be racing locally, at Meridian Speedway. It is a � mile flat paved oval. We will be racing in the “Street Stock” class. Street stock is the basic “run what you brung” kind of class with a lot of restrictions in place to keep it affordably competitive. For instance, you must run stock type cast iron intakes, and cast iron exhaust manifolds. The class carburetor is a Holley 4412, 2 bbl, 500 cfm. Suspension must remain in stock configuration (leaf spring cars must remain leaf spring cars, etc.), but you can buy racing shocks and springs. A lot of the cars are full frame cars, but several guys are running 2nd gen Camaros. I believe we will be the first here locally to run a 3rd gen Camaro, because the rules just changed this year allowing cars with 101” wheelbase to compete.
The car originally had the four cylinder engine with a 5 speed, but later had been being run with a SBC and an THM tranny according to the seller. There wasn’t an engine and tranny in it anyway, so the only thing that mattered to us was the fact that it still had the clutch pedal, since Nick wants to run a manual tranny. Nick already had a good 350 four bolt main engine from an earlier project, so we have the power plant covered, it just needed to be freshened up with new rings and bearings.
Upon getting it home, we knew we would have to work fast to make racing season, so we very promptly parked it in his garage and closed the door. Then we forgot about it for a couple of months and did absolutely nothing to it. Nick was finishing up welding classes at the local university, and didn’t have much time for anything else, including a job, which meant that he had no money to buy materials for the car. After seasoning the car well in the garage for weeks on end, we finally decided to get to work on it. Nick was able to get us a couple of sponsors. One of the sponsors is a fabrication shop owned by Nick’s buddy Mark and the other being a junk yard up the street from his house. We would build the roll cage and do other fab work in Mark’s shop, and a lot of the stuff we needed to get the car going would be free from the junkyard.
So the game plan is to build the car to the following basic specs:
350 four bolt main (I’ll update with the particulars later)
3 speed Sagina tranny with dual stick shifter mated to a metric bellhousing
Stock rear diff w/ 3.73 gear ratio and a “Lincoln locker”
1 �” x .120” HREW tubing roll cage
8 gallon fuel cell
2” schedule 40 black pipe front bumper / 2”x3”x �” rectangular tube rear bumper
Quick release steering wheel hub w/ 15” steering wheel running P/S
Kirkey Racing seat
Simpson 5 point harness
Hoosier 970 series racing tires
5/8” extra long quick start wheel studs
Suspension is still up in the air, we will go as far as our limited budget will allow
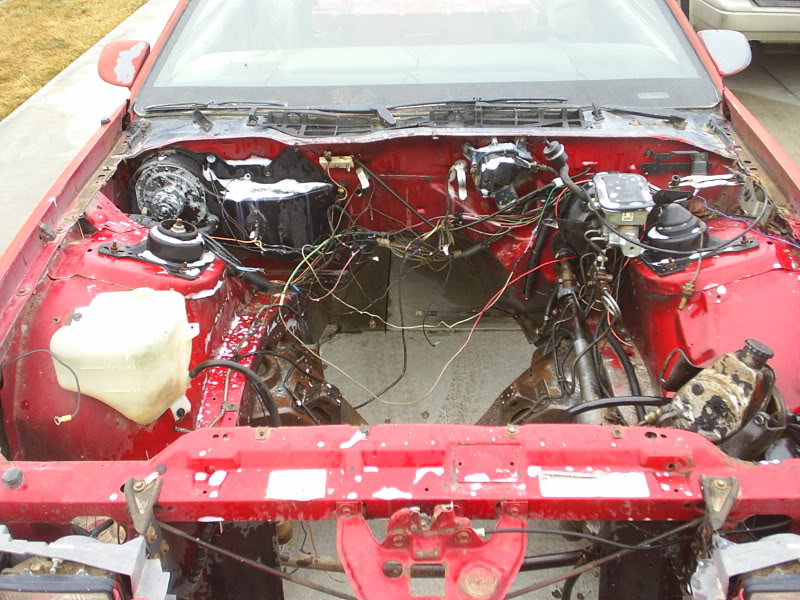
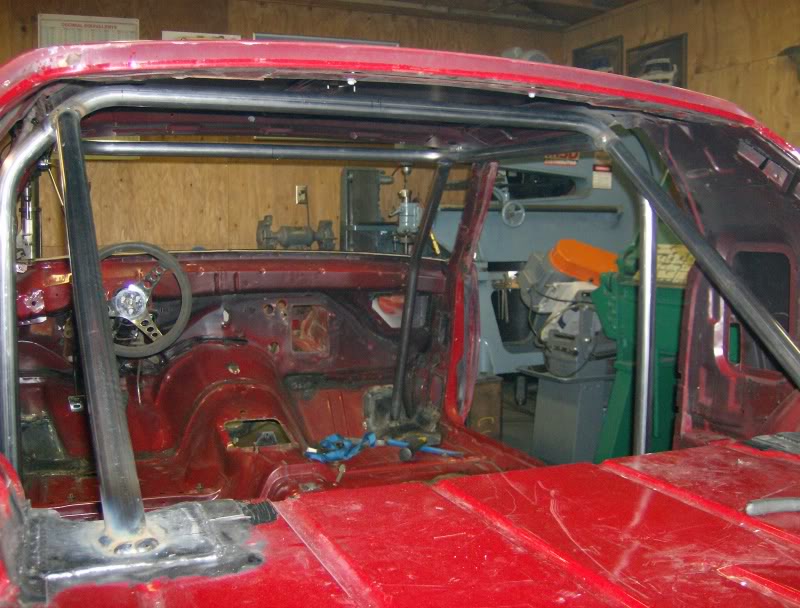
We started by stripping all the crap that was still in the car out of it. Having no interior saved us a lot of trouble, but we did remove all of the glass, the dash, the heater assembly and all the duct work. We removed the doors and took the torch to them until they were reduced to just the exterior panels. We removed the headlights, taillights, and all of the other plastic crap. We removed all of the wiring, ecu and related useless crap. Nick got a job so he bought enough tubing to start the roll cage. We took the car over to Mark’s shop and started on the cage. Nick bought a few sticks of 1 �” .120 wall HREW and got busy on the cage. First we installed the main hoop and halo. Then we bent up some A pillars and welded them in. Then we made the rear support tubes for the main hoop and welded them in.
The cage is being tied into the floor pan using 1/8” plates.
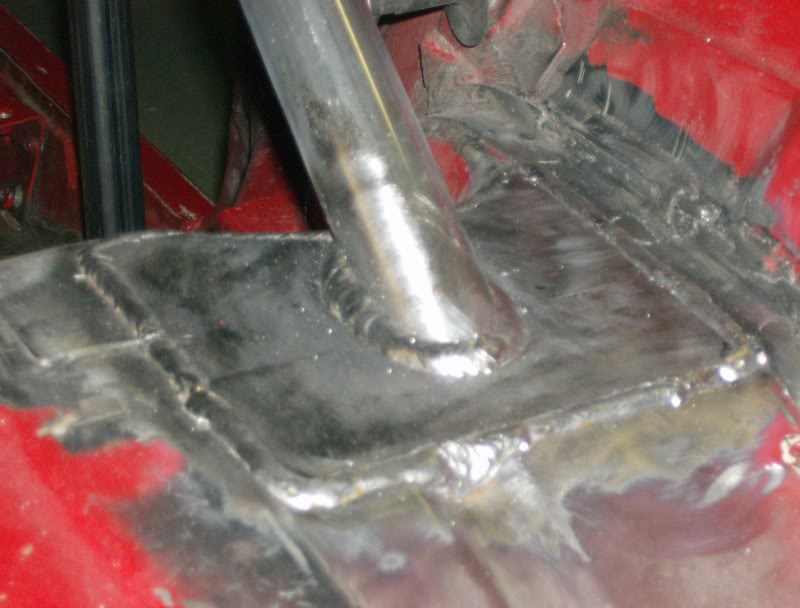
We tried to tie it in on top of or as close to the box portions of the front & rear sub frame as possible.
First off, let me tell you something about us. Nick owns the car and will be driving it. My name is Zane. I am donating labor to help him get racing. I am a mechanic, not a “race car guy”, but I can fabricate. Nick has been around racing much more than me, and actually has pretty good contacts around town. He has crewed (donated labor) on some pretty high dollar (locally speaking) race teams and done a lot of travelling to races here in the west. He has never driven though, so this will be a first for him. We will be racing locally, at Meridian Speedway. It is a � mile flat paved oval. We will be racing in the “Street Stock” class. Street stock is the basic “run what you brung” kind of class with a lot of restrictions in place to keep it affordably competitive. For instance, you must run stock type cast iron intakes, and cast iron exhaust manifolds. The class carburetor is a Holley 4412, 2 bbl, 500 cfm. Suspension must remain in stock configuration (leaf spring cars must remain leaf spring cars, etc.), but you can buy racing shocks and springs. A lot of the cars are full frame cars, but several guys are running 2nd gen Camaros. I believe we will be the first here locally to run a 3rd gen Camaro, because the rules just changed this year allowing cars with 101” wheelbase to compete.
The car originally had the four cylinder engine with a 5 speed, but later had been being run with a SBC and an THM tranny according to the seller. There wasn’t an engine and tranny in it anyway, so the only thing that mattered to us was the fact that it still had the clutch pedal, since Nick wants to run a manual tranny. Nick already had a good 350 four bolt main engine from an earlier project, so we have the power plant covered, it just needed to be freshened up with new rings and bearings.
Upon getting it home, we knew we would have to work fast to make racing season, so we very promptly parked it in his garage and closed the door. Then we forgot about it for a couple of months and did absolutely nothing to it. Nick was finishing up welding classes at the local university, and didn’t have much time for anything else, including a job, which meant that he had no money to buy materials for the car. After seasoning the car well in the garage for weeks on end, we finally decided to get to work on it. Nick was able to get us a couple of sponsors. One of the sponsors is a fabrication shop owned by Nick’s buddy Mark and the other being a junk yard up the street from his house. We would build the roll cage and do other fab work in Mark’s shop, and a lot of the stuff we needed to get the car going would be free from the junkyard.
So the game plan is to build the car to the following basic specs:
350 four bolt main (I’ll update with the particulars later)
3 speed Sagina tranny with dual stick shifter mated to a metric bellhousing
Stock rear diff w/ 3.73 gear ratio and a “Lincoln locker”
1 �” x .120” HREW tubing roll cage
8 gallon fuel cell
2” schedule 40 black pipe front bumper / 2”x3”x �” rectangular tube rear bumper
Quick release steering wheel hub w/ 15” steering wheel running P/S
Kirkey Racing seat
Simpson 5 point harness
Hoosier 970 series racing tires
5/8” extra long quick start wheel studs
Suspension is still up in the air, we will go as far as our limited budget will allow
We started by stripping all the crap that was still in the car out of it. Having no interior saved us a lot of trouble, but we did remove all of the glass, the dash, the heater assembly and all the duct work. We removed the doors and took the torch to them until they were reduced to just the exterior panels. We removed the headlights, taillights, and all of the other plastic crap. We removed all of the wiring, ecu and related useless crap. Nick got a job so he bought enough tubing to start the roll cage. We took the car over to Mark’s shop and started on the cage. Nick bought a few sticks of 1 �” .120 wall HREW and got busy on the cage. First we installed the main hoop and halo. Then we bent up some A pillars and welded them in. Then we made the rear support tubes for the main hoop and welded them in.
The cage is being tied into the floor pan using 1/8” plates.
We tried to tie it in on top of or as close to the box portions of the front & rear sub frame as possible.
Last edited by zlathim; 05-17-2009 at 02:34 PM.
#2
05-15-2009, 05:18 PM
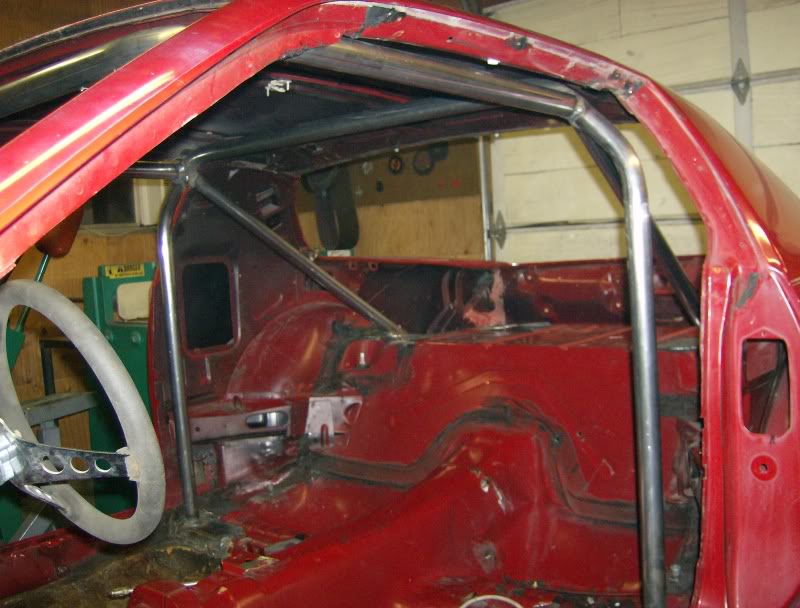
After adding some door bars, it began to look like a race car, at least on the inside. We hacked out the steering column and fabbed up a bracket with a heim that comes off of the dash bar of the cage to support the steering shaft.
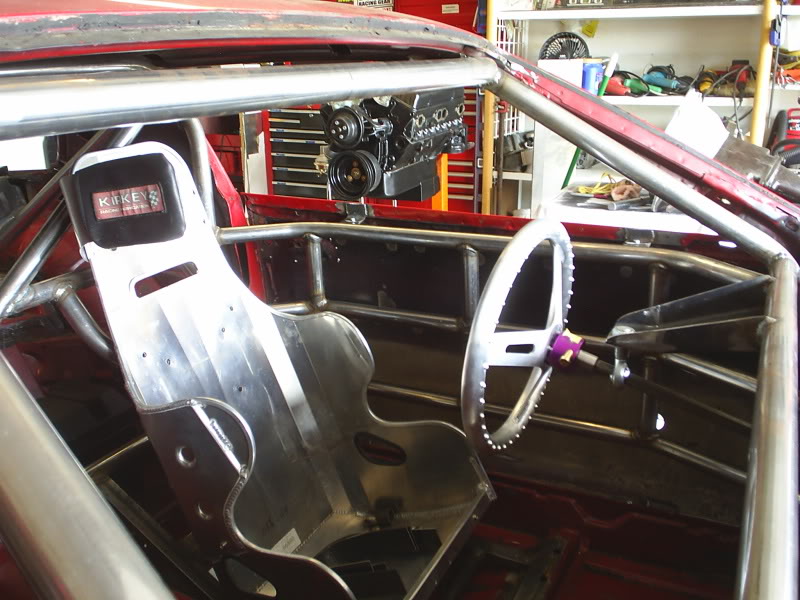

Nick attached to seat back to the cage and made a steel frame for the bottom that also ties into the cage.
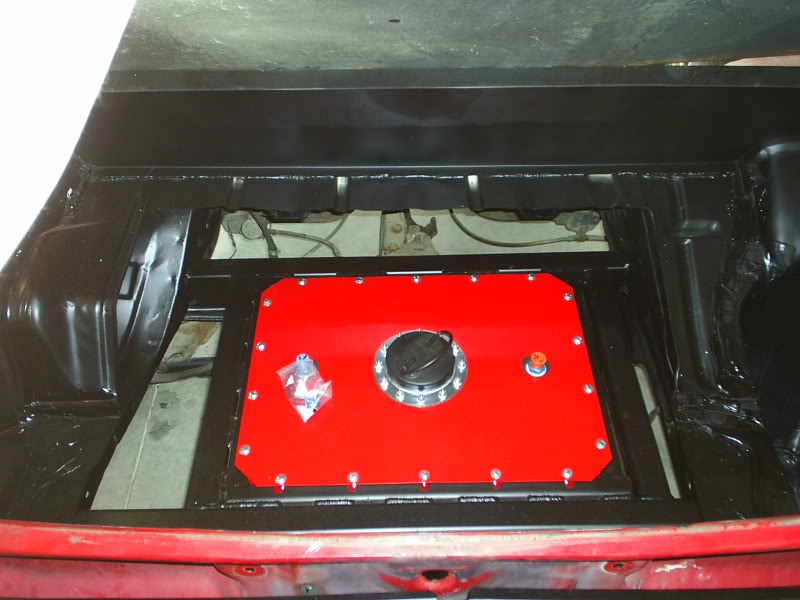
Nick reinforced the rear sub frame area with 2x3x1/4” rectangular tubing and installed the new steel can fuel cell.
The front struts on this car present a challenge. All the other cars in our class are double a arm suspensions. Everyone runs with no inner fenders, because they are in the way and just end up getting beat up anyway. On our car, the inner fender is the anchor point for the strut tower. If it gets bent up, our steering geometry will be screwed. We are in the process of trying to tie the strut tower into the front hoop of the roll cage. If we can do that, the inner fenders are going to get chopped out.
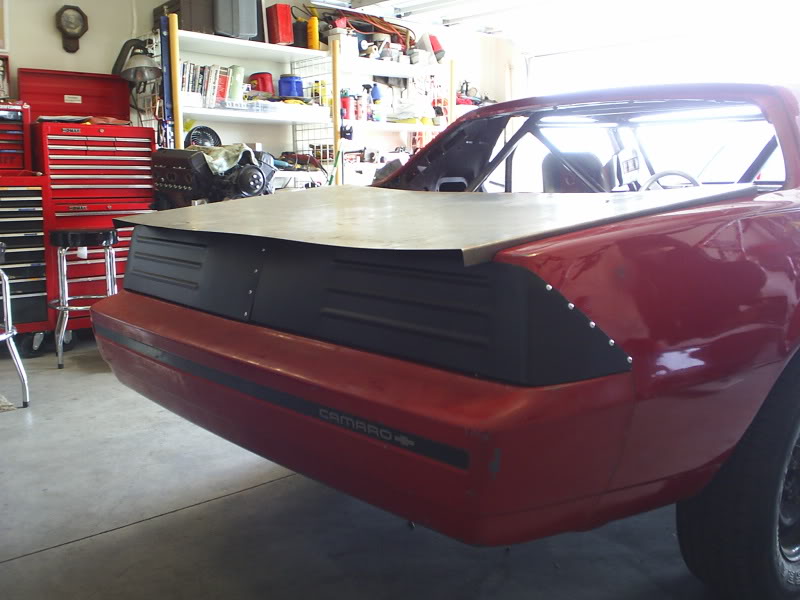
Nick built and installed a 2” schedule 40 front bumper and rectangular steel rear bumper (not pictured). Both of them tuck under the factory bumper cover. The firewall has been sealed off using 18 gauge sheet metal.
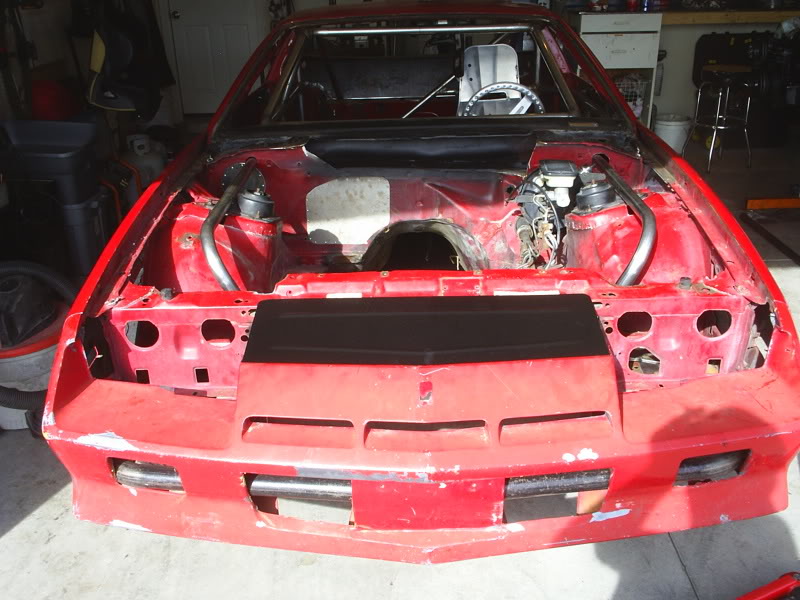
The entire rear of this car was a big a$$ heavy piece of glass, that when removed leaves a cavernous opening. We had to extend the rear firewall up with some sheet metal to seal the fuel cell from the driver area. You can see what that looks like in one of the photos above. Nick has a start on the new deck lid. He has the basic shape cut out and broke on the edges. It needs some work before it will look good, but it is started. Since all of the glass and plastic has been removed, it is necessary to cover the headlight and taillight areas with sheet metal. Nick has completed the rear light cover and it looks pretty good.
Nick attached to seat back to the cage and made a steel frame for the bottom that also ties into the cage.
Nick reinforced the rear sub frame area with 2x3x1/4” rectangular tubing and installed the new steel can fuel cell.
The front struts on this car present a challenge. All the other cars in our class are double a arm suspensions. Everyone runs with no inner fenders, because they are in the way and just end up getting beat up anyway. On our car, the inner fender is the anchor point for the strut tower. If it gets bent up, our steering geometry will be screwed. We are in the process of trying to tie the strut tower into the front hoop of the roll cage. If we can do that, the inner fenders are going to get chopped out.
Nick built and installed a 2” schedule 40 front bumper and rectangular steel rear bumper (not pictured). Both of them tuck under the factory bumper cover. The firewall has been sealed off using 18 gauge sheet metal.
The entire rear of this car was a big a$$ heavy piece of glass, that when removed leaves a cavernous opening. We had to extend the rear firewall up with some sheet metal to seal the fuel cell from the driver area. You can see what that looks like in one of the photos above. Nick has a start on the new deck lid. He has the basic shape cut out and broke on the edges. It needs some work before it will look good, but it is started. Since all of the glass and plastic has been removed, it is necessary to cover the headlight and taillight areas with sheet metal. Nick has completed the rear light cover and it looks pretty good.
Last edited by zlathim; 05-15-2009 at 05:49 PM.
#3
05-15-2009, 05:22 PM
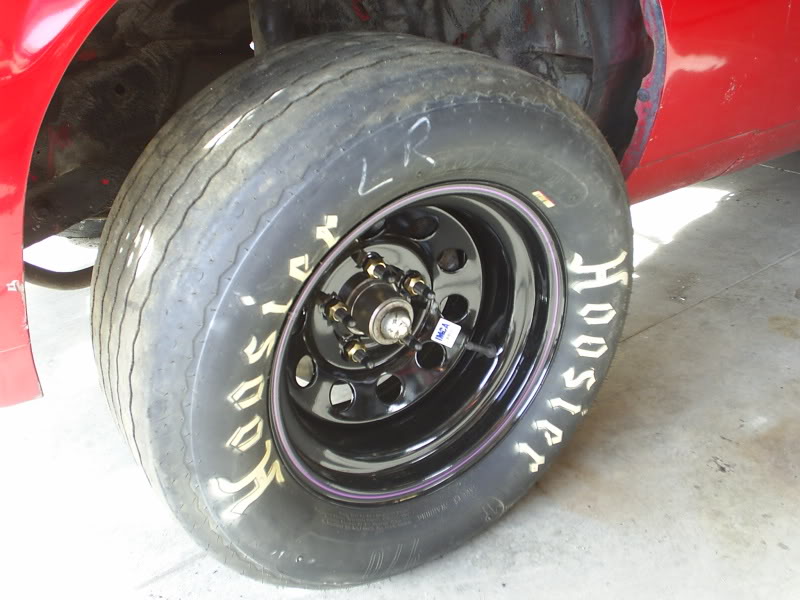
Nick bought new rotors, so we installed the 5/8” long wheel studs in them. We had to pound out the stock studs and drill the holes out bigger to accept the larger diameter studs. We got the tires mounted up on some new 15x8” racing wheels with 3” backspacing. we still have to drill out for the larger studs on the rear axles, but we are planning on doing that and rear brakes tonight.
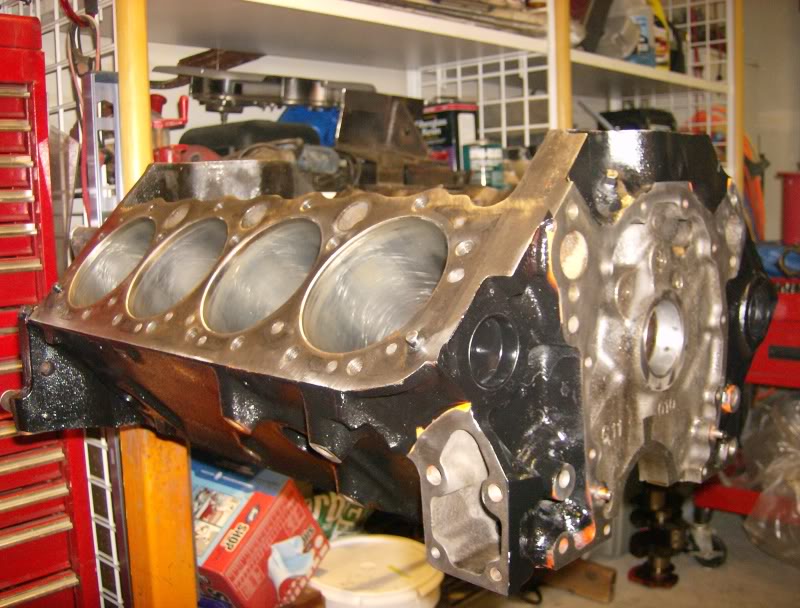
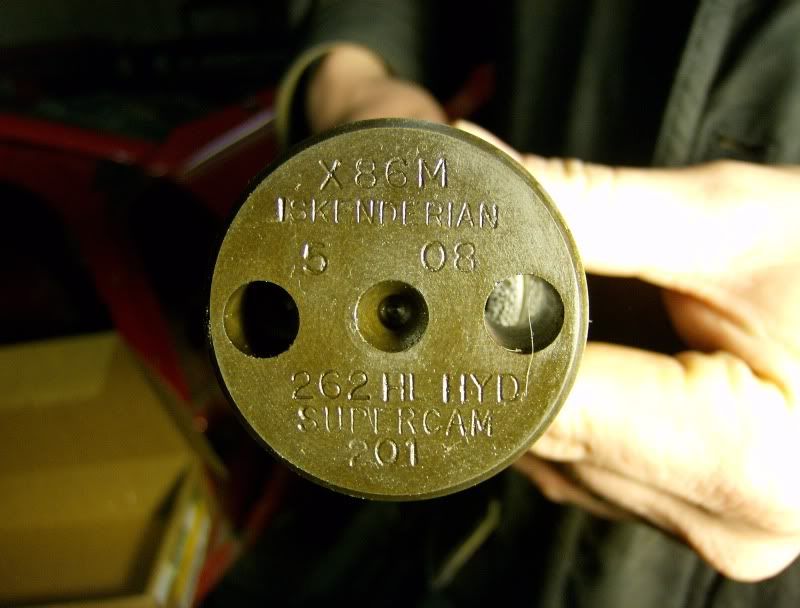
For the engine, Nick had a four bolt main 350 that came out of a step side pickup his dad got in a trade. He tore it down, and the thing was actually in pretty good shape. It has .030 over TRW pistons and an Iscanderian cam in it. There was very little wear on the engine, so we decided to throw a set of rings and bearings at it and call it good. It also got a new oil pump, water pump, and a seven quart claimer style oil pan. We got a cast iron 2 bbl intake from the junkyard and also got some exhaust manifolds. We do not yet have the carburetor. We need a Holley 4412 for this class. We also need to grab an early HEI dizzy for it. Here is a picture of it tore down. In one of the pictures above, you can see it as it now sits.
Here is the cam that is in it:
Nick picked up a used Sagina tranny for $50 off of craigslist. Since the car has the clutch pedal assy in it, we want to use the stock style hydraulic clutch system for this race car. In order to avoid fabbing a slave cylinder bracket, we decided to use a metric bellhousing with the bracket on it. The bolt holes on the tranny and bellhousing lined up, but the bearing support / front cover on the tranny was to big to fit in the hole on the bellhousing. I unbolted the bearing housing and chucked it up in the lathe to turn it down so that it fit into the bore on the bellhousing. That seemed to do the trick. Nicks dad bought him a twin stick shifter with funky purple shift rods, so we have some bling to bolt on. Yes, I know we have the shifter handles facing the wrong way in this photo:
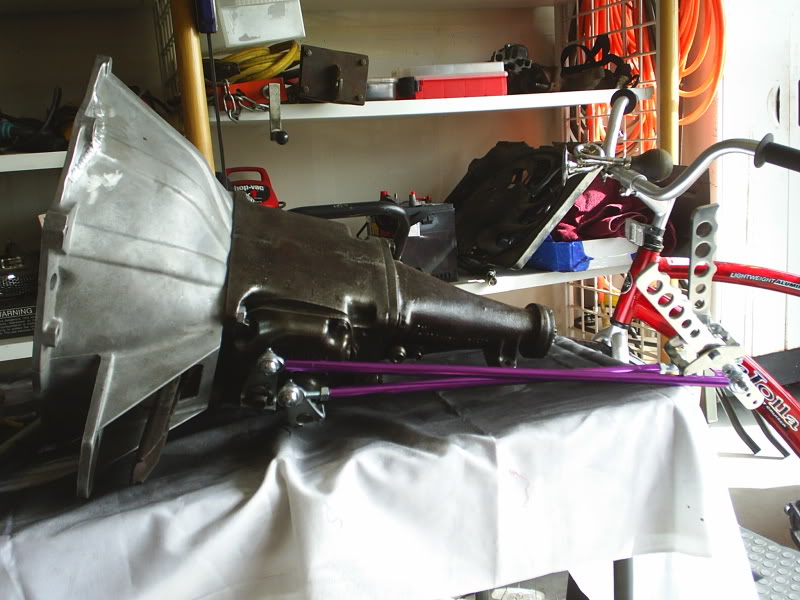
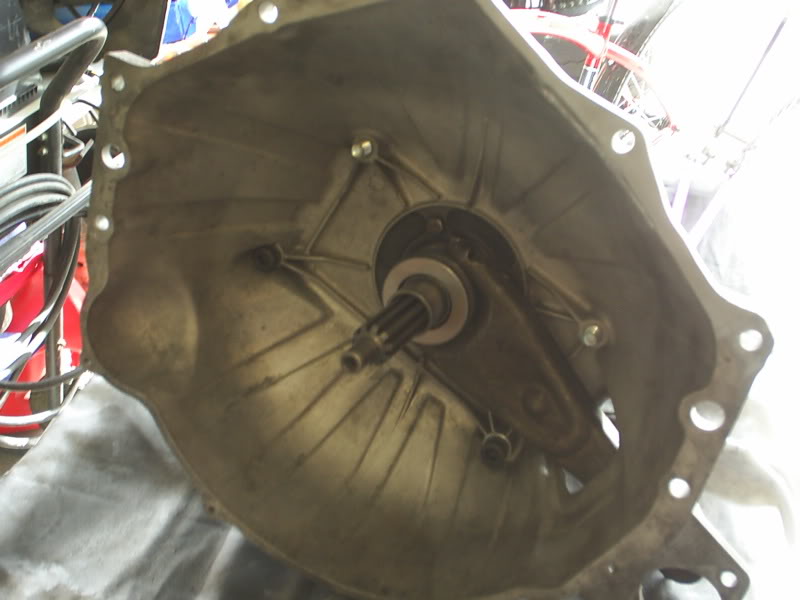
Here is a view of that front bearing support we had to turn down in the lathe in order to get the bellhousing to fit:
We still have a lot of work to do. Probably at least 80 hours worth of work needs to be done. That is just to get it on the track. Tuning and setting up the suspension is a whole ‘nother story. For the street stock class, the first race is tomorrow night. We obviously won’t make that race or any other race in May for that matter. We are hoping to have it ready to race in June.
If there are any questions or constructive criticism, I would love to hear it., Otherwise, stay tuned because there will be more to come.
For the engine, Nick had a four bolt main 350 that came out of a step side pickup his dad got in a trade. He tore it down, and the thing was actually in pretty good shape. It has .030 over TRW pistons and an Iscanderian cam in it. There was very little wear on the engine, so we decided to throw a set of rings and bearings at it and call it good. It also got a new oil pump, water pump, and a seven quart claimer style oil pan. We got a cast iron 2 bbl intake from the junkyard and also got some exhaust manifolds. We do not yet have the carburetor. We need a Holley 4412 for this class. We also need to grab an early HEI dizzy for it. Here is a picture of it tore down. In one of the pictures above, you can see it as it now sits.
Here is the cam that is in it:
Nick picked up a used Sagina tranny for $50 off of craigslist. Since the car has the clutch pedal assy in it, we want to use the stock style hydraulic clutch system for this race car. In order to avoid fabbing a slave cylinder bracket, we decided to use a metric bellhousing with the bracket on it. The bolt holes on the tranny and bellhousing lined up, but the bearing support / front cover on the tranny was to big to fit in the hole on the bellhousing. I unbolted the bearing housing and chucked it up in the lathe to turn it down so that it fit into the bore on the bellhousing. That seemed to do the trick. Nicks dad bought him a twin stick shifter with funky purple shift rods, so we have some bling to bolt on. Yes, I know we have the shifter handles facing the wrong way in this photo:
Here is a view of that front bearing support we had to turn down in the lathe in order to get the bellhousing to fit:
We still have a lot of work to do. Probably at least 80 hours worth of work needs to be done. That is just to get it on the track. Tuning and setting up the suspension is a whole ‘nother story. For the street stock class, the first race is tomorrow night. We obviously won’t make that race or any other race in May for that matter. We are hoping to have it ready to race in June.
If there are any questions or constructive criticism, I would love to hear it., Otherwise, stay tuned because there will be more to come.
Last edited by zlathim; 05-15-2009 at 05:28 PM.
#4
05-15-2009, 05:36 PM
I almost forgot to add our current "to-do" list.
Drive Train
1. Install engine & tranny
2. Build rear tranny mount
3. Build torque arm mount
4. Install radiator, hoses & overflow tank
5. Mount fan
6. Mount clutch master & slave, bleed system
7. Driveline & U-joints
8. D-Line hoops
9. Mount battery, box & cables
10. Install conduit & fuel line
11. Drill & tap intake manifold for carburetor
12. Install carburetor & air cleaner
13. Install HEI, plugs & wires
14. Install Exhaust pipes & mufflers
15. Install starter
16. Install P/S pump
17. Clean, seal & fill rear diff
Controls
18. Mount quick release hub & steering wheel
19. Mount shifter
20. Mount temp gauge
21. Mount oil pressure gauge
22. Mount ignition switch
23. Mount fan switch & relays
24. Mount starter switch
25. Wire Ignition, starter, fan, & gauges
26. Install throttle cable & pedal
Suspension / Steering / Brakes
27. Install front strut tower plates
28. Build & install strut tower crossover bar
29. Install new front struts
30. Install new rear shocks
31. Install new right outer tie rod end
32. Plumb P/S
33. Install 5/8” wheel studs
34. Mount tires and wheels
35. Overhaul rear brakes
Roll Cage / Crash Protection
36. Install window tire bar
37. Install diagonal tube from rear hoop support to right front
38. Install down bar on driver side window opening
39. Finish & install front hoops & frame plates
40. Build radiator protection
41. Install gussets on roll cage
42. Install nerf bars
43. Install drivers window net
44. Install padding on cage tubes within reach of driver
45. Install helmet & steering wheel hooks
Body / Interior
46. Straighten, paint & install hood with pins
47. Finish & paint deck lid
48. Build cover plate for tranny hole on floor pan
49. Paint engine compartment
50. Install chicken wire or lexan windshield
51. Cover headlight openings
52. Finish grill support / air dam on top of radiator support
53. Paint interior
54. Finish mounting seat
55. Remove all sharp edges near driver
56. Install harness
57. Build dash panel
58. Build switch panel
59. Remove inner fenders
60. Clearance fenders for tires
61. Install scanner
62. Install fire extinguisher
63. Build bellhousing protection
64. Design, order & install sponsor decals
65. Put the car number on the doors


#10
05-17-2009, 12:00 PM
Thanks for the kind words guys.
We did some more work this weekend. I took a bunch more pics, but they are still on Nick's camera. I'll update this thread with more pics as soon as he uploads them and I get some extra time.
