CRU!NCH TIME - 73 Z28 Build
#1
 04-10-2011, 10:53 PM


When this car was maybe a few years old

My dad ordered it with the canvas top, a/c, power steering, seat belts, and no spoiler? He ordered it week later and had it install at the dealer. He added the side pipes and those wheels.
My grandmother bought it for him for his first car when he was 16. It's been sitting around for the last two decades. My dad told me when I was about 6 this car was going to be my first car when I turned 16. We just never got around to fixing it. I'm 26 and it's time to get it back on the road. I have set a goal to have it running by July this year for my 27th. hints the Crunch time. I have been working on it for a month now so I'm a little behind on doing this.
The car has been kept for the most part inside our shops for most of those years. The first step I took to making this happen is move it to my new shop.
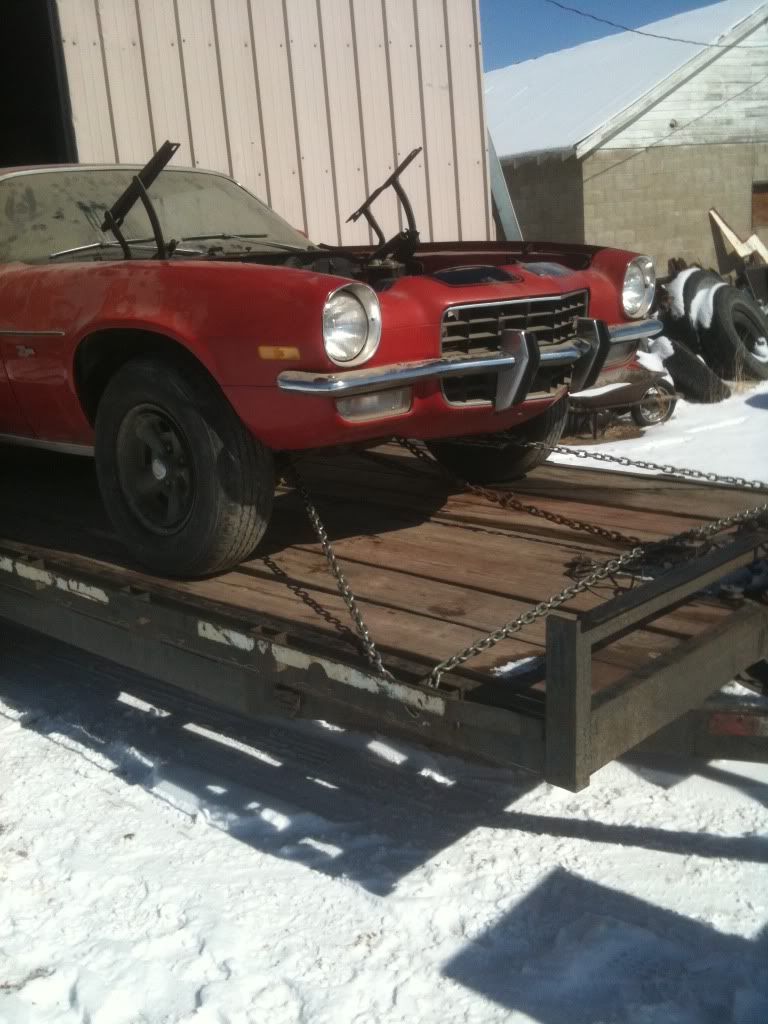
iphone396.jpg?t=1302490107
iphone397.jpg?t=1302490107
Here we go it's new home, where it's going to get blown into pieces
iphone412.jpg?t=1302490107
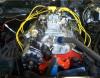
My dad and I removed the engine when I was 13. It had thrown a rod threw the oil pan.
iphone413.jpg?t=1302490107
The second step I took before I even touched the car was build an area to store all the parts I was about to remove.
iphone416.jpg?t=1302490175
iphone417.jpg?t=1302490175
Now lets get down to business, it's time to do work...
iphone419.jpg?t=1302490175
This is the last picture of the car together.
My lovely assistant Jordan (aka Girl friend) removing the first part
iphone420.jpg?t=1302490175
Removed the head lights, and trim. The bumper and grill.
iphone421.jpg?t=1302490175
These pieces are in great shape just need a little freshing up. I am not a fan of chrome I was thinking of powder coating the front and rear bumpers black?? undecided...
iphone422.jpg?t=1302490175
iphone423.jpg?t=1302490175
Upper and lower fascia removed
iphone425.jpg?t=1302490175
In this picture you can see over spray when the car was repainted and stripes put on.
iphone427.jpg?t=1302492157
Fenders off
iphone431.jpg?t=1302492157
iphone433.jpg?t=1302492157
iphone434.jpg?t=1302492157
Subframe is next
iphone435.jpg?t=1302492599
iphone436.jpg?t=1302492599
Got the training wheels on. No way I'm letting this thing sit on up my lift for the next few months.
My dad ordered it with the canvas top, a/c, power steering, seat belts, and no spoiler? He ordered it week later and had it install at the dealer. He added the side pipes and those wheels.
My grandmother bought it for him for his first car when he was 16. It's been sitting around for the last two decades. My dad told me when I was about 6 this car was going to be my first car when I turned 16. We just never got around to fixing it. I'm 26 and it's time to get it back on the road. I have set a goal to have it running by July this year for my 27th. hints the Crunch time. I have been working on it for a month now so I'm a little behind on doing this.
The car has been kept for the most part inside our shops for most of those years. The first step I took to making this happen is move it to my new shop.
iphone396.jpg?t=1302490107
iphone397.jpg?t=1302490107
Here we go it's new home, where it's going to get blown into pieces
iphone412.jpg?t=1302490107
My dad and I removed the engine when I was 13. It had thrown a rod threw the oil pan.
iphone413.jpg?t=1302490107
The second step I took before I even touched the car was build an area to store all the parts I was about to remove.
iphone416.jpg?t=1302490175
iphone417.jpg?t=1302490175
Now lets get down to business, it's time to do work...
iphone419.jpg?t=1302490175
This is the last picture of the car together.
My lovely assistant Jordan (aka Girl friend) removing the first part
iphone420.jpg?t=1302490175
Removed the head lights, and trim. The bumper and grill.
iphone421.jpg?t=1302490175
These pieces are in great shape just need a little freshing up. I am not a fan of chrome I was thinking of powder coating the front and rear bumpers black?? undecided...
iphone422.jpg?t=1302490175
iphone423.jpg?t=1302490175
Upper and lower fascia removed
iphone425.jpg?t=1302490175
In this picture you can see over spray when the car was repainted and stripes put on.
iphone427.jpg?t=1302492157
Fenders off
iphone431.jpg?t=1302492157
iphone433.jpg?t=1302492157
iphone434.jpg?t=1302492157
Subframe is next
iphone435.jpg?t=1302492599
iphone436.jpg?t=1302492599
Got the training wheels on. No way I'm letting this thing sit on up my lift for the next few months.
Last edited by JmeZ28; 04-10-2011 at 11:01 PM.
#2
04-11-2011, 08:55 AM

Join Date: Aug 2008
Location: Portland, Or
Posts: 9,097
Welcome to the forum!
Nice complete early Camaro! When did the vinyl top get removed? Looks like it didn't have Z emblems or the SS stripes in the old photo, did those get added later? Or is it just the picture angle that I can't see them?
Nice complete early Camaro! When did the vinyl top get removed? Looks like it didn't have Z emblems or the SS stripes in the old photo, did those get added later? Or is it just the picture angle that I can't see them?
#3
04-11-2011, 09:02 AM
Floor jack and 2x4's make moving subframe around easy.
iphone437.jpg?t=1302492599
A good shot of the The Shop.
iphone440.jpg?t=1302492599
iphone441.jpg?t=1302492599
I decided to fix up the subframe first. I'll disassemble completely sandblast prime and paint then add some new goodies I bought from Speed Tech Performance.
I didn't really think this part through... Like taking the springs off before I removed the subframe, yeah the weight of the vehicle is your friend in this case. Those springs are seriously sprung! Well with the right tool I was able to make short work of them still didn't feel to safe with out the weight holding down on the jack...
iphone452.jpg?t=1302493181 ;
iphone453.jpg?t=1302493181
more to come
#5
04-11-2011, 09:13 AM
Thanks. I know it's for sure a z28 I'm not sure about the emblems though. They might just be hard to see in the photo I'll ask my pops. He loaned the car to his sister and husband in the 80's and my uncle had the vinyl top removed and added the stripes he also had it painted a different red so it's possible he added emblems then.
#6
04-11-2011, 10:21 AM
Join Date: Aug 2008
Location: Portland, Or
Posts: 9,097
Should be pretty easy to determine since it's been in your family since new. The build sheet should be under one of the backseat cushions, or on top the gas tank. (maybe both) So once you get further into it you can post a picture of the sheet and we can see the data to detemine.
#7
04-11-2011, 11:49 AM
I checked with my dad he didn't remember if the emblems were there or not lol. so I guess I'll have to check the top of the tank for that sheet. I'll pry never speak to my uncle again so I can't ask him. ne way moving on...
here is some more pics of the subframe disassembly.
Spring compressor in use watch out.
DSC00703.jpg?t=1302538840
DSC00705.jpg?t=1302538840
DSC00706.jpg?t=1302538840
thats a relieve those are out of the way. I do this kind of stuff for a living but dam I never get used to the thought that those things could really mess you up if not handled correctly.
I just need to remove that last control arm. make a trip to the car wash, clean the area up drop the plastic and do some sandblasting my favorite part.
DSC00709.jpg?t=1302538840
DSC00710.jpg?t=1302538840
DSC00711.jpg?t=1302538840
I made this sandblasting booth myself what do you guys think?
DSC00714.jpg?t=1302539150
I also took a little bit of time to clean up some of the welding splatter. looks like they welded these things with there eyes closed.
DSC00715.jpg?t=1302539150
last pic of nasty rusty looking subframe
DSC00716.jpg?t=1302539150
beautiful...
DSC00718.jpg?t=1302539150
DSC00717.jpg?t=1302539150
I should have ground all the welds down while I was at it. oh well, I plan on using an aftermarket subframe later down the road.
After some clean up, blah i hate that part I did the underside
DSC00719.jpg?t=1302539150
done with that. The booth doubles as a place for the body to hang out with I am not taking parts off of it.
DSC00720.jpg?t=1302539907
DSC00721.jpg?t=1302539907
Last edited by JmeZ28; 05-17-2011 at 11:12 AM.
#8
04-11-2011, 11:57 AM

I can see the emblems on the old pic and also on the new pics. The old pics it is not very clear but they are in the same location as the ones in the newer pics.
Great looking project and it is good to see your girl is helping you out.
Massey
Great looking project and it is good to see your girl is helping you out.
Massey
#9
04-11-2011, 12:04 PM
ouch those welds look like some one was drunk or it was that guy's first day. I think I would grind them down and run a nice fresh bead over them just to make it all look pretty and reinforce it some.
Massey
Massey
#10
04-11-2011, 07:56 PM
Yeah she likes to get involved with the car. Her dad has built some amazing cars in the past if I can get a hold of some pictures I'll have to post them some time. I really thought about cleaning up those welds but I didn't what to spend a ton of time on it since most of it isn't even visible anyway. If I don't ever get an aftermarket subframe I'll redo it better next time  lol. That sounds like fun ha.
Here I got the subframe in primer.
DSC00739.jpg?t=1302567757
now some pretty new paint
DSC00741.jpg?t=1302567757
DSC00742.jpg?t=1302567757
I used a semi-gloss I really like the way it turned out. Ugly welds and all they kind of seem to blend in more after painted. (when there isn't a camera flash lol)
Just for fun I used to dual action/ polish on the quarter panel to see what was under the oxidized paint. I looks really good the picture doesn't really do it justice it's really smooth and nice. I just wish the quarters didn't have rust. I wouldn't have to have the car repainted anytime soon.
DSC00750.jpg?t=1302567757
nice huh?
I pressed/cut out ball joints and bushings on the control arms. I was about to order some new stuff and the more I looked at the factory control arms I started to realize how nasty they looked and how much it was going to take to make these look good. I thought I don't really want to mess with these.
DSC00738.jpg?t=1302568458
DSC00737.jpg?t=1302568515
ugly looking things.
So I convinced myself to pull the trigger and order a complete new set up. Speed Tech Performance Road Assault Package
DSC00770.jpg?t=1302568835
DSC00767.jpg?t=1302568835
DSC00772.jpg?t=1302568835
Ordered them and didn't look back. The sway bar is like twice as thick as the original. If anyone is shopping around I would say go with Speed Tech's stuff it is really nice, better than I thought they would be. and the price isn't to bad. Later I plan on getting their AFX spindles which have the corvette wheel bearing hubs so I can run the corvette brakes and wheels.
Here is a comparison of the new coil over shock and spring to the old spring and shock
DSC00793.jpg?t=1302569027
DSC00792.jpg?t=1302569027
I had to get the ball joint covers too
DSC00795.jpg?t=1302569289
DSC00796-1.jpg?t=1302569289
Next project is the radiator support and other front end parts.